Introduction
Tea, a beloved beverage enjoyed globally, derives its complex flavors and aromas from delicate processing methods. However, when tea leaves absorb excess moisture—whether due to improper storage, humidity, or accidental exposure to water—their quality can deteriorate rapidly. Damp tea leaves may develop mold, lose flavor, or become unpalatable. Fortunately, with careful attention and the right techniques, it is possible to rescue damp tea leaves and restore their original character. This guide explores the science behind tea moisture, the risks of improper drying, and step-by-step methods to safely revive your tea leaves. Whether you’re a casual tea drinker or a connoisseur, mastering these techniques will ensure your leaves remain vibrant and flavorful.

Understanding Tea Moisture and Its Impact
Tea leaves naturally contain moisture, typically ranging from 3% to 8% depending on the type (e.g., green, black, oolong). This moisture is carefully controlled during processing to halt enzymatic activity and preserve flavor. When leaves exceed this range, they become susceptible to microbial growth, off-flavors, and physical degradation.
The Dangers of Excess Moisture
- Mold and Bacteria: Damp environments above 60% relative humidity create ideal conditions for mold spores and bacteria to thrive. Consuming moldy tea can pose health risks.
- Oxidation: Excess moisture accelerates oxidation, altering the tea’s taste profile. For example, green tea may develop grassy or stale notes, while black tea might lose its briskness.
- Clumping and Compression: Moisture causes leaves to stick together, making it difficult to separate them without damaging their structure.
Assessing the Extent of Damage
Before attempting to dry tea leaves, evaluate their condition:
- Slight Dampness: Leaves feel cool to the touch but retain their shape.
- Moderate Dampness: Leaves clump together and may emit a musty odor.
- Severe Dampness: Leaves are soggy, discolored, or show visible mold.
Critical Note: If mold is present, discard the tea immediately to avoid health risks.
Step-by-Step Drying Methods
Oven Drying: The Controlled Approach
Oven drying is ideal for moderate dampness but requires precision to avoid “cooking” the leaves.
Steps:
- Preheat the Oven: Set to the lowest temperature (ideally 50–60°C or 120–140°F). Higher temperatures risk scorching.
- Prepare Leaves: Spread damp leaves in a single layer on a baking tray lined with parchment paper or a clean cloth. Avoid overcrowding.
- Monitor Closely: Place the tray in the oven and check every 5–10 minutes. Gently stir the leaves to ensure even drying.
- Test for Dryness: Remove a leaf and bend it. If it cracks easily, the leaves are dry. Overdrying will make them brittle.
Pros: Fast, consistent results.
Cons: Risk of overheating; requires constant supervision.
Sun Drying: A Natural Method
Sun drying harnesses solar heat but demands specific environmental conditions.

Steps:
- Choose a Dry Day: Humidity should be below 30%. Avoid windy conditions to prevent debris from contaminating the leaves.
- Spread Leaves: Lay them on a clean, breathable surface like a bamboo tray or cheesecloth. Cover with a thin, translucent cloth to protect from insects.
- Rotate Regularly: Stir the leaves every 30 minutes to prevent uneven drying.
- Bring Indoors at Dusk: Moisture levels rise at night, so complete drying within a single day.
Pros: Energy-free, preserves natural aromas.
Cons: Weather-dependent, slower than oven drying.
Food Dehydrator: The Precision Tool
Dehydrators offer adjustable temperature settings, making them ideal for delicate teas.
Steps:
- Set Temperature: 40–50°C (104–122°F) for green teas; 50–60°C (122–140°F) for black or oolong teas.
- Arrange Leaves: Place them on dehydrator trays, ensuring air can circulate freely.
- Dry for 2–4 Hours: Check hourly and rotate trays if necessary.
Pros: Consistent temperature, minimal flavor loss.
Cons: Requires specialized equipment.
Microwave Drying: Use with Caution
Microwaves are quick but risky, as uneven heating can destroy leaves.
Steps:
- Use a Glass Dish: Spread leaves in a thin layer. Do not use plastic containers.
- Set to Low Power: 30% power or “defrost” mode.
- Heat in Bursts: 30 seconds for small batches, stirring thoroughly between intervals.
- Stop Immediately if Smoking Occurs: This indicates overheating.
Pros: Rapid drying.
Cons: High risk of burning; not recommended for high-quality teas.
Air Drying: The Gentle Option
For slightly damp leaves, air drying preserves subtlety but requires patience.
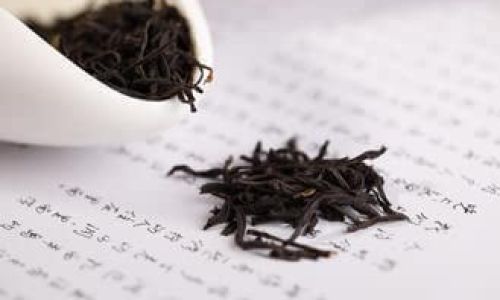
Steps:
- Choose a Dry Location: A well-ventilated room with low humidity (ideally below 40%).
- Spread Leaves: On a clean cloth or paper towel, away from direct sunlight.
- Flip Daily: Ensure both sides dry evenly.
- Wait 1–3 Days: Leaves should feel crisp but not brittle.
Pros: No specialized equipment needed.
Cons: Time-consuming; ineffective for severe dampness.
Common Mistakes to Avoid
- Using High Heat: Temperatures above 70°C (158°F) can volatilize delicate aromatic compounds.
- Overcrowding Leaves: Restricts airflow, leading to uneven drying.
- Ignoring Humidity Levels: Drying in humid environments reintroduces moisture.
- Storing Prematurely: Leaves must cool completely before sealing to prevent condensation.
Post-Drying Storage Solutions
Proper storage is as critical as drying to prevent future dampness:
- Airtight Containers: Use opaque, airtight tins or ceramic jars. Avoid plastic, which can trap moisture.
- Desiccants: Place silica gel packets or dried rice grains in containers to absorb residual humidity.
- Cool, Dark Location: Store away from light, heat, and strong odors.
- Avoid Refrigeration/Freezing: Unless in a vacuum-sealed bag, condensation can occur during thawing.
When to Consult a Professional
If dampness has compromised a large batch of high-value tea, seek help from a tea restoration specialist. They may use advanced techniques like vacuum freeze-drying to salvage leaves without flavor loss.
Conclusion
Restoring damp tea leaves is a delicate balancing act between removing moisture and preserving flavor. By understanding the science of tea moisture and employing the right method for your situation—whether oven drying for speed, sun drying for natural aromas, or air drying for gentleness—you can revive even slightly compromised leaves. Remember that patience and vigilance are key; rushing the process risks irreparable damage. With practice, you’ll master the art of tea revival, ensuring every cup delivers the nuanced flavors you love.
Postscript: Prevention Tips
- Store Tea Properly: Use moisture-absorbing packets and check containers monthly.
- Avoid Kitchen Storage: Humidity from cooking can seep into tea tins.
- Buy in Small Batches: Frequent purchases reduce the risk of long-term storage issues.
By adhering to these guidelines, you’ll not only rescue damp tea leaves but also deepen your appreciation for the craft of tea preservation. Here’s to many more fragrant, flavorful cups!


0 comments