Mint, with its refreshing aroma and versatile culinary applications, is a beloved herb in kitchens and gardens worldwide. Whether grown in pots, backyard plots, or harvested from local markets, fresh mint leaves offer a vibrant burst of flavor to teas, salads, desserts, and cocktails. However, mint’s peak season is fleeting, and its delicate leaves can wilt or lose potency quickly. Drying mint leaves is an age-old technique to extend its shelf life, lock in its essential oils, and ensure a steady supply of this aromatic herb throughout the year. This comprehensive guide explores step-by-step methods for drying mint, from traditional sun-drying to modern oven techniques, along with tips for storage and usage.
Why Dry Mint Leaves?
Drying mint serves multiple purposes. First, it concentrates the herb’s flavors, making it more potent for recipes. Dried mint retains its characteristic cool, sweet taste, which complements both sweet and savory dishes. Second, drying eliminates moisture, preventing spoilage and microbial growth. Finally, storing dried mint requires minimal space compared to bulky fresh bundles, making it ideal for pantry organization.
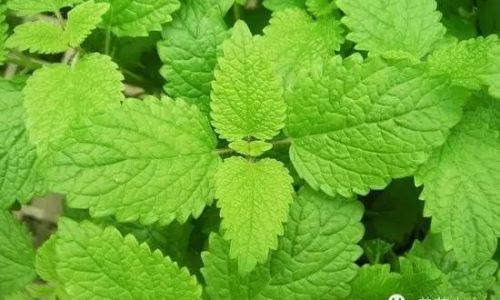
Harvesting Mint for Drying
The quality of dried mint begins with proper harvesting. For optimal results:
- Timing: Harvest mint in the morning, after dew has evaporated but before the sun’s heat intensifies. This ensures peak essential oil content.
- Selection: Choose healthy, undamaged leaves. Avoid stems with signs of disease or pests.
- Method: Use sharp scissors or pruning shears to snip stems just above a leaf node. This encourages regrowth.
Methods for Drying Mint Leaves
Air-Drying (Hanging Bunches)
Air-drying is the most traditional method, requiring minimal equipment.
- Steps:
- Prepare the Mint: Gently rinse leaves under cool water to remove dirt. Pat dry with a clean towel or salad spinner.
- Bundle: Group 8–10 stems together and tie them with twine or a rubber band.
- Hang: Suspend the bundles upside down in a warm, dry, well-ventilated area (e.g., a porch, attic, or garage). Avoid direct sunlight, which can fade color and flavor.
- Cover: Drape a paper bag or cheesecloth over the bundles to catch falling leaves and protect them from dust.
- Dry: Wait 1–2 weeks until leaves crumble easily.
Oven Drying
Oven drying is faster than air-drying, ideal for those seeking quick results.
- Steps:
- Preheat: Set the oven to its lowest temperature (ideally below 180°F/82°C). Higher heat risks scorching.
- Prepare: Wash and dry mint leaves. Remove tough stems.
- Arrange: Spread leaves in a single layer on a baking sheet lined with parchment paper.
- Dry: Place the sheet in the oven. Leave the door slightly ajar to allow moisture to escape.
- Monitor: Check every 15 minutes. Leaves should crumble when pressed (1–2 hours total).
Dehydrator Drying
Food dehydrators offer precise temperature control, preserving flavor and nutrients.
- Steps:
- Prepare: Wash and dry mint leaves.
- Layer: Spread leaves on dehydrator trays, ensuring no overlap.
- Set Temperature: Use 95–115°F (35–46°C). Higher temps may compromise quality.
- Dry: Dehydrate for 4–6 hours, or until leaves are brittle.
Microwave Drying
The microwave is the fastest method but requires caution to avoid burning.
- Steps:
- Prepare: Wash and dry mint leaves. Remove stems.
- Arrange: Place leaves between two paper towels on a microwave-safe plate.
- Heat: Microwave in 30-second intervals, checking for dryness. Total time: 2–3 minutes.
- Cool: Let leaves rest before testing crispness.
Sun-Drying
Sun-drying is natural but weather-dependent, best suited for arid climates.
- Steps:
- Prepare: Wash and dry mint leaves. Remove stems.
- Spread: Lay leaves in a single layer on a tray or mesh screen.
- Cover: Use cheesecloth to shield from insects and debris.
- Dry: Place in direct sunlight for 2–3 days. Bring indoors overnight to prevent moisture absorption.
Storing Dried Mint
Proper storage is crucial to maintain flavor and potency:
- Cooling: Allow dried leaves to cool completely before storing.
- Crushing: Gently crush leaves by hand or in a mortar and pestle. Avoid over-processing, as powdered mint loses flavor faster.
- Containers: Use airtight glass jars or resealable bags. Dark-colored containers protect against light degradation.
- Location: Store in a cool, dark pantry. Avoid humidity and heat sources like stoves or ovens.
Shelf Life and Usage Tips
- Shelf Life: Properly dried and stored mint retains quality for 6–12 months.
- Flavor Check: Discard if the aroma fades or leaves develop an off smell.
- Substitution Ratio: Use 1 teaspoon of dried mint per tablespoon of fresh in recipes.
Common Mistakes to Avoid
- Overheating: High temperatures during drying destroy essential oils.
- Incomplete Drying: Moisture leads to mold. Ensure leaves are brittle before storage.
- Improper Storage: Exposure to light or air degrades flavor.
Creative Uses for Dried Mint
- Teas: Brew with green tea or chamomile.
- Spice Blends: Add to raita, tzatziki, or tabbouleh.
- Desserts: Sprinkle over chocolate dishes or fruit salads.
- Infusions: Mix with vinegar or oil for dressings.
Conclusion
Drying mint leaves is a simple yet rewarding process that bridges seasonal gaps and elevates culinary creations. Whether you prefer the slow charm of air-drying or the speed of oven methods, the key lies in patience and attention to detail. Experiment with techniques to find your favorite, and soon you’ll have a pantry stocked with aromatic dried mint ready to enhance dishes year-round. So, harvest those fragrant leaves, embrace the drying ritual, and savor the enduring essence of mint in every meal.



0 comments