Introduction
Mint, a vibrant and aromatic herb, has been cherished for centuries for its refreshing taste and medicinal properties. From culinary masterpieces to herbal teas and homemade remedies, mint’s versatility makes it a staple in kitchens and gardens worldwide. However, fresh mint leaves have a short shelf life, often wilting or losing their potency within days. Drying mint leaves is an age-old technique that extends their usability, allowing enthusiasts to enjoy their flavor and benefits year-round. This comprehensive guide explores the science and art of drying mint leaves, covering multiple methods, tips for optimal results, and creative ways to use your dried harvest. Whether you’re a seasoned gardener or a curious home cook, mastering the process of drying mint will elevate your culinary creations and empower you to harness the herb’s full potential.
Why Dry Mint Leaves?
Drying mint leaves serves two primary purposes: preservation and concentration. Fresh mint contains up to 90% water, which dilutes its essential oils—the compounds responsible for its distinct aroma and flavor. By removing moisture through drying, these oils become more concentrated, intensifying the mint’s taste and fragrance. Dried mint also offers convenience: it requires no refrigeration, occupies minimal storage space, and can be rehydrated or used directly in recipes. Additionally, dried mint retains its potency for 6–12 months when stored correctly, making it a cost-effective alternative to store-bought varieties.
Harvesting Mint for Drying
The journey to perfectly dried mint begins with proper harvesting. Follow these steps to ensure optimal results:
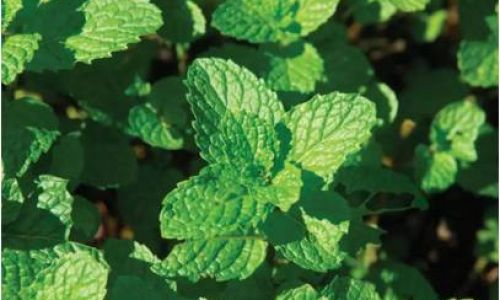
- Timing: Harvest mint in the morning, after the dew has evaporated but before the sun’s heat intensifies. This is when the plant’s essential oils are most concentrated.
- Selection: Choose healthy, pest-free stems with vibrant green leaves. Avoid leaves that are yellowing, bruised, or damaged.
- Cutting: Use sharp, clean scissors or pruning shears to cut stems just above a set of leaves. This encourages regrowth and prevents damage to the plant.
- Quantity: Harvest no more than one-third of the plant at a time to maintain its health and productivity.
Preparing Mint Leaves for Drying
Before drying, mint leaves require minimal preparation:
- Washing: Gently rinse the stems under cool water to remove dirt, insects, or debris. Avoid soaking, as excess moisture can delay drying and promote mold.
- Drying: Pat the stems dry with a clean kitchen towel or paper towels. Alternatively, lay them on a baking sheet lined with paper towels and let them air-dry for 1–2 hours.
- Stripping Leaves: Once the stems are dry, strip the leaves by running your thumb and forefinger from the top of the stem to the base. Discard tough stems, as they do not dry well.
Methods of Drying Mint Leaves
Several techniques exist for drying mint leaves, each with unique advantages and considerations. Experiment to find the method that best suits your needs, climate, and available resources.
Air Drying (Hanging Method)
Air drying is the oldest and simplest method, relying on ambient temperature and airflow.
Steps:
- Bundle Stems: Gather 4–6 mint stems and tie them together at the base using twine or a rubber band. Ensure the bundle is loose enough to allow air circulation.
- Hang Upside Down: Hang the bundles in a warm, dry, well-ventilated area away from direct sunlight. A attic, garage, or pantry works well.
- Cover with Paper Bags (Optional): To catch falling leaves and protect against dust, place a paper bag with holes punched for airflow over each bundle.
- Wait: Let the mint dry for 1–3 weeks. The leaves are ready when they crumble easily between your fingers.
Pros:
- Preserves essential oils and flavor.
- Requires no special equipment.
- Energy-efficient.
Cons:
- Time-consuming.
- Susceptible to mold in humid environments.
- Leaves may lose some vibrancy.
Oven Drying
Oven drying accelerates the process, making it ideal for those with limited time or space.
Steps:
- Preheat Oven: Set your oven to the lowest temperature (ideally 180°F/82°C or lower).
- Prepare Leaves: Spread mint leaves in a single layer on a baking sheet lined with parchment paper. Avoid overcrowding.
- Bake: Place the sheet in the oven and leave the door slightly ajar to allow moisture to escape. Check every 10–15 minutes, flipping leaves if necessary.
- Monitor: Remove leaves once they are crisp but not browned (20–40 minutes, depending on oven type).
Pros:
- Fast (1–2 hours total).
- Suitable for small batches.
- Less prone to mold than air drying.
Cons:
- High heat can degrade essential oils.
- Risk of burning if unattended.
Microwave Drying
The quickest method, microwave drying is best for small quantities.
Steps:
- Prepare Leaves: Place mint leaves between two paper towels on a microwave-safe plate.
- Microwave: Heat on low power (30–50%) in 30-second intervals, checking for dryness. Total time: 2–4 minutes.
- Cool: Let leaves cool completely before storing.
Pros:
- Ultra-fast (under 5 minutes).
- Retains vibrant color.
Cons:
- Uneven drying possible.
- May compromise flavor if overheated.
Dehydrator Drying
Food dehydrators offer precise control over temperature and airflow, ensuring consistent results.
Steps:
- Set Temperature: Configure your dehydrator to 95–115°F (35–46°C).
- Arrange Leaves: Spread mint leaves in a single layer on dehydrator trays.
- Dry: Process for 4–8 hours, checking periodically. Leaves are ready when brittle.
Pros:
- Consistent, high-quality results.
- Energy-efficient.
- Retains maximum nutrients and flavor.
Cons:
- Requires specialized equipment.
- Slower than oven or microwave methods.
Sun Drying
Ideal for arid climates, sun drying harnesses natural heat and light.
Steps:
- Prepare Screen: Place mint leaves in a single layer on a clean window screen or baking rack.
- Cover: Protect from insects and debris using cheesecloth or netting.
- Sunbathe: Position in direct sunlight for 2–5 days, bringing indoors at night to prevent dew absorption.
Pros:
- Energy-free.
- Enhances flavor in dry climates.
Cons:
- Risk of mold in humid areas.
- Leaves may fade.
Storing Dried Mint Leaves
Proper storage is critical to maintaining flavor and potency:
- Cooling: Allow dried leaves to cool completely to prevent condensation.
- Crushing: Crumble leaves into desired texture (whole, coarse, or powder) using your hands or a mortar and pestle.
- Containers: Store in airtight glass jars with tight-fitting lids. Avoid plastic, as it can absorb oils and impart off-flavors.
- Location: Keep jars in a cool, dark place (pantry or cupboard) away from heat and light.
- Labeling: Date and label containers for easy identification.
Testing for Dryness
Over-dried mint becomes brittle and flavorless, while under-dried mint risks mold. Use these tests:
- Crumble Test: Leaves should shatter when crushed.
- Bend Test: Stems should snap, not bend.
- Weight Test: Dried mint should feel lightweight and papery.
Common Mistakes to Avoid
- Overcrowding: Leaves need airflow to dry evenly.
- High Heat: Temperatures above 120°F (49°C) degrade essential oils.
- Ignoring Humidity: Humid environments prolong drying and encourage mold.
- Premature Storage: Storing damp mint leads to spoilage.
Creative Uses for Dried Mint
Dried mint’s versatility extends beyond tea:
- Culinary: Add to salads, marinades, yogurt sauces, or chocolate desserts.
- Beverages: Brew into iced tea, lemonade, or mojitos.
- Beauty: Infuse into homemade toothpaste, mouthwash, or facial toners.
- Crafts: Blend with other herbs for potpourri or sachets.
Troubleshooting Guide
- Moldy Leaves: Discard affected batches; improve ventilation or use a dehydrator.
- Dull Flavor: Store in opaque containers; avoid prolonged sunlight exposure.
- Uneven Drying: Rotate trays or bundles during the process.
Conclusion
Drying mint leaves is a rewarding process that bridges the gap between seasonal abundance and year-round enjoyment. By understanding the nuances of each drying method—from the slow-burn patience of air drying to the rapid efficiency of microwave techniques—you can tailor your approach to fit your lifestyle and goals. Remember that the key to exceptional dried mint lies in meticulous harvesting, careful preparation, and mindful storage. Whether you’re crafting a soothing cup of tea, elevating a dish with a hint of freshness, or experimenting with herbal remedies, your homemade dried mint will add a touch of garden-fresh magic to every creation. So, step into the world of herb preservation, and let the invigorating aroma of mint inspire your culinary adventures.






0 comments