Table of content
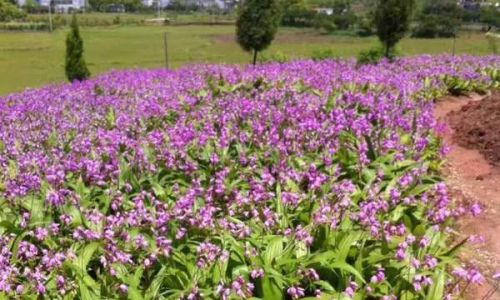
Bletilla striata, commonly known as hyacinth bletilla or white bletilla, is a perennial herb prized in traditional medicine and horticulture. Its tuberous roots, rich in bioactive compounds like glucomannans and flavonoids, are harvested for their healing properties, including wound repair, anti-inflammatory effects, and skin rejuvenation. However, the efficacy and safety of Bletilla striata products depend heavily on proper post-harvest processing—particularly drying. Improper drying can lead to mold growth, nutrient degradation, or spoilage, rendering the herb unusable. This article explores the science and art of drying Bletilla striata, offering step-by-step guidance, troubleshooting tips, and insights into preserving its medicinal potency.
Understanding Bletilla Striata: Composition and Drying Challenges
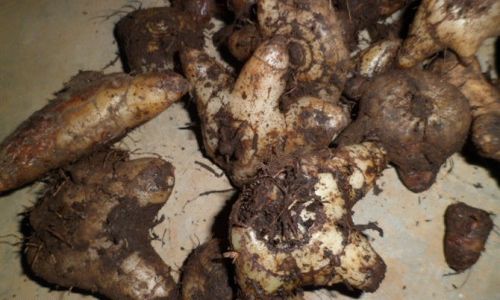
Before diving into drying methods, it’s essential to grasp why Bletilla striata demands careful handling. The plant’s tubers contain approximately 70–80% moisture when fresh, along with starch, mucilage, and volatile oils. These components make it susceptible to microbial activity and enzymatic breakdown if not dried promptly.
Key Challenges in Drying Bletilla Striata:
- High Moisture Content: Excess moisture accelerates bacterial and fungal growth.
- Delicate Structural Integrity: Overheating can crack or harden the tubers, reducing their market value and medicinal efficacy.
- Volatile Compound Preservation: Heat-sensitive phytochemicals like flavonoids may degrade under aggressive drying conditions.
Step 1: Harvesting at the Right Time
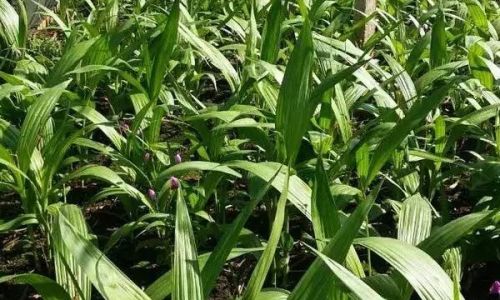
Drying begins with proper harvesting. Bletilla striata tubers are typically unearthed in autumn, 3–4 years after planting, when the aerial parts wither. Early harvesting results in underdeveloped tubers, while delayed harvesting increases rot risk.
Signs of Optimal Harvest Time:
- Yellowing or browning of leaves and stems.
- Firm, plump tubers with minimal surface damage.
- Soil moisture content below 20% (to simplify cleaning).
Step 2: Pre-Drying Preparation
Raw tubers require immediate processing to halt metabolic activity and microbial growth.
A. Cleaning and Trimming
- Remove Soil: Gently brush off dirt using a soft brush. Avoid washing, as moisture exacerbates spoilage.
- Trim Rootlets: Use sterilized shears to cut off fibrous roots, leaving the main tuber intact.
- Sort by Size: Categorize tubers into small (1–3 cm), medium (4–6 cm), and large (>7 cm) to ensure uniform drying.
B. Blanching (Optional)
Some processors briefly blanch tubers in hot water (80–90°C) for 2–3 minutes to inactivate enzymes. However, this step may leach water-soluble compounds, so it’s often skipped in traditional methods.
Step 3: Drying Methods
The choice of drying technique depends on scale, climate, and desired quality. Below are four proven methods, each with pros and cons.
Sun Drying (Passive Solar Drying)
Ideal for: Small-scale farmers, regions with low humidity.
Process:
- Spread tubers in a single layer on bamboo trays or mesh screens.
- Elevate trays 30–50 cm above ground to prevent pest contamination.
- Cover with breathable cheesecloth to shield from insects and dust.
- Rotate tubers every 2–3 hours for even drying.
Optimal Conditions:
- Temperature: 25–35°C
- Humidity: <60%
- Duration: 7–14 days
Advantages:
- Cost-effective (no energy costs).
- Retains volatile oils better than artificial methods.
Disadvantages:
- Weather-dependent.
- Labor-intensive (requires constant monitoring).
Shade Drying
Ideal for: Humid climates, preserving color and texture.
Process:
- Hang tubers in netted bags or spread them on racks in a well-ventilated, dark room.
- Use fans to enhance airflow if humidity exceeds 70%.
Optimal Conditions:
- Temperature: 20–30°C
- Humidity: 50–60%
- Duration: 14–21 days
Advantages:
- Prevents photodegradation of light-sensitive compounds.
- Minimizes case hardening (outer layer drying too quickly).
Disadvantages:
- Slower than sun drying.
- Requires adequate space.
Oven Drying
Ideal for: Small batches, urgent processing.
Process:
- Preheat oven to 40–50°C (lower temperatures preserve nutrients).
- Place tubers on trays without overlapping.
- Leave the oven door slightly ajar to release moisture.
- Check every 30 minutes and flip tubers to prevent sticking.
Optimal Conditions:
- Temperature: 40–50°C
- Duration: 8–12 hours (depending on tuber size)
Advantages:
- Rapid and controllable.
- Suitable for rainy seasons.
Disadvantages:
- High energy consumption.
- Risk of overheating (above 60°C damages phytochemicals).
Freeze-Drying (Lyophilization)
Ideal for: Premium products, pharmaceutical use.
Process:
- Freeze tubers at -40°C for 24 hours.
- Transfer to a vacuum chamber where ice sublimates at -20°C to -10°C.
- Seal in airtight containers immediately.
Optimal Conditions:
- Temperature: -40°C to -10°C
- Pressure: <100 Pa
- Duration: 48–72 hours
Advantages:
- Preserves 95%+ of nutrients and volatile compounds.
- Produces lightweight, crispy tubers.
Disadvantages:
- Expensive equipment.
- Not feasible for small-scale operations.
Step 4: Testing for Dryness
Properly dried Bletilla striata tubers should have:
- Moisture Content: 8–12% (measured with a moisture meter).
- Texture: Brittle but not shattered; snap cleanly when bent.
- Color: Pale yellow to light brown (avoid darkening, which indicates overheating).
Step 5: Post-Drying Processing
- Cooling: Allow dried tubers to reach room temperature before storage to prevent condensation.
- Grading: Sort by size, color, and quality. Discard tubers with mold or insect damage.
- Packaging: Store in airtight, UV-resistant containers (glass jars or aluminum foil bags). Add silica gel packs in humid climates.
Common Mistakes and How to Avoid Them
-
Mold Growth:
- Cause: Incomplete drying or high storage humidity.
- Fix: Re-dry affected batches at 40°C and ensure storage humidity <50%.
-
Case Hardening:
- Cause: Rapid drying in ovens or sun.
- Fix: Use shade drying or lower oven temperatures.
-
Nutrient Loss:
- Cause: Excessive heat (above 60°C).
- Fix: Opt for shade or freeze-drying.
-
Pest Infestation:
- Cause: Improper sealing or exposure to rodents.
- Fix: Use metal containers and inspect regularly.
Storing Dried Bletilla Striata
- Temperature: 15–25°C (avoid freezers, as ice crystals may form during thawing).
- Light Exposure: Store in dark environments to prevent photodegradation.
- Shelf Life: 12–24 months when properly dried and packaged.
Scaling Up: Industrial Drying Solutions
For commercial growers, consider:
- Solar Tunnel Dryers: Combine solar and convective heat for faster drying.
- Dehumidifier Dryers: Use in humid regions to maintain optimal conditions.
- Quality Control: Implement HACCP (Hazard Analysis Critical Control Point) systems to monitor moisture and microbial levels.
Conclusion: Balancing Tradition and Technology
Drying Bletilla striata is a delicate dance between preserving ancestral wisdom and embracing modern innovation. While sun and shade drying remain staples in rural communities, techniques like freeze-drying are revolutionizing pharmaceutical applications. Regardless of the method, the golden rule is consistency—uniform drying ensures every tuber retains its healing touch. By mastering these steps, you not only extend the life of Bletilla striata but also honor the legacy of a plant that has bridged tradition and science for centuries.
Final Tip: Always label batches with harvest and drying dates. Tracking these details over time will refine your process and guarantee a product that’s as potent as it is pristine.
0 comments