Mint, a versatile and aromatic herb, has been cherished for centuries for its refreshing flavor and medicinal properties. Whether grown in a backyard garden, harvested from the wild, or purchased fresh from a market, preserving mint through drying allows enthusiasts to enjoy its benefits year-round. Drying mint not only extends its shelf life but also concentrates its essential oils, enhancing its potency in culinary dishes, teas, and homemade remedies. This comprehensive guide explores step-by-step methods for drying mint, from traditional air-drying techniques to modern appliances, along with expert tips for storage and avoiding common pitfalls.
Why Dry Mint?
Fresh mint leaves are perishable, often wilting within a week of harvest. Drying eliminates moisture, inhibiting microbial growth and enzymatic reactions that cause spoilage. Properly dried mint retains its vibrant color, aroma, and flavor for up to 12 months when stored correctly. Beyond preservation, dried mint offers convenience—it can be crushed into powders, steeped for tea, or incorporated into spice blends without the hassle of washing or chopping fresh leaves.
Harvesting Mint for Drying
The quality of dried mint begins with proper harvesting. Follow these guidelines to ensure optimal results:
- Timing: Harvest mint in the morning, after dew has evaporated but before the sun intensifies. This is when essential oils are most concentrated.
- Technique: Use sharp, clean scissors or pruning shears to cut stems just above a set of leaves. Avoid tearing, as this damages the plant and invites pathogens.
- Selection: Choose healthy, pest-free stems with vibrant green leaves. Discard yellowed or damaged foliage.
- Quantity: For air-drying, gather 4–6 stems per bundle. Larger bundles may mold due to poor airflow.
Methods of Drying Mint
Air-Drying (Hanging Method)
The oldest and simplest drying technique, air-drying relies on ambient heat and ventilation.

- Step 1: Rinse mint gently under cool water to remove dirt. Pat dry with a clean towel or salad spinner.
- Step 2: Group 4–6 stems into small bundles. Secure with twine or rubber bands, leaving 6–8 inches of stem for hanging.
- Step 3: Hang bundles upside down in a warm, dry, and dark location. Avoid kitchens or bathrooms, where humidity fluctuates. A garage, attic, or pantry works well.
- Step 4: Allow 1–3 weeks for leaves to crumble easily between fingers. Check weekly for brittleness.
Pro Tip: Cover bundles with paper bags pierced with holes to catch falling leaves and protect from dust.
Using a Food Dehydrator
Dehydrators offer controlled temperature and airflow, accelerating drying without risking flavor loss.
- Step 1: Preheat dehydrator to 95°F (35°C). Higher temperatures may volatilize essential oils.
- Step 2: Remove mint leaves from stems (optional). Spread leaves in a single layer on dehydrator trays.
- Step 3: Dry for 1–4 hours, checking hourly. Leaves are ready when they snap crisply.
Pro Tip: Dehydrate mint separately from strong-smelling herbs (e.g., oregano) to prevent flavor absorption.
Oven Drying
Ideal for small batches, oven drying is faster than air-drying but requires vigilance to avoid burning.
- Step 1: Preheat oven to the lowest setting (ideally 170°F/75°C). Line a baking sheet with parchment paper.
- Step 2: Spread mint leaves in a single layer. Leave the oven door slightly ajar to release moisture.
- Step 3: Bake for 1–2 hours, stirring every 15 minutes. Remove when leaves crumble easily.
Caution: Ovens lack humidity control, increasing mold risk if leaves aren’t dried thoroughly.
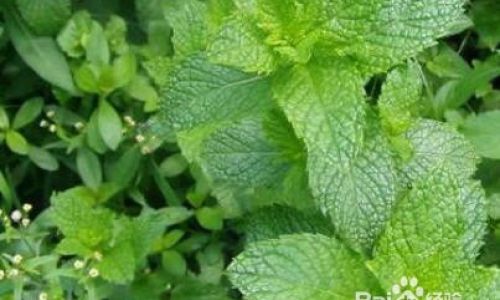
Microwave Drying
The quickest method, microwave drying is suitable for small quantities but demands caution.
- Step 1: Place a single layer of mint leaves between paper towels on a microwave-safe plate.
- Step 2: Microwave on 50% power in 30-second intervals, checking for dryness. Total time: 2–4 minutes.
Warning: Overheating can scorch leaves, ruining flavor and color.
Post-Drying Processing
Regardless of the method, follow these steps after drying:
- Cooling: Allow dried mint to cool completely before storing. Residual heat can cause condensation.
- Stripping Leaves: Gently rub stems between palms to release leaves. Discard tough stems.
- Crushing (Optional): For powdered mint, crush leaves using a mortar and pestle or spice grinder. Leave whole for visual appeal.
Storage Solutions for Dried Mint
Proper storage is critical to maintaining quality. Follow these guidelines:
- Containers: Use airtight, opaque glass jars with rubber seals. Avoid plastic, which retains moisture and odors.
- Labeling: Date and label jars. Dried mint retains peak quality for 6–12 months.
- Location: Store in a cool, dark pantry or cupboard. Light and heat degrade essential oils.
- Inspection: Check jars monthly for signs of moisture. If condensation appears, re-dry immediately.
Pro Tip: Add a silica gel packet to jars to absorb excess humidity (ensure it’s food-safe).
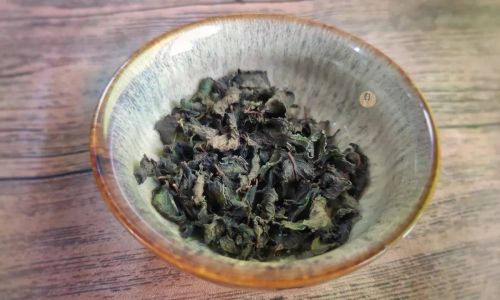
Uses of Dried Mint
Dried mint’s versatility shines in countless applications:
- Culinary: Flavor lamb dishes, yogurt sauces, salads, and chocolate desserts.
- Beverages: Brew into tea (alone or blended with green tea or chamomile).
- Homemade Remedies: Infuse into oils for topical use or mix with honey for sore throats.
- Crafts: Incorporate into potpourri or sachets for a fresh scent.
Common Mistakes to Avoid
- Inadequate Drying: Partially dried mint risks mold. Ensure leaves are brittle before storage.
- High Heat: Oven or dehydrator temperatures above 100°F (38°C) destroy flavor compounds.
- Improper Storage: Using damp containers or exposing mint to light accelerates degradation.
- Overcrowding: Bundling too many stems or piling leaves impedes airflow, leading to spoilage.
Conclusion
Drying mint is a rewarding process that transforms a fleeting herb into a pantry staple. Whether you prefer the rustic charm of air-drying or the speed of a dehydrator, patience and attention to detail are key. By harvesting at the right time, drying thoroughly, and storing correctly, you’ll preserve mint’s zesty character for months. Experiment with different methods to find what suits your lifestyle, and soon, you’ll wonder how you ever managed without a jar of homemade dried mint in your kitchen.
Final Tip: Replant mint annually or divide perennials every 2–3 years to ensure a fresh, abundant harvest. With proper care, this resilient herb will reward you season after season.





0 comments