Table of content
Introduction
Snow Skin Mooncakes, also known as Xue Mei Niang in Chinese, are a delightful dessert that has gained global popularity for their soft, chewy texture and elegant appearance. Unlike traditional baked mooncakes, these treats require no oven and boast a delicate, translucent outer layer made from glutinous rice flour. Filled with creamy whipped cream and fresh fruit or pastry cream, they offer a refreshing contrast to heavier desserts. This tutorial will walk you through every detail of creating these delicate confections, from selecting ingredients to mastering advanced techniques for flawless results.
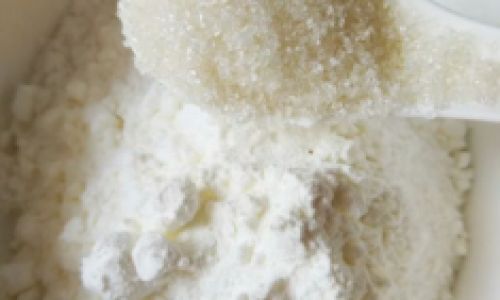
Ingredients & Tools: Your Culinary Arsenal
Before diving into the process, gather these essentials:
Ingredients
For the Dough:
- 100g glutinous rice flour (sticky rice flour)
- 30g cornstarch (cornflour)
- 50g powdered sugar (icing sugar)
- 180ml whole milk
- 30ml heavy cream (double cream)
- 20g unsalted butter (melted)
- ½ tsp vanilla extract (optional)
For the Filling:
- 200ml heavy cream (cold)
- 20g powdered sugar
- Fresh fruit (e.g., mango, strawberries, kiwi), diced
- Red bean paste or lotus paste (optional, for traditional fillings)
For Coating (Optional):
- 20g roasted glutinous rice flour (to prevent sticking)
- Cocoa powder, matcha powder, or food coloring (for variations)
Tools
- Steamer basket or heatproof bowl
- Mixing bowls (2 large, 1 medium)
- Fine-mesh sieve
- Whisk or electric mixer
- Silicone spatula
- Rolling pin
- Plastic wrap
- Kitchen scale
- Measuring cups/spoons
- Small cookie cutter or round mold (5cm diameter)
- Piping bag (optional)
Step-by-Step Tutorial
Preparing the Dough
a. Mix Dry Ingredients:
In a medium bowl, sift together 100g glutinous rice flour, 30g cornstarch, and 50g powdered sugar. Sifting eliminates lumps and ensures even mixing.
b. Combine Wet Ingredients:
In a separate bowl, whisk 180ml milk, 30ml heavy cream, and ½ tsp vanilla extract until smooth. Gradually pour this mixture into the dry ingredients, stirring continuously to avoid clumps. The batter should resemble thick pancake mix.
c. Strain for Smoothness:
Pass the batter through a fine-mesh sieve into a heatproof dish. This step guarantees a lump-free texture, critical for a silky-smooth dough.
Cooking the Dough
a. Steam to Perfection:
Cover the dish tightly with plastic wrap, poking a few holes to vent steam. Steam over medium heat for 20–25 minutes. Check doneness by inserting a toothpick—it should emerge clean.
b. Add Butter:
While the dough is hot, add 20g melted butter. Use a silicone spatula to fold the butter into the dough until fully incorporated. The residual heat melts the butter, creating a glossy finish.
Kneading & Cooling
a. Initial Knead:
Transfer the dough to a clean surface dusted with roasted glutinous rice flour. Knead gently for 2–3 minutes until smooth. At this stage, the dough will be sticky—resist the urge to over-flour, as this toughens the texture.
b. Chill for Elasticity:
Wrap the dough tightly in plastic wrap and refrigerate for 30–45 minutes. Chilling firms the butter, making the dough pliable and less prone to tearing.
Preparing the Filling
a. Whip the Cream:
Chill a mixing bowl and whisk attachment for 15 minutes. Pour 200ml cold heavy cream and 20g powdered sugar into the bowl. Whip on medium-high speed until stiff peaks form. Over-whipping risks turning the cream into butter, so stop once peaks hold their shape.
b. Assemble Fillings:
Cut fruit into 1cm cubes. For layered flavors, pipe a small dollop of cream into a mold, add fruit, and top with more cream. Freeze for 10 minutes to firm up before wrapping.
Assembling the Mooncakes
a. Divide the Dough:
Unwrap the chilled dough and divide it into 15g portions (about 12 pieces). Roll each into a smooth ball.
b. Flatten & Fill:
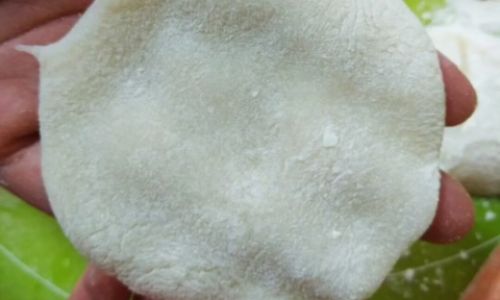
Dust a silicone mat with roasted flour. Use a rolling pin to flatten each dough ball into a 10cm circle, rotating frequently to prevent sticking. For ultra-thin skins, roll until nearly translucent.
c. Wrap Like a Pro:
Place a spoonful of cream and fruit in the center. Gently gather the edges, pinching to seal. Twist the excess dough and trim if needed. Flip the mooncake seam-side down for a smooth finish.
d. Mold & Shape:
Dust a mooncake mold with flour, tap out excess, and press the filled dough into the mold. Gently tap to release. For hand-shaped variants, use a cookie cutter or leave as rustic domes.
Final Touches & Serving
a. Dust for Elegance:
Lightly dust with matcha or cocoa powder for a gourmet touch. Alternatively, brush with melted white chocolate for shine.
b. Chill Before Serving:
Refrigerate for 1 hour to set. This step melds flavors and firms the cream.
Expert Tips for Flawless Results
- Prevent Sticking: Always use roasted glutinous rice flour (bake raw flour at 120°C/250°F for 10 minutes) for dusting.
- Achieve Thin Skins: Roll dough between two sheets of plastic wrap for even thickness.
- Fix Tears: If the dough tears, patch with a small piece of dough and smooth gently.
- Flavor Variations: Add 1 tsp matcha or 5g cocoa powder to the dough for colored skins.
- Storage Hack: Place parchment paper between layers to prevent sticking when stacking.
Creative Variations
- Black Sesame Delight: Mix 1 tbsp black sesame paste into the dough.
- Mango Passion: Layer mango cubes with passionfruit curd.
- Chocolate Lover’s: Swap cream for chocolate ganache and dust with cocoa.
Storage & Shelf Life
- Refrigerator: Store in an airtight container for up to 3 days.
- Freezer: Wrap individually in plastic and freeze for up to 1 month. Thaw in the fridge overnight.
Troubleshooting Guide
- Dough Too Sticky: Add 1 tsp roasted flour at a time.
- Dough Cracks: Over-kneaded or too dry—add a splash of milk.
- Cream Melts: Ensure all ingredients and tools are chilled before whipping.
- Dull Color: Steam the dough in a glass bowl (plastic may leach chemicals).
Conclusion
Mastering Snow Skin Mooncakes requires patience, but the results are worth every effort. These delicate treats impress as dessert centerpieces or thoughtful gifts. Experiment with fillings and flavors to discover your signature recipe. With this guide, even beginners can achieve bakery-quality results. Share your creations with #SnowSkinMooncakeMasterpiece—we’d love to see your culinary artistry!
Word Count: 1,217




0 comments