Table of content
Introduction
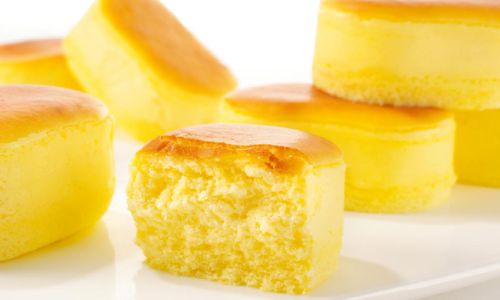
Half-baked cheesecake, a delightful fusion of creamy texture and subtle sweetness, has captured the hearts of dessert enthusiasts worldwide. Unlike its fully baked counterpart, this dessert retains a velvety, almost molten center that melts in your mouth. Achieving the perfect balance between a golden exterior and a soft, jiggly interior requires precision, patience, and a deep understanding of the baking process. In this comprehensive guide, we will explore the art of making half-baked cheesecake, from selecting the finest ingredients to mastering the delicate baking technique. Whether you are a novice baker or a seasoned pro, this recipe will equip you with the knowledge to create a dessert that impresses every time.
Understanding Half-Baked Cheesecake
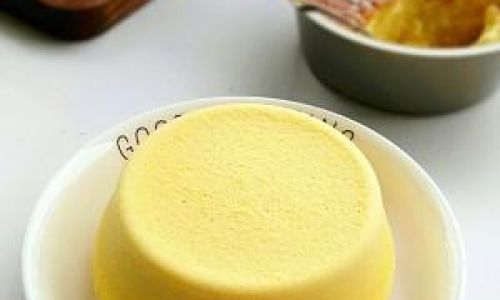
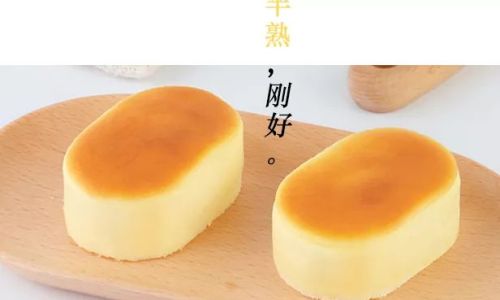
Before diving into the recipe, it is essential to grasp what sets half-baked cheesecake apart. Traditional cheesecakes are baked until fully set, resulting in a dense, uniform texture. In contrast, half-baked cheesecake is removed from the oven while the center remains slightly underdone. This creates a contrast between the firm edges and the custard-like center, offering a luxurious mouthfeel. The key to success lies in controlling the oven temperature and baking time to achieve this delicate equilibrium.
Ingredients You Will Need
The quality of your ingredients directly impacts the final result. Opt for full-fat dairy products to ensure richness and stability. Here is a breakdown of the essential components:
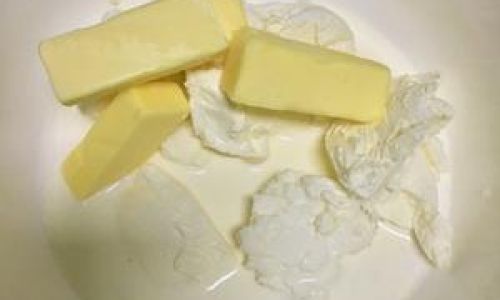
- Cream Cheese (450g): Use blocks of cream cheese, not spreadable tubs, for a firmer texture.
- Granulated Sugar (1 cup): Adjust to taste, but avoid reducing it drastically, as sugar aids in stabilization.
- Large Eggs (3): Room-temperature eggs blend seamlessly into the batter.
- Sour Cream (1/2 cup): Adds tanginess and moisture.
- Heavy Cream (1/4 cup): Enhances richness without making the cake dense.
- Vanilla Extract (1 tsp): Elevates the flavor profile.
- All-Purpose Flour (2 tbsp): Acts as a stabilizer to prevent cracking.
- Lemon Juice (1 tbsp): Balances sweetness with a hint of acidity.
Optional Additions:
- A graham cracker crust (1.5 cups crushed crackers + 6 tbsp melted butter) for added crunch.
- Fresh berries, chocolate shavings, or caramel drizzle for garnish.
Step-by-Step Recipe
Preparing the Pan
- Springform Pan: Use a 9-inch springform pan for easy removal. Wrap the exterior tightly in aluminum foil to prevent water seepage during baking.
- Crust (Optional): If using a crust, mix crushed graham crackers with melted butter. Press the mixture firmly into the pan’s base. Chill for 15 minutes before adding the batter.
Preparing the Cream Cheese Base
- Softening: Leave cream cheese at room temperature for 1–2 hours until pliable. Avoid microwaving, as this creates uneven softening.
- Mixing: In a large bowl, beat the cream cheese on medium speed until smooth and lump-free (2–3 minutes). Scrape the bowl’s sides regularly to ensure even consistency.
Incorporating Sweetness and Flavor
- Sugar: Gradually add sugar to the cream cheese, mixing until fully incorporated. This step should take 1–2 minutes.
- Flavorings: Stir in vanilla extract and lemon juice. These ingredients brighten the flavor without overpowering the cheese’s natural richness.
Adding Eggs and Stabilizers
- Eggs: Add eggs one at a time, mixing on low speed after each addition. Overmixing at this stage can introduce excess air, leading to cracks.
- Flour: Sift flour into the batter and fold gently with a spatula. This prevents gluten formation, ensuring a tender crumb.
Enhancing Texture with Dairy
- Sour Cream and Heavy Cream: Fold these into the batter until just combined. The sour cream adds a subtle tang, while heavy cream contributes to the silky texture.
Baking Technique: The Water Bath Method
- Preheat Oven: Set to 325°F (160°C). A lower temperature ensures gradual, even baking.
- Water Bath: Place the springform pan inside a larger roasting pan. Pour hot water into the roasting pan until it reaches halfway up the springform pan’s sides. This steam environment prevents drying and minimizes cracking.
Baking Time and Doneness Test
- Bake for 45–50 minutes: The edges should puff slightly, and the center should jiggle like Jell-O when tapped. A toothpick inserted 2 inches from the edge should come out clean, while the center remains moist.
- Avoid Overbaking: Resist the urge to bake longer, as the residual heat will continue cooking the center after removal.
Cooling Process
- Gradual Cooling: Turn off the oven and crack the door open. Let the cheesecake cool inside for 1 hour. This slow cooling prevents sudden temperature changes that cause cracks.
- Chilling: Refrigerate for at least 6 hours, preferably overnight. Chilling solidifies the texture and allows flavors to meld.
Expert Tips for Perfect Results
- Room Temperature Ingredients: Cold ingredients result in a lumpy batter. Plan ahead to soften cream cheese and eggs.
- Avoid Overmixing: Overmixing incorporates air bubbles, leading to a puffy, cracked surface.
- Use a Water Bath: Essential for moisture and even heat distribution. If leaking occurs, place the springform pan inside an oven-safe bag before baking.
- Doneness Test: Rely on the jiggle test rather than a timer. Ovens vary, so visual cues are critical.
- Patience During Cooling: Rushing the cooling process is a common mistake. Let the cheesecake rest undisturbed in the oven and fridge.
Troubleshooting Common Issues
- Cracked Surface: Caused by rapid temperature changes or overbaking. Use a water bath and cool gradually.
- Sunken Center: Underbaking. Extend baking time by 5-minute increments until the edges are set.
- Lumpy Texture: Insufficient softening of cream cheese or overmixing. Ensure cream cheese is at room temperature and mix on low speed.
- Soggy Crust: Excess moisture from the water bath. Double-wrap the pan or bake the crust separately before adding the batter.
Creative Variations
- Matcha Half-Baked Cheesecake: Whisk 2 tbsp matcha powder into the batter before baking.
- Chocolate Swirl: Drizzle melted dark chocolate over the batter and swirl with a skewer.
- Berry Compote Topping: Spread a layer of cooked berries (strawberries, raspberries) over the chilled cheesecake.
Serving Suggestions
- Pair with Espresso: The bitterness of coffee complements the cheesecake’s richness.
- Fresh Berries: A garnish of macerated strawberries or blueberries adds a refreshing contrast.
- Whipped Cream: A dollop of lightly sweetened whipped cream enhances the dessert’s elegance.
Storage and Make-Ahead Tips
- Refrigeration: Wrap tightly in plastic wrap and store for up to 5 days.
- Freezing: Place slices on a baking sheet to freeze individually, then transfer to an airtight container. Thaw overnight in the fridge.
- Make-Ahead: The cheesecake’s texture improves after 24 hours in the fridge, making it ideal for preparing in advance.
Conclusion
Mastering the half-baked cheesecake is a testament to the baker’s artistry. By combining precise technique with quality ingredients, you can create a dessert that delights the senses and leaves a lasting impression. Remember that patience is your greatest ally—rushing the process often leads to disappointment. Whether enjoyed plain or adorned with creative toppings, this cheesecake is a celebration of balance and indulgence. So, preheat your oven, gather your ingredients, and embark on a journey to create a dessert that will have everyone asking for seconds. Happy baking!





0 comments