Table of content
- Tools of the Trade
- Ingredients: The Building Blocks
- Step 1: Choose Your Flavor Profile
- Step 2: Prep Your Ingredients
- Step 3: Blend or Mix
- Step 4: Pour into Molds
- Step 5: Insert Sticks
- Step 6: Freeze Time
- Step 7: Unmolding
- Step 8: Storage
- Step 9: Serving
- Classic Flavors
- Creative Combinations
- Gourmet Twists
- Infusing Flavors
- Unconventional Molds
- Dairy-Free and Low-Sugar Variations
Introduction
There’s something undeniably magical about a popsicle on a scorching summer day. The first icy bite, the burst of sweetness, and the refreshing chill that follows—it’s a simple pleasure that transcends age and culture. While store-bought popsicles are convenient, crafting your own at home allows for endless creativity, control over ingredients, and a nostalgic sense of accomplishment. This guide will walk you through everything you need to know to make perfect homemade popsicles, from selecting the right tools and ingredients to experimenting with gourmet flavor combinations. Whether you’re a novice in the kitchen or a seasoned home chef, you’ll discover tips, tricks, and recipes to elevate your popsicle game.
Chapter 1: Essential Tools and Ingredients
Tools of the Trade
- Popsicle Molds: These come in various shapes, sizes, and materials. Silicone molds are flexible and easy to unmold, while plastic or stainless steel options offer durability. If you don’t have molds, small paper cups or even ice cube trays can work in a pinch.
- Wooden Sticks or Reusable Plastic Sticks: Wooden sticks are classic, but reusable options are eco-friendly.
- Blender or Food Processor: Essential for creating smooth mixtures, especially for fruit-based popsicles.
- Saucepan: For heating ingredients like sugar syrups or chocolate coatings.
- Funnel: Helpful for pouring liquids into molds without spills.
- Cutting Board and Knife: For prepping fruits and herbs.
Ingredients: The Building Blocks
- Fruits: Fresh or frozen berries, mangoes, kiwis, bananas, and citrus fruits add natural sweetness and vibrant color.
- Liquids: Water, juice (orange, apple, or coconut), tea, or milk (dairy or plant-based) form the base.
- Sweeteners: Honey, agave, maple syrup, or granulated sugar balance tartness. For low-sugar options, use stevia or fruit purées.
- Add-Ins: Yogurt, coconut cream, chopped nuts, chocolate chips, or herbs like mint or basil elevate texture and flavor.
- Natural Colorants: Beet juice, spinach, or turmeric can create visually stunning layers without artificial dyes.
Chapter 2: Step-by-Step Popsicle Making
Step 1: Choose Your Flavor Profile
Decide whether to highlight a single ingredient (e.g., strawberry) or blend flavors (e.g., mango-lime). Consider contrasting textures, like creamy yogurt swirled with tangy fruit.
Step 2: Prep Your Ingredients
- Fruits: Wash, peel, and chop as needed. Freeze overripe bananas for a creamier base.
- Herbs: Muddle mint or basil to release oils before adding to the mix.
- Liquids: Heat water or juice with sweeteners to dissolve sugar if desired.
Step 3: Blend or Mix
For smooth popsicles, blend ingredients until silky. For a chunkier texture, gently stir in diced fruits or add-ins.
Step 4: Pour into Molds
Fill molds to the top to avoid air pockets. Tap gently on the counter to remove bubbles.
Step 5: Insert Sticks
Freeze for 30 minutes before adding sticks to keep them upright. Alternatively, use molds with built-in sticks.
Step 6: Freeze Time
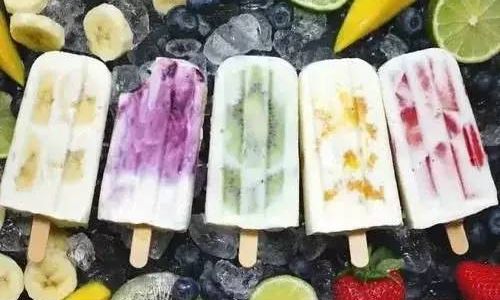
Most popsicles require 4–6 hours to set. Overnight freezing ensures solidity.
Step 7: Unmolding
Run molds under warm water for 10–15 seconds to loosen. Gently twist or pull to release.
Step 8: Storage
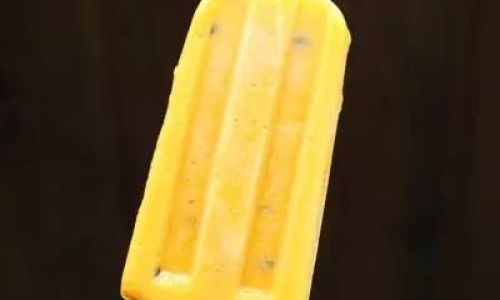
Wrap individually in parchment paper and store in a freezer-safe bag for up to three months.
Step 9: Serving
Dip in melted chocolate, sprinkle with coconut, or pair with fresh fruit for garnish.
Chapter 3: Classic and Creative Flavor Ideas
Classic Flavors
- Orange Creamsicle: Blend 1 cup fresh orange juice, ½ cup whole milk, 2 tbsp honey, and 1 tsp vanilla extract.
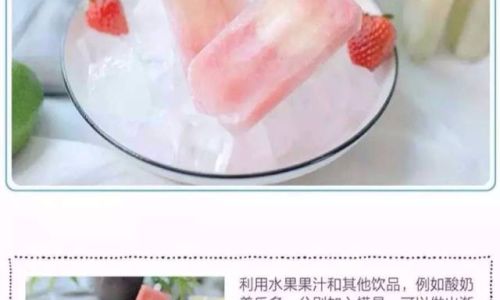
- Strawberry Lemonade: Purée 2 cups strawberries, ½ cup lemon juice, ¼ cup sugar, and 1 cup water.
- Chocolate Fudge: Melt ½ cup dark chocolate with 1 cup heavy cream and 2 tbsp cocoa powder.
Creative Combinations
- Tropical Paradise: Layer mango purée, pineapple chunks, and coconut milk for a piña colada vibe.
- Herbal Infusions: Mix cucumber juice, lime zest, and fresh mint for a spa-inspired treat.
- Layered Delights: Freeze a layer of raspberry purée, then add a layer of lemon yogurt for a striped effect.
Gourmet Twists
- Roasted Peach and Honey: Roast peaches with honey, then blend with Greek yogurt.
- Avocado Lime: Combine avocado, lime juice, coconut milk, and a pinch of salt for a savory-sweet twist.
- Espresso Martini: Mix cold brew coffee, vodka, and coffee liqueur for an adult-only popsicle.
Chapter 4: Tips for Popsicle Perfection
- Avoid Ice Crystals: Use ingredients with natural sugars (like fruit) or add a touch of corn syrup to prevent a grainy texture.
- Balance Sweetness: Taste the mixture before freezing and adjust sweeteners—flavors will dull slightly when frozen.
- Prevent Drips: Run molds under warm water for precise unmolding.
- Experiment with Texture: Add chia seeds, chopped nuts, or granola for crunch.
- Vegan Options: Use coconut milk or almond yogurt as dairy-free bases.
Chapter 5: Troubleshooting Common Issues
- Popsicle Won’t Release: Run the mold under hot water for longer, or let it sit at room temperature for 2–3 minutes.
- Too Icy: Reduce water content or add a fat source like yogurt.
- Sticks Fell Over: Freeze for 30 minutes before inserting sticks, or use molds with guides.
- Flavor is Bland: Add a pinch of salt to enhance sweetness, or increase acidity with citrus.
Chapter 6: Advanced Techniques
Infusing Flavors
- Tea-Infused Popsicles: Steep green tea or hibiscus in the liquid base for a floral note.
- Spiced Mixes: Add cinnamon sticks, star anise, or cardamom pods to simmering mixtures.
Unconventional Molds
- Use shot glasses for mini popsicles, or fill hollowed-out orange halves for a natural mold.
Dairy-Free and Low-Sugar Variations
- Substitute agave for sugar and use almond milk for a vegan option.
- Freeze puréed dates with water for a caramel-like sweetness.
Chapter 7: Safety and Hygiene
- Always wash fruits thoroughly, even if peeling.
- Avoid cross-contamination by using separate cutting boards for fruits and raw ingredients.
- Label popsicles with dates to avoid freezer burn.
Chapter 8: Presentation and Pairing
- Garnishes: Dip in melted dark chocolate, roll in crushed pistachios, or drizzle with berry coulis.
- Pairings: Serve with sparkling water for a mocktail effect, or pair with wine for a sophisticated dessert.
Conclusion
Making popsicles at home is a delightful blend of science and art. It’s an activity that encourages experimentation, whether you’re recreating childhood favorites or inventing bold new flavors. By mastering the basics—choosing quality ingredients, understanding freezing techniques, and embracing creativity—you’ll craft treats that rival any gourmet shop. So gather your molds, fire up the blender, and let your imagination run wild. The best part? Every lick is a reminder that summer’s sweetest pleasures are often the simplest.
Final Tip: Share your creations with friends and family—few things bond people faster than a shared love for icy, fruity, utterly customizable joy. Happy freezing!

0 comments