Introduction
Quail eggs, prized for their delicate flavor and nutritional richness, have become a staple in kitchens worldwide. These tiny treasures, though small, require careful handling to ensure they are safe for consumption. Unlike chicken eggs, quail eggs have a thinner, more porous shell, making them susceptible to contamination if not cleaned properly. Whether you harvest them from your backyard flock or purchase them from a local market, mastering the art of cleaning quail eggs is essential for preserving their quality and safety. This guide will walk you through every step of the process, from gathering supplies to advanced troubleshooting, ensuring your quail eggs are pristine and ready to use.
Why Clean Quail Eggs?
Quail eggs, like all eggs, are coated with a natural protective layer called the bloom or cuticle. This layer seals the shell’s pores, preventing bacteria from penetrating and keeping the egg fresh. However, when eggs are exposed to dirt, feces, or other contaminants during laying or collection, this natural barrier becomes compromised. Cleaning quail eggs removes dirt, bacteria, and pathogens, extending their shelf life and reducing the risk of foodborne illnesses. It’s important to note that cleaning also strips away the bloom, so properly cleaned eggs must be refrigerated to maintain freshness.
Gathering Your Supplies
Before diving into the cleaning process, assemble the necessary tools and materials. Here’s what you’ll need:
- Warm Water: Lukewarm water (around 90–100°F or 32–38°C) is ideal to avoid shocking the eggs and causing cracks.
- White Vinegar: A mild acid that helps dissolve stains and kill bacteria without damaging the shell.
- Baking Soda: A gentle abrasive for stubborn dirt.
- Soft-Bristled Brushes: Toothbrushes or vegetable brushes work well for scrubbing without scratching.
- Clean Towels: Lint-free cloths or paper towels for drying.
- Colander or Strainer: To rinse eggs without dropping them.
- Sanitized Containers: For soaking and storing eggs.
- Gloves (Optional): To protect hands from prolonged water exposure.
Step-by-Step Cleaning Process
Initial Inspection
Begin by examining each egg for cracks or breaks. Discard any damaged eggs, as they may be contaminated. Gently hold the egg under a bright light to check for hairline fractures. Even small cracks can allow bacteria to enter, so err on the side of caution.
Dry Cleaning (Optional)
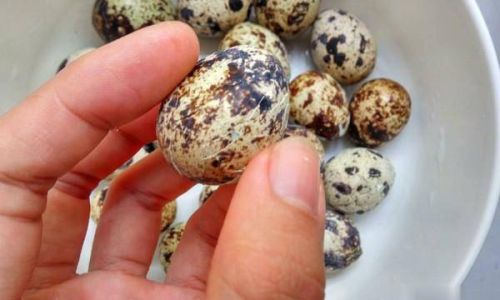
If eggs are only lightly soiled, you may attempt dry cleaning. Use a dry, soft cloth or a fine-grit sanding sponge to gently rub away dirt. Avoid excessive pressure, as this can damage the shell. This method preserves the bloom but is ineffective for heavily soiled eggs.
Soaking in Vinegar Solution
For eggs with stubborn stains or dried debris, prepare a soaking solution:
- Fill a bowl with warm water.
- Add 1/4 cup of white vinegar per gallon of water.
- Submerge the eggs for 5–10 minutes.
The vinegar helps loosen dirt and kills surface bacteria. Avoid soaking longer than 15 minutes, as prolonged exposure may weaken the shell.
Gentle Scrubbing
After soaking, use a soft-bristled brush to scrub the eggs. Focus on stained areas, using circular motions. For persistent grime, dip the brush in a paste made of baking soda and water. Rinse the brush frequently to prevent scratching the shell.
Rinsing
Place a colander in the sink and run a gentle stream of warm water. Rinse each egg individually, rotating it to ensure all traces of vinegar or baking soda are removed. Avoid using high-pressure water, as it may force contaminants through the pores.
Final Inspection
Dry each egg with a clean towel and inspect it once more. Check for remaining stains or cracks. If an egg passes inspection, it’s ready for storage or use.
Advanced Techniques for Stubborn Stains
Lemon Juice Soak
For eggs with yellowish stains, substitute vinegar with lemon juice. The citric acid works similarly to vinegar but leaves a fresh scent. Soak eggs for 10 minutes before scrubbing.
Hydrogen Peroxide Rinse
After cleaning, dip eggs in a solution of 1 tablespoon hydrogen peroxide per cup of water. This adds an extra layer of sanitization. Rinse thoroughly with warm water afterward.
Oxygen Bleach Solution
For commercial operations or large batches, mix 1 tablespoon of oxygen-based bleach per gallon of water. Soak eggs for 5 minutes, then rinse. This method is effective but requires thorough rinsing to avoid chemical residue.
Drying and Storage Tips
Air Drying
Lay cleaned eggs on a clean towel in a single layer. Allow them to air-dry for 1–2 hours in a well-ventilated area. Avoid direct sunlight, as it may degrade the shell’s quality.
Refrigeration
Store dried eggs in a carton or covered container in the refrigerator. Use within 2–4 weeks for optimal freshness. Label the container with the cleaning date to track freshness.
Freezing (Not Recommended)
Freezing quail eggs is not advisable, as the shells may crack due to expansion. If necessary, crack eggs into a freezer-safe container, whisk gently, and freeze for up to six months.
Safety Precautions
Cross-Contamination Prevention
- Use separate utensils and bowls for cleaning eggs.
- Wash hands thoroughly before and after handling eggs.
- Sanitize work surfaces with a bleach solution (1 tablespoon bleach per gallon of water).
Avoid Harsh Chemicals
Never use dish soap, detergents, or commercial cleaners on eggs. These substances can seep through the shell and contaminate the contents.
Temperature Control
- Avoid extreme temperature changes, which can cause condensation and bacterial growth.
- Never wash eggs with cold water, as this can draw contaminants into the egg.
Troubleshooting Common Issues
Persistent Stains
If stains remain after vinegar soaking, try a longer soak (up to 20 minutes) or switch to lemon juice. For extremely stubborn stains, lightly sand the shell with fine-grit sandpaper.
Cloudy Appearance
A milky film on the shell after drying is normal and indicates the removal of the bloom. This does not affect the egg’s quality.
Strong Odor
If eggs emit a sulfurous smell after cleaning, they may be past their prime. Discard them immediately.
Cracked During Cleaning
If an egg cracks during scrubbing, discard it. Even a tiny crack can harbor bacteria.
The Debate: To Wash or Not to Wash?
In some cultures, quail eggs are consumed without washing, relying on the bloom for protection. However, this practice is risky unless eggs are collected meticulously and consumed immediately. For most home cooks, washing is the safer choice, provided eggs are refrigerated promptly.
Conclusion
Cleaning quail eggs is a blend of science and artistry. By understanding the shell’s structure, employing gentle techniques, and adhering to safety protocols, you can ensure your eggs are both beautiful and safe. Whether you’re a hobbyist farmer or a gourmet chef, mastering this process elevates your culinary creations and safeguards your health. Remember, patience and precision are your greatest allies—treat each egg with care, and it will reward you with unparalleled flavor and nutrition. Happy cleaning!


0 comments