Introduction
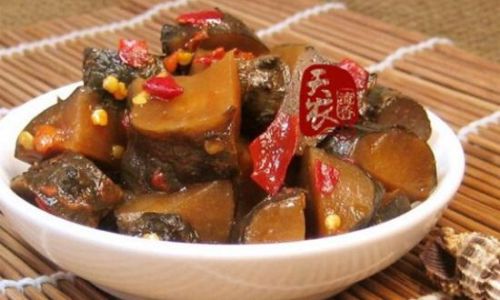
Pickling, an ancient food preservation technique, has been a cornerstone of culinary traditions worldwide. It involves submerging fresh produce in a brine or vinegar solution to extend its shelf life while enhancing its flavor. Among the myriad of vegetables that lend themselves well to pickling, green vegetables stand out for their vibrant color, crisp texture, and nutritious profile. From cucumbers to cabbage, and particularly green vegetables like kale, spinach, and mustard greens, the art of pickling transforms these humble ingredients into tangy, savory delicacies. This comprehensive guide delves into the traditional method of pickling green vegetables, offering step-by-step instructions, tips for success, and the science behind the process.

Understanding the Basics of Pickling
Before diving into the specifics of pickling green vegetables, it’s crucial to grasp the fundamental principles involved. Pickling primarily relies on lactic acid fermentation, a natural process where lactic acid bacteria convert sugars present in the vegetables into lactic acid. This acid creates an environment hostile to harmful bacteria, thereby preserving the vegetables. Additionally, vinegar, salt, and sometimes spices are used to further inhibit the growth of undesirable microorganisms and add layers of flavor.
Choosing the Right Green Vegetables
Not all green vegetables are suited for pickling. The ideal candidates are those with a high water content and firm texture, which retain their crispness after fermentation. Here are some popular choices:
- Kale: Its robust flavor and leafy structure make kale an excellent pickling candidate.
- Spinach: While delicate, spinach can be pickled successfully when handled gently.
- Mustard Greens: These have a spicy, peppery taste that intensifies during fermentation.
- Collard Greens: Similar to kale, collards offer a hearty, earthy flavor.
- Broccoli Stalks: Often discarded, broccoli stalks can be pickled for a crunchy, nutritious snack.
Preparation and Equipment

-
Cleaning and Sterilization: Start by thoroughly washing the vegetables under running water to remove dirt and debris. Pat them dry using a clean kitchen towel or air-dry them. Ensure all utensils, jars, and lids are sterile to prevent contamination. This can be achieved by boiling them in water for a few minutes or using a bleach solution diluted with water (rinse thoroughly afterward).
-
Choosing the Right Jar: Glass jars with tight-fitting lids are ideal for pickling as they do not react with the acidic contents and allow for easy monitoring of the fermentation process.
-
Brine Preparation: The brine is the lifeblood of pickling. A basic brine consists of water, salt, and sometimes vinegar. For every quart of water, use approximately 2 tablespoons of non-iodized salt. If using vinegar, add a cup of distilled white vinegar to the brine for extra preservation power. Adjust the saltiness to taste, remembering that a slightly saltier brine aids in fermentation and preservation.
The Pickling Process
-
Packing the Jars: Begin by packing the cleaned and dried green vegetables tightly into the jars. This helps exclude oxygen, which can slow down fermentation and encourage mold growth. Use a chopstick or a narrow spatula to press down the vegetables, ensuring there are no air pockets.

-
Pouring the Brine: Once the jars are filled with vegetables, pour the prepared brine over them, ensuring the vegetables are fully submerged. Leave about half an inch of headspace at the top of the jar to allow for gas expansion during fermentation.
-
Weighting Down and Sealing: To keep the vegetables submerged, use a fermentation weight, a smaller jar filled with water, or a clean stone. This prevents the vegetables from floating and exposing themselves to oxygen. Secure the lids loosely to allow gases to escape during fermentation.
-
Fermentation: Place the jars in a cool, dark place where temperatures remain consistent, ideally between 65°F to 75°F (18°C to 24°C). Check the jars daily for the first few days to ensure everything is submerged and to release any built-up pressure. Bubbles forming on the surface and a slight hiss when opening the jar are signs of active fermentation.
-
Tasting and Storing: After about a week (this can vary depending on the vegetable type and desired level of tanginess), start tasting the pickles. Once they reach your preferred flavor, tightly seal the jars and store them in the refrigerator to slow down further fermentation. Properly pickled vegetables can last for several months in the fridge.
Troubleshooting and Tips for Success

- Mold: If you notice mold on the surface of the brine, it’s usually harmless Kahm yeast. Skim it off with a clean spoon, ensuring no mold particles fall back into the brine. If the mold is fuzzy or black, discard the batch and start anew.
- Burping: During active fermentation, gases can build up inside the jars. “Burping” them by gently loosening the lids daily helps release pressure and prevents explosions.
- Flavor Adjustments: Experiment with spices, herbs, and garlic to customize the flavor of your pickles. For a sweeter pickle, add a small amount of sugar to the brine.
- Safety First: Always use clean, sterile equipment and follow proper food handling practices to avoid contamination.
Conclusion
Pickling green vegetables is not only a practical way to preserve fresh produce but also a delightful culinary endeavor that adds a burst of flavor to any meal. By following the traditional method outlined in this guide, you can transform humble green vegetables into tangy, crunchy treats that are as nutritious as they are delicious. Remember, the art of pickling lies in patience and attention to detail. With each batch, you’ll refine your technique, discovering new flavors and textures that celebrate the beauty of fermented foods. So, gather your ingredients, sterilize your jars, and embark on a journey of pickling discovery that will delight your taste buds and nourish your body. Happy pickling!


0 comments