Introduction: The Art of Crafting Perfect Oil Pancakes
In the vast realm of culinary arts, there are countless dishes that captivate our taste buds and leave us yearning for more. Among these, oil pancakes, or youbing as they are affectionately known in some regions, stand out for their simplicity and profound flavor. These pancakes, characterized by their soft texture and delightful taste, are a staple in many households across Asia and beyond. The secret to crafting the perfect oil pancake lies not just in the ingredients but also in the meticulous process of preparation. This article delves into the intricacies of making oil pancakes, offering a comprehensive recipe that guarantees soft and delicious results every time.
Understanding the Basics: Ingredients and Tools
Before diving into the recipe, it’s crucial to understand the fundamental components and tools required for making oil pancakes. The ingredients are relatively straightforward, but their quality and proportions play a pivotal role in achieving the desired outcome.
Ingredients:
- Flour: Preferably all-purpose flour, which provides the right balance of gluten for structure without being overly chewy.
- Water: Room temperature water helps in achieving a smooth dough consistency.
- Salt: A pinch to enhance flavor.
- Vegetable Oil: For frying, ensuring the pancakes are golden and crispy on the outside while remaining soft on the inside.
- Baking Powder (Optional): A small amount can be added to make the dough lighter and fluffier.
Tools:
- Mixing Bowls: For combining ingredients and kneading the dough.
- Rolling Pin: Essential for flattening the dough into thin, even pancakes.
- Frying Pan: A heavy-bottomed pan distributes heat evenly, preventing the pancakes from burning.
- Spatula: For flipping the pancakes without tearing them.
- Paper Towels or a Kitchen Towel: For draining excess oil after frying.
Step-by-Step Recipe: Crafting Soft and Delicious Oil Pancakes
Now that we have our ingredients and tools ready, let’s embark on the journey of making oil pancakes. Each step is crucial, and attention to detail will yield pancakes that are not only soft but also bursting with flavor.
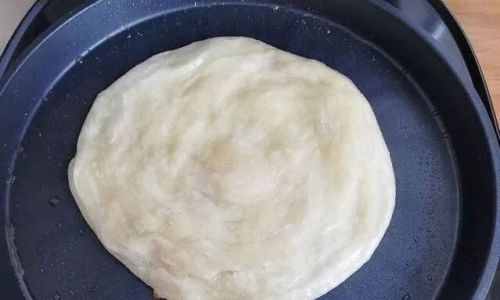
Step 1: Preparing the Dough
-
Combine Ingredients: In a large mixing bowl, add 2 cups of all-purpose flour, a pinch of salt, and a teaspoon of baking powder (if using). Mix these dry ingredients thoroughly to ensure they are well combined.
-
Add Water Gradually: Begin adding water, a little at a time, while stirring continuously with a wooden spoon or chopsticks. The goal is to create a dough that is neither too sticky nor too dry. Aim for a consistency that allows you to handle the dough without it sticking excessively to your hands.
-
Knead the Dough: Once the dough starts to come together, transfer it onto a lightly floured surface and knead for about 8-10 minutes. Kneading helps develop the gluten in the flour, giving the dough elasticity and structure. The dough should feel smooth and pliable when done.
-
Rest the Dough: Cover the dough with a damp cloth or plastic wrap and let it rest for at least 30 minutes. This resting period allows the gluten to relax, making the dough easier to roll out and less prone to shrinking.
Step 2: Rolling Out the Pancakes
-
Divide the Dough: After resting, divide the dough into smaller portions, each about the size of a tennis ball. This will make it easier to handle and roll out into thin pancakes.
-
Flatten and Roll Out: Take one dough portion and flatten it slightly with your hands. Use a rolling pin to roll it out into a thin circle, about 1/8 inch thick. The thinner the pancake, the crispier it will be on the outside while remaining soft on the inside.
-
Repeat with Remaining Dough: Continue the process with the remaining dough portions, stacking the rolled-out pancakes lightly with parchment paper or plastic wrap to prevent them from sticking together.
Step 3: Frying the Pancakes
-
Heat the Oil: Pour enough vegetable oil into a frying pan to cover the bottom by about 1/4 inch. Heat the oil over medium-high heat until it reaches a temperature of around 350°F (175°C). You can test the oil’s readiness by dropping a small piece of dough into it; it should sizzle immediately and rise to the surface.
-
Fry the Pancakes: Carefully place a rolled-out pancake into the hot oil. Fry for about 1-2 minutes on each side, or until golden brown and crispy. Use a spatula to gently flip the pancake halfway through cooking to ensure even browning.
-
Drain and Cool: Once fried, remove the pancake from the oil using a slotted spatula and let it drain on paper towels or a kitchen towel to remove excess oil. Repeat the process with the remaining pancakes.
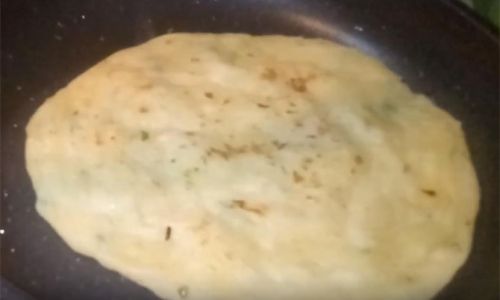
Step 4: Serving and Enjoying
-
Serve Warm: Oil pancakes are best enjoyed warm, right out of the frying pan. They can be served plain, with a sprinkle of salt, or accompanied by various dipping sauces like soy sauce, chili sauce, or even a simple mixture of vinegar and garlic.
-
Storage: If you have leftovers, store them in an airtight container. To reheat, place them in a single layer on a baking sheet and warm them in a preheated oven at 300°F (150°C) for about 5-7 minutes, or until heated through.
Tips and Tricks for Perfect Oil Pancakes
While the basic recipe provides a solid foundation, there are several tips and tricks that can elevate your oil pancakes to the next level:
-
Quality Ingredients: Always use fresh, high-quality ingredients. This makes a significant difference in the final taste and texture of the pancakes.
-
Temperature Control: Maintaining the correct oil temperature is crucial. Too hot can burn the pancakes, while too low can make them soggy.
-
Even Rolling: Ensure that the pancakes are rolled out to an even thickness. This ensures uniform cooking and a consistent texture.
-
Don’t Overcrowd the Pan: Fry the pancakes in batches if necessary to avoid overcrowding the pan. This ensures that each pancake has enough space to cook evenly.
-
Experiment with Flavors: Feel free to experiment with different spices and herbs. A pinch of five-spice powder or a sprinkle of sesame seeds can add a unique twist to your oil pancakes.
Conclusion: A Culinary Journey in Every Bite
Making oil pancakes is not just about following a recipe; it’s a culinary journey that brings together the art of dough handling, the science of frying, and the joy of sharing a delicious meal with loved ones. The softness and deliciousness of these pancakes are a testament to the simplicity and elegance of traditional cooking. By following the steps outlined in this recipe and embracing the tips and tricks shared, you’ll be well on your way to crafting oil pancakes that are sure to become a staple in your kitchen.
As you delve into the process, remember that cooking is an art form that thrives on creativity and experimentation. Feel free to adapt the recipe to your taste preferences, whether it’s adding a splash of milk to the dough for added richness or incorporating different spices for a flavorful twist. The beauty of oil pancakes lies in their versatility and the ability to cater to a wide range of palates.
So, the next time you’re in the mood for a comforting, homemade treat, gather your ingredients, roll up your sleeves, and embark on the delightful journey of making soft and delicious oil pancakes. With each bite, you’ll be transported to a world of culinary delight, where tradition meets innovation, and simplicity becomes extraordinary. Happy cooking!


0 comments