Table of content
Vinegar, a tangy, versatile liquid cherished for its culinary, medicinal, and cleaning properties, has been a kitchen staple for millennia. Its origins trace back to ancient civilizations, where accidental fermentation of wine or beer led to the discovery of this sour elixir. Today, vinegar is commercially produced in vast quantities, but the art of crafting it at home remains a rewarding and cost-effective endeavor. This guide delves into the science, techniques, and creativity behind making vinegar, empowering you to transform simple ingredients into a flavorful, probiotic-rich condiment.
The Science Behind Vinegar Fermentation
Vinegar production hinges on a two-step fermentation process. First, natural sugars in fruits, grains, or other carbohydrates convert into alcohol through yeast activity, creating wine, cider, or beer. In the second stage, acetic acid bacteria (Acetobacter species) oxidize the alcohol into acetic acid, the compound responsible for vinegar’s signature sourness. This process, called acetous fermentation, requires oxygen and thrives in temperatures between 75–90°F (24–32°C).

The key player in this transformation is the mother of vinegar—a gelatinous mass of cellulose and bacteria that forms on the surface of fermenting liquids. While commercial vinegars are often pasteurized to remove the mother, preserving it ensures faster, more reliable vinegar production in subsequent batches.
Ingredients and Equipment
To embark on your vinegar-making journey, gather the following:
Ingredients
- Alcohol Base: Wine, beer, cider, or a homemade alcohol solution (e.g., fermented fruit juice or a sugar-water mixture fermented with brewer’s yeast).
- Fruits/Flavorings (optional): Berries, apples, herbs, or spices to infuse unique flavors.
- Water: Non-chlorinated to avoid inhibiting bacteria.
- Sugar (optional): To boost alcohol content if using a low-sugar base.
Equipment
- Glass Jars/Containers: Wide-mouthed jars (1-gallon size or larger) for fermentation.
- Cheesecloth or Coffee Filters: To cover the jar while allowing airflow.
- Thermometer: To monitor temperature.
- pH Strips: To track acidity (optional but helpful).
- Wooden Spoon: For stirring (avoid metal, which can react with acid).
- Bottles with Airlocks: For controlled fermentation (optional but recommended).
Step-by-Step Vinegar-Making Methods
Traditional Vinegar Making (From Wine or Cider)
This method leverages pre-made alcohol, such as red wine, white wine, or apple cider, as the base.
Step 1: Prepare the Alcohol Base
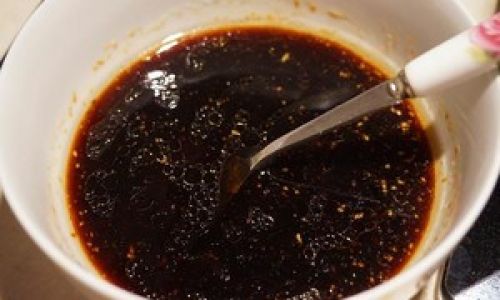
- Use unpasteurized, preservative-free wine or cider (pasteurization or sulfites can kill bacteria).
- If using hard alcohol (e.g., vodka), dilute it to 8–10% ABV (alcohol by volume) with water, as higher concentrations can inhibit bacterial growth.
Step 2: Initiate Fermentation
- Pour the alcohol into a clean glass jar, leaving 20% headspace for oxygen exposure.
- Cover the jar with cheesecloth secured with a rubber band to keep out insects while allowing airflow.
- Place the jar in a warm, dark location (75–85°F/24–29°C).
Step 3: Introduce the Mother of Vinegar
- If you have a mother from a previous batch, float it on the liquid’s surface.
- Alternatively, add 1 cup of unpasteurized raw vinegar (e.g., Bragg’s Apple Cider Vinegar) per gallon of liquid to introduce bacteria.
Step 4: Monitor Fermentation
- Stir the liquid daily with a wooden spoon to aerate it.
- Within 1–4 weeks, a gelatinous mother will form, and a strong vinegar aroma will develop.
- Taste periodically; the vinegar is ready when it reaches your desired acidity (3–6 weeks).
Step 5: Strain and Store
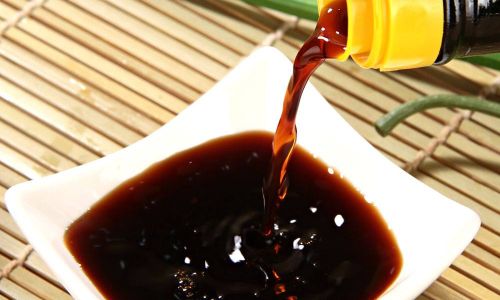
- Strain the vinegar through cheesecloth to remove the mother (which can be reused).
- Bottle the vinegar in dark glass containers to protect it from light, which degrades flavor.
Quick Vinegar Method (Using Fruit Scraps)
This eco-friendly approach repurposes fruit peels, cores, and overripe produce.
Step 1: Prepare the Fruit Base
- Collect fruit scraps (apples, berries, peaches, etc.) and chop them into small pieces.
- Place the scraps in a jar and cover with water (1:1 ratio by volume).
- Add 1–2 tablespoons of sugar per quart of water to feed yeast.
Step 2: Ferment into Alcohol
- Cover the jar with cheesecloth and stir daily.
- After 1–2 weeks, the mixture will bubble and smell alcoholic.
Step 3: Convert to Vinegar

- Strain the liquid to remove solids.
- Pour the alcohol into a new jar and add a mother of vinegar or raw vinegar.
- Ferment as described in the traditional method.
Continuous Brew Vinegar
For a steady supply, maintain a perpetual vinegar mother.
Step 1: Set Up a Brewing Station
- Use a large crock or jar with a spigot at the bottom.
- Add 1 gallon of alcohol base and a mother of vinegar.
Step 2: Draw Off Vinegar Regularly
- Once fermentation begins, drain 10–20% of the vinegar weekly through the spigot.
- Replace the drained liquid with fresh alcohol to sustain the mother.
Troubleshooting Common Issues
- Mold Growth: Skim off mold and ensure proper aeration. Use a tighter cheesecloth cover if pests are an issue.
- Slow Fermentation: Increase temperature (use a heating pad if needed) or add a mother of vinegar.
- Off Flavors/Smells: Strain the vinegar and start fresh. Overly sulfurous smells may indicate spoilage.
- Low Acidity: Extend fermentation time or add a pinch of sugar to feed bacteria.
Creative Variations and Flavor Infusions
Vinegar’s versatility shines when experimenting with flavors:
- Herbal Vinegars: Add rosemary, thyme, or tarragon during fermentation.
- Spiced Vinegars: Infuse with cinnamon sticks, cloves, or chili peppers.
- Fruit-Infused Vinegars: Use raspberries, mango, or figs for a sweet-tart twist.
- Balsamic-Style Vinegar: Age reduced wine vinegar in oak barrels for complexity.
Storing and Using Homemade Vinegar
- Storage: Keep vinegar in airtight, dark bottles at room temperature. It improves with age, developing milder acidity over months.
- Shelf Life: Properly stored vinegar lasts indefinitely, though flavor may mellow.
- Culinary Uses: Dressings, marinades, pickling, and deglazing pans.
- Non-Culinary Uses: Cleaning windows, disinfecting surfaces, or soothing sunburns.
Health Benefits of Homemade Vinegar
Rich in probiotics, enzymes, and acetic acid, homemade vinegar offers:
- Digestive Aid: Stimulates stomach acid production.
- Blood Sugar Regulation: May improve insulin sensitivity.
- Antimicrobial Properties: Natural preservative and disinfectant.
- Weight Management: Acetic acid may suppress fat accumulation.
Conclusion: The Joy of Crafting Vinegar
Making vinegar at home is a blend of science, patience, and creativity. Whether you start with a bottle of wine or a basket of apple peels, the process rewards you with a living product that evolves over time. Experiment with flavors, share batches with friends, and savor the satisfaction of transforming simple ingredients into a culinary gem. As you master the art, you’ll join a legacy of fermenters spanning centuries—one bottle of vinegar at a time.
Word Count: 1,920


0 comments