Fried peanut kernels, often referred to as roasted peanuts, are a beloved snack enjoyed across the globe. Their crunchy texture, nutty aroma, and versatile flavor make them a perfect companion for gatherings, meals, or solitary indulgences. While store-bought options are convenient, mastering the art of frying peanut kernels at home allows you to control the seasoning, texture, and freshness, resulting in a superior taste. This comprehensive guide will walk you through every step of the process, from selecting the finest peanuts to achieving that coveted golden-brown crispiness. Whether you are a novice in the kitchen or a seasoned home cook, this article will equip you with the knowledge to create peanut kernels that rival those from gourmet stores.
Understanding the Basics of Frying Peanut Kernels
Before diving into the steps, it is essential to grasp the science behind frying peanuts. Peanuts, despite their name, are legumes, not nuts, and they are rich in oil, protein, and carbohydrates. When exposed to heat, the natural oils within the kernels begin to break down, creating a Maillard reaction—a chemical process that browns the surface and develops complex flavors. Achieving the ideal balance between crispiness and prevent-ing burning requires careful temperature control and timing.
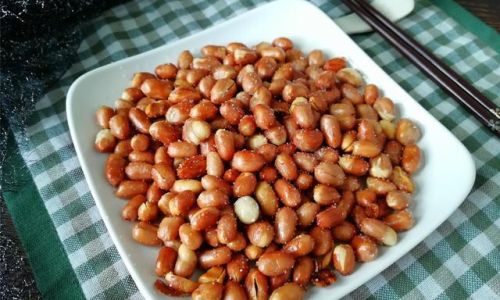
Step 1: Selecting the Right Peanuts
The foundation of exceptional fried peanut kernels lies in selecting high-quality raw materials. Opt for raw, unsalted peanut kernels with their reddish-brown skins intact. The skin not only adds a subtle earthy flavor but also helps protect the kernel during frying, preventing excessive oil absorption. Avoid pre-roasted or flavored peanuts, as they may already contain additives that alter the taste and texture.
Types of Peanuts to Consider:
- Virginia Peanuts: Known for their large size and crunchy texture, these are ideal for frying.
- Runner Peanuts: Smaller but flavorful, they are commonly used in commercial snacks.
- Spanish Peanuts: Smaller still, with a reddish skin, they offer a robust taste.
Choose peanuts that are uniform in size to ensure even cooking. Organic or locally sourced peanuts may yield a fresher flavor, but conventional varieties work equally well if stored properly.
Step 2: Preparing the Peanuts for Frying
Proper preparation ensures even cooking and enhances the final texture. Begin by rinsing the peanuts under cool water to remove any dirt or debris. Spread them on a clean kitchen towel and pat them dry thoroughly. Excess moisture can cause the oil to splatter during frying and may result in soggy kernels.
Optional Pre-Soaking:
For an extra-crispy texture, some chefs recommend soaking the peanuts in water for 30 minutes to an hour before frying. This step softens the kernels slightly, allowing them to absorb heat more evenly. However, this is entirely optional and depends on personal preference. If you choose to soak, drain the peanuts completely and dry them again before proceeding.
Step 3: Choosing the Right Oil and Equipment
The type of oil you use significantly impacts the flavor and healthfulness of your fried peanuts. Neutral oils with high smoke points, such as peanut oil, vegetable oil, or canola oil, are ideal. They allow the natural taste of the peanuts to shine without imparting additional flavors. Avoid olive oil or butter, as their low smoke points may lead to burning.
Equipment Checklist:
- A heavy-bottomed skillet or wok (to distribute heat evenly).
- A slotted spoon or spider strainer (for stirring and removing peanuts).
- Paper towels or a baking sheet lined with parchment paper (for draining excess oil).
- A thermometer (optional but helpful for monitoring oil temperature).
Step 4: Heating the Oil
Pour enough oil into the skillet to cover the peanuts halfway—approximately 2–3 inches deep. Overcrowding the pan will lower the oil temperature and result in uneven cooking. Heat the oil over medium-low heat. Patience is key here; rushing the process by using high heat will scorch the peanuts before they cook through.
Testing Oil Temperature:
If you do not have a thermometer, test the oil by dropping a single peanut into the pan. If it sizzles gently without burning, the oil is ready. A violent bubble reaction indicates the oil is too hot, while no reaction means it needs more time to heat.
Step 5: Frying the Peanuts
Once the oil reaches the ideal temperature (around 300–325°F or 150–160°C), carefully add the peanuts to the skillet. Stir gently but continuously to prevent them from clumping or sticking to the bottom. The frying time typically ranges from 8 to 12 minutes, depending on the peanut size and desired crispiness.
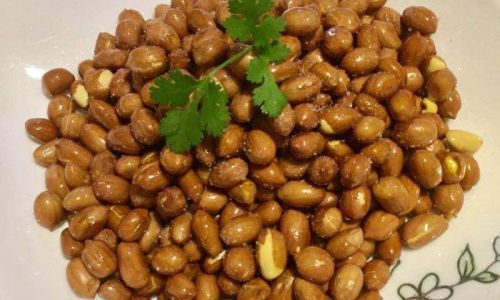
Key Observations During Frying:
- Color Change: The peanuts will transition from pale beige to a light golden brown.
- Aroma: A toasty, nutty scent will fill your kitchen.
- Sound: The sizzling will subside as the peanuts release moisture.
Avoiding Common Mistakes:
- Overcrowding the Pan: This leads to uneven cooking and lower oil temperature.
- High Heat: Rapid frying burns the exterior while leaving the interior raw.
- Neglecting to Stir: Peanuts at the bottom of the pan may char if not stirred regularly.
Step 6: Testing for Doneness
Determining when the peanuts are perfectly fried requires a combination of visual cues and taste tests. Remove a peanut from the oil, allow it to cool slightly, and bite into it. The kernel should be crisp, not soft, and the color should be evenly golden. If the peanut tastes raw or chewy, continue frying for another 1–2 minutes and test again.
Pro Tip: Fried peanuts continue to cook slightly after being removed from the oil due to residual heat. Err on the side of slightly underdone rather than overdone to prevent bitterness.
Step 7: Draining and Cooling
Once the peanuts reach the desired doneness, use a slotted spoon or spider strainer to transfer them to a baking sheet lined with paper towels or parchment paper. Spread them in a single layer to allow excess oil to drain and to ensure even cooling. Avoid piling them, as this traps steam and softens the texture.
Seasoning While Warm:
While the peanuts are still warm, sprinkle them with salt or your preferred seasonings. The heat helps the seasonings adhere to the kernels. Popular options include:
- Sea salt
- Smoked paprika
- Chili powder
- Cayenne pepper
- Sugar (for a sweet-and-salty twist)
- Garlic powder
Gently toss the peanuts to distribute the seasonings evenly.
Step 8: Storing Fried Peanuts
Allow the peanuts to cool completely before storing them in an airtight container. Properly stored, they can last up to two weeks at room temperature or one month in the refrigerator. For longer shelf life, freeze them in a resealable bag for up to three months.
Reheating Tip: To restore crispiness, spread the peanuts on a baking sheet and reheat them in a preheated 350°F (175°C) oven for 5–7 minutes.
Advanced Techniques and Variations
For those seeking to elevate their fried peanut game, here are some creative twists:
-
Honey-Roasted Peanuts:
After frying, toss the peanuts in a mixture of honey and butter while they’re still warm. Return them to the oven at 300°F (150°C) for 5–10 minutes to caramelize the honey. -
Spicy Szechuan Peanuts:
Fry the peanuts as usual, then toss them with a blend of Szechuan peppercorns, red chili flakes, and a dash of soy sauce. -
Herb-Infused Peanuts:
Add fresh rosemary, thyme, or sage to the oil before frying. The herbs will infuse the peanuts with aromatic flavors. -
Coconut-Crusted Peanuts:
Roll cooled peanuts in a mixture of shredded coconut and sugar before lightly frying them again to toast the coconut.
Troubleshooting Common Issues
- Soggy Peanuts: This occurs when the oil temperature is too low or the peanuts are overcrowded. Ensure the oil is hot enough and fry in small batches.
- Burnt Peanuts: High heat or overcooking are the culprits. Reduce the heat and monitor the peanuts closely.
- Uneven Browning: Stir the peanuts continuously and avoid overfilling the pan.
The Health Perspective
While fried peanuts are undeniably indulgent, they also offer nutritional benefits. Peanuts are rich in:
- Healthy Fats: Monounsaturated and polyunsaturated fats support heart health.
- Protein: A quarter-cup serving provides about 9 grams of plant-based protein.
- Fiber: Aids digestion and promotes satiety.
- Vitamins and Minerals: Including vitamin E, magnesium, and folate.
Moderation is key, as frying adds calories. Opt for air-frying or oven-roasting as lower-fat alternatives if you prefer.
Cultural Significance of Fried Peanuts
Fried peanuts hold a special place in many culinary traditions. In China, they are a staple street food, often spiced with star anise and cinnamon. In the American South, boiled peanuts are a regional delicacy, while in India, fried peanuts are mixed with spices to create masala peanuts. Understanding these cultural contexts adds depth to your appreciation of this humble snack.
Conclusion
Frying peanut kernels to perfection is a blend of science and art. By selecting quality ingredients, mastering temperature control, and paying attention to detail, you can create a snack that is both addictively crunchy and deeply satisfying. Whether enjoyed on their own, tossed into salads, or paired with a cold beverage, homemade fried peanuts are a testament to the joy of simple, wholesome cooking. So, roll up your sleeves, heat that oil, and embark on a culinary adventure that promises to delight your taste buds and impress your guests. Happy frying!
0 comments