Table of content
Introduction
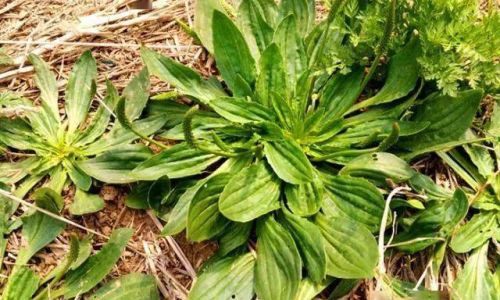
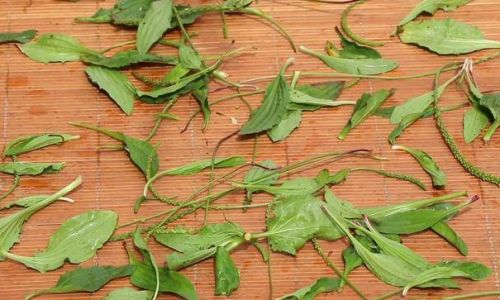
Plantain (Plantago major or Plantago lanceolata), a common weed found in lawns, gardens, and wild meadows, has been cherished for centuries for its medicinal and culinary uses. Among its many applications, transforming its leaves into a soothing herbal tea has gained popularity among health enthusiasts and herbalists alike. This article delves into the intricate process of harvesting, drying, and preserving plantain leaves to craft a high-quality tea that retains its natural flavors and therapeutic properties. From selecting the right time to harvest to mastering drying techniques, we will explore every step to ensure your homemade plantain tea is nothing short of exceptional.
Chapter 1: Understanding Plantain and Its Benefits
Before diving into the drying process, it is essential to appreciate why plantain leaves are valued. Rich in antioxidants, vitamins (A, C, and K), and minerals like calcium and potassium, plantain offers anti-inflammatory, antimicrobial, and diuretic effects. Historically, it has been used to alleviate coughs, soothe digestive issues, and promote wound healing. When brewed as tea, plantain leaves provide a mild, earthy flavor with subtle grassy notes, making it a refreshing alternative to traditional teas.
Chapter 2: Harvesting Plantain Leaves
The foundation of exceptional plantain tea begins with proper harvesting. Timing, technique, and ethical foraging practices are critical to ensure the leaves’ potency and sustainability.
1 When to Harvest
The ideal time to harvest plantain leaves is during late spring to early summer when the plant is in its vigorous growth phase. At this stage, the leaves are tender, vibrant green, and packed with nutrients. Avoid harvesting during flowering seasons, as the plant’s energy shifts to reproduction, potentially reducing the leaves’ medicinal compounds.
2 Selecting the Right Leaves
Choose young to mature leaves, avoiding those that are wilted, yellowed, or damaged. The largest leaves, typically found at the base of the plant, are the most flavorful and nutrient-dense. Leave smaller leaves to sustain the plant’s growth, promoting ecological balance.
3 Ethical Harvesting Practices
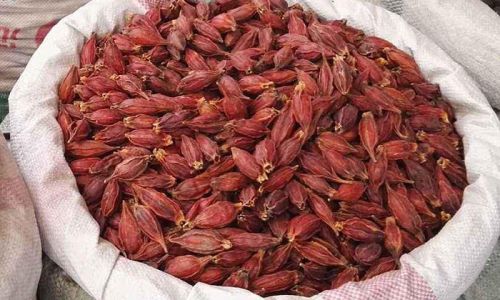
Always harvest responsibly. Never strip a plant entirely; leave at least one-third of the foliage to ensure regrowth. If harvesting from public areas or wild patches, seek permission and avoid contaminated zones (e.g., areas sprayed with pesticides or near roadways).
Chapter 3: Preparing Leaves for Drying
Proper cleaning and sorting are pivotal to preventing mold, bacterial growth, and off-flavors in your final product.
1 Cleaning the Leaves
- Gentle Rinsing: Rinse the leaves under cool, running water to remove dirt, insects, or debris. Avoid using soap, as residues may linger.
- Soaking (Optional): For heavily soiled leaves, soak them in a basin of cold water for 5–10 minutes, then drain and pat dry with a clean towel.
- Trimming: Remove tough stems or discolored edges using sharp scissors or kitchen shears. Focus on retaining the leafy portions.
2 Sorting and Discarding
Discard any leaves showing signs of decay, insect infestation, or disease. Even minor imperfections can compromise the entire batch during drying.
Chapter 4: Drying Methods for Plantain Leaves
The drying process is where science meets art. The goal is to eliminate moisture without degrading the leaves’ volatile oils, enzymes, or nutrients. Below are four effective methods, each with unique advantages and considerations.
1 Sun-Drying: The Traditional Approach
Sun-drying harnesses natural heat and airflow, making it an eco-friendly and cost-effective method.
- Steps:
- Spread cleaned leaves in a single layer on a breathable surface (e.g., bamboo trays, mesh screens, or cheesecloth).
- Place the trays in a sunny spot with good ventilation. Protect from dust, insects, and animals using a thin cloth or netting.
- Flip the leaves every 2–3 hours to ensure even drying.
- Sun-drying typically takes 3–5 days, depending on humidity and sunlight intensity.
- Pros: Low cost, retains natural flavors.
- Cons: Weather-dependent, slower process, risk of contamination.
2 Oven-Drying: Speed and Control
Oven-drying is ideal for those seeking rapid results, especially in humid climates.
- Steps:
- Preheat the oven to the lowest setting (ideally 95–115°F or 35–46°C). Higher temperatures risk cooking the leaves rather than drying them.
- Arrange leaves on a baking sheet lined with parchment paper, ensuring no overlapping.
- Leave the oven door slightly ajar to allow moisture to escape.
- Check every 15–20 minutes, flipping leaves for even drying. The process takes 1–3 hours.
- Pros: Fast, consistent results.
- Cons: Energy-intensive, requires careful temperature monitoring.
3 Food Dehydrator: Precision Engineering
A dehydrator offers unparalleled control over temperature and airflow, making it a favorite among herbalists.
- Steps:
- Set the dehydrator to 95–115°F (35–46°C).
- Layer leaves on trays without overlapping.
- Dry for 4–8 hours, checking periodically. Leaves are ready when crispy and crumble easily.
- Pros: Consistent results, retains maximum nutrients.
- Cons: Requires investment in equipment.
4 Air-Drying Indoors: The Slow-and-Steady Method
Air-drying in a cool, dark, and well-ventilated space preserves delicate flavors and colors.
- Steps:
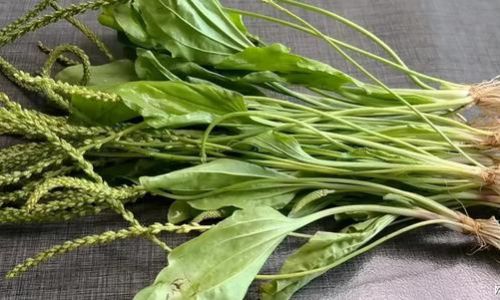
- Tie leaves in small bundles using twine or rubber bands.
- Hang them upside-down in a dry area (e.g., attic, pantry, or garage) away from direct sunlight.
- Cover with paper bags pierced with holes to catch falling leaves and deter pests.
- Drying takes 1–3 weeks.
- Pros: Minimal equipment, enhances aromatic complexity.
- Cons: Lengthy process, requires adequate space.
Chapter 5: Testing for Dryness
Regardless of the method, leaves must be completely dry to prevent mold. Test by:
- Crumbling Test: A leaf should shatter into fine pieces when crushed.
- Bending Test: Fully dried leaves will snap cleanly rather than bending.
- Moisture Check: If leaves feel pliable or cool to the touch, they need more time.
Chapter 6: Storing Dried Plantain Leaves
Proper storage is the final frontier in preserving quality.
- Containers: Use airtight, opaque glass jars or metal tins to shield leaves from light and humidity.
- Location: Store in a cool, dark place (e.g., pantry or cupboard). Avoid refrigerators, as condensation can occur.
- Shelf Life: Properly dried and stored plantain leaves retain potency for 12–18 months.
Chapter 7: Brewing the Perfect Cup of Plantain Tea
Now, the moment of truth: transforming dried leaves into a steaming cup of tea.
- Ratio: Use 1 teaspoon of dried leaves per 8 oz (240 ml) of hot water.
- Water Temperature: 195–205°F (90–96°C). Boiling water may impart bitterness.
- Steeping Time: 5–7 minutes. Longer steeping intensifies flavor and medicinal properties.
- Enhancements: Add honey, lemon, or mint for a personalized twist.
Chapter 8: Health Benefits and Precautions
While plantain tea is generally safe, moderation is key.
- Benefits: May alleviate coughs, soothe digestive discomfort, and support urinary health.
- Cautions: Pregnant individuals or those on blood-thinning medications should consult a healthcare provider before consumption.
Conclusion
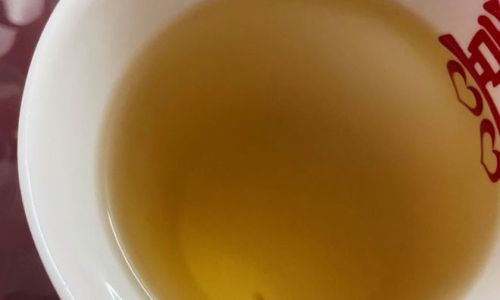
Crafting plantain tea from scratch is a rewarding journey that connects us to ancient herbal traditions. By mastering harvesting, drying, and brewing techniques, you unlock a world of flavor and wellness. Whether you prefer the slow charm of sun-drying or the precision of a dehydrator, the end result—a mug of golden-hued plantain tea—is a testament to nature’s bounty and human ingenuity. So, step into your garden, gather those leaves, and embark on a flavorful adventure that nourishes both body and soul.
Final Word: Experimentation is encouraged! Adjust drying times, blend with other herbs (e.g., chamomile or peppermint), or explore iced tea variations. The possibilities are as endless as the fields where plantain grows wild. Cheers to your homemade herbal elixir!




0 comments