Introduction
Colorful steamed buns, or baozi as they are traditionally known, have captivated food enthusiasts worldwide with their vibrant hues and pillowy textures. These delightful treats, originating from Chinese cuisine, have evolved beyond their humble beginnings to become a canvas for culinary creativity. While their aesthetic appeal is undeniable, the true magic lies in achieving that coveted softness and delicate flavor. Mastering the art of making colorful steamed buns requires a blend of scientific precision and artistic flair. This guide delves into the intricacies of ingredient selection, technique, and troubleshooting to help you create buns that are as visually stunning as they are delicious. Whether you’re a novice baker or a seasoned pro, understanding the nuances of dough hydration, fermentation, and coloring will elevate your steamed buns to new heights.
The Science Behind Soft Steamed Buns
To create steamed buns that melt in your mouth, one must first grasp the role of each ingredient and the chemical reactions that occur during preparation. The foundation of any bun lies in its dough, a simple mixture of flour, water, yeast, and sometimes sugar or fat. However, the secret to unparalleled softness hinges on gluten development and fermentation.
Gluten Formation
Flour contains proteins that, when hydrated and kneaded, form gluten—a stretchy network responsible for the dough’s structure. The type of flour used directly impacts gluten development. Bread flour, with its higher protein content, yields a chewier texture, while all-purpose flour strikes a balance between softness and structure. Over-kneading, however, can tighten the gluten network, resulting in a dense, tough crumb. Achieving the ideal texture requires finding the sweet spot: knead enough to develop gluten without overworking the dough.
Fermentation: The Key to Flavor and Softness
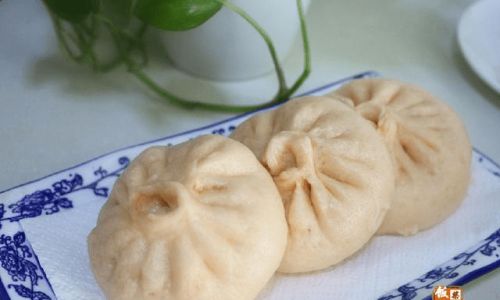
Yeast, a living organism, feeds on sugars in the dough, producing carbon dioxide and alcohol. This process, known as fermentation, creates air pockets that expand during steaming, giving buns their airy texture. The duration and temperature of proofing (the resting period after kneading) are critical. A warm environment (around 75–80°F or 24–27°C) accelerates fermentation, while cooler temperatures slow it down. Over-proofing can collapse the dough’s structure, while under-proofing leaves buns dense and heavy.
Hydration Levels
The ratio of liquid to flour, known as hydration, affects dough pliability. A higher hydration dough (e.g., 60–65%) is stickier but yields softer buns, while lower hydration results in a firmer texture. Milk, often used in recipes, adds fat and lactose, enhancing richness and browning.
Selecting the Right Ingredients
The quest for perfect steamed buns begins with quality ingredients. Each component plays a distinct role, and substitutions can drastically alter the outcome.
Flour
- All-Purpose Flour: Versatile and widely accessible, it produces buns with a tender crumb.
- Cake Flour: With its low protein content, it yields exceptionally soft buns but may lack structure.
- Bread Flour: Ideal for chewier buns, though it requires careful handling to avoid toughness.
Yeast
- Active Dry Yeast: Requires blooming in warm liquid before use.
- Instant Yeast: Can be mixed directly into dry ingredients, speeding up the process.
- Fresh Yeast: Sold in blocks, it has a shorter shelf life but activates quickly.
Liquid
- Water: Neutral flavor, perfect for highlighting other ingredients.
- Milk: Adds richness and a subtle sweetness; whole milk yields the best results.
- Juice: Freshly squeezed (e.g., carrot, beet) imparts color and flavor.
Fat
- Neutral Oil: Vegetable or canola oil keeps buns moist without adding flavor.
- Butter: Enhances richness but requires cold incorporation to avoid gluten disruption.
- Shortening: Ideal for vegan buns, offering a soft, tender texture.
Sweeteners
- Sugar: Feeds yeast and promotes browning.
- Honey or Agave: Adds moisture and a hint of flavor.
Preparation: Step-by-Step Mastery
Creating colorful steamed buns involves meticulous attention to detail at every stage.
Mixing the Dough
- Combine Dry Ingredients: Whisk flour, yeast, sugar, and salt (if using) in a large bowl.
- Incorporate Wet Ingredients: Gradually add liquid (water, milk, or juice) while stirring with a wooden spoon or dough whisk.
- Add Fat: Once a shaggy dough forms, knead in oil or melted butter until fully absorbed.
Kneading Technique
- By Hand: Knead on a lightly floured surface for 8–10 minutes, using the heel of your hand to stretch and fold the dough.
- By Stand Mixer: Use a dough hook attachment on medium-low speed for 6–8 minutes, stopping occasionally to scrape the bowl.
- Windowpane Test: Gently stretch a small piece of dough. If it forms a translucent membrane without tearing, gluten is adequately developed.
First Proofing
- Shape the Dough: Place in a lightly oiled bowl, turning to coat. Cover with plastic wrap or a damp cloth.
- Proofing Time: Allow to double in size, typically 1–1.5 hours at room temperature.
- Punch Down: Gently deflate the dough to release excess gas, preventing large air pockets.
Shaping and Coloring
- Divide the Dough: Portion into equal pieces (50–60g each for standard buns).
- Add Color:
- Natural Dyes: Use purées (spinach, beetroot) or powders (matcha, turmeric) mixed with a small amount of water.
- Incorporation: Knead color into individual portions, ensuring even distribution.
- Shape: Roll each piece into a smooth ball, tucking the edges underneath. For filled buns, flatten, add filling, and pinch the edges closed.
Second Proofing
- Rest: Arrange shaped buns on parchment-lined trays, leaving space between them. Cover and proof for 20–30 minutes until puffy.
Steaming
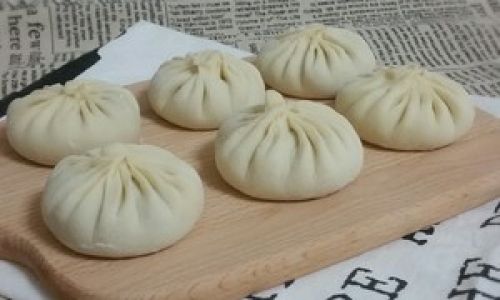
- Prepare the Steamer: Use a bamboo steamer or a pot with a tight-fitting lid. Line with parchment to prevent sticking.
- Steam Time: Place buns in the steamer, leaving room for expansion. Steam for 12–15 minutes over medium heat.
- Rest After Steaming: Turn off the heat and let buns sit for 5 minutes before uncovering to prevent shrinkage.
Achieving Vibrant Colors Naturally
Artificial food colorings offer convenience, but natural alternatives provide both beauty and nutrition.
Vegetable and Fruit Purées
- Spinach: Blanch leaves, blend with water, and strain for a bright green hue.
- Beetroot: Roast or boil, then purée for a vivid pink.
- Carrot: Steam and blend for a warm orange tone.
Spices and Powders
- Turmeric: Adds a sunny yellow (use sparingly to avoid bitterness).
- Matcha: Imparts an earthy green (opt for culinary-grade powder).
- Butterfly Pea Flower: Steep in hot water for a striking blue (pH-sensitive; turns purple with acid).
Troubleshooting Common Issues
Even seasoned bakers encounter hiccups. Here’s how to diagnose and fix common problems.
Dense or Gummy Texture
- Cause: Over-proofing, insufficient steam, or low hydration.
- Solution: Shorten proofing time, ensure a tight-fitting lid, and increase liquid slightly.
Shrunken or Wrinkled Buns
- Cause: Prematurely removing the lid during steaming.
- Solution: Let buns rest 5 minutes post-steaming before uncovering.
Uneven Coloring
- Cause: Inconsistent distribution of dye or over-mixing.
- Solution: Knead color into small portions and avoid excessive handling.
Advanced Techniques and Flavor Pairings
Once you’ve mastered the basics, experimentation awaits.
Flavor Infusions
- Herbs and Spices: Add minced ginger, garlic, or cilantro to the dough.
- Sweet Variations: Incorporate coconut milk, pandan extract, or brown sugar.
Fillings
- Savory: Seasoned ground pork, mushrooms, or tofu.
- Sweet: Red bean paste, lotus seed, or custard.
Steaming Methods
- Bamboo Steamer: Absorbs excess moisture for a dry texture.
- Electric Steamer: Precise temperature control for consistent results.
Storage and Reheating
- Freezing: Place cooled buns in airtight bags; steam directly from frozen for 8–10 minutes.
- Reheating: Microwave with a damp paper towel for 20–30 seconds or re-steam for 5 minutes.
Conclusion
Crafting colorful steamed buns is a journey of patience and precision. By understanding the interplay of ingredients, mastering fermentation, and embracing natural colors, you can create buns that are as soft as clouds and as vibrant as a sunset. Remember, practice is the greatest teacher—each batch offers insights to refine your technique. Whether you’re serving them at a festive gathering or savoring them solo, these buns are a testament to the joy of combining science and art in the kitchen. So, roll up your sleeves, embrace the process, and let your creativity steam ahead!

0 comments