Introduction
In the realm of artisanal beverages, mulberry wine stands out as a unique and delightful elixir, blending the sweet, tart flavors of mulberries with the smooth, mellow notes of aged alcohol. This fruit, native to warm temperate regions across Asia, Europe, and North America, boasts a rich history in traditional medicine and culinary arts. Its deep purple hue, coupled with a range of health benefits, has made mulberries a cherished ingredient in various alcoholic concoctions, particularly mulberry wine. Crafting mulberry wine at home is not only a rewarding endeavor but also a journey through the senses, where the aroma, color, and taste of the final product evoke memories of sun-drenched mulberry trees and the sweet promise of harvest.
This comprehensive guide delves into the art of crafting mulberry wine, focusing on the traditional method of infusing mulberries in alcohol. From selecting the perfect mulberries to bottling your finished wine, each step is meticulously detailed to ensure a successful and delicious outcome.
Section 1: Choosing the Right Mulberries
The quality of your mulberries is paramount to the success of your mulberry wine. Here are some key considerations:
-
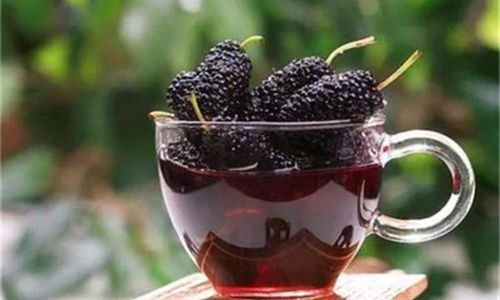
Variety Selection: There are several varieties of mulberries, each with its unique flavor profile. For wine-making, opt for varieties known for their sweetness and robust fruit flavor, such as the Morus alba (white mulberry) or Morus nigra (black mulberry).
-
Ripeness: Only use fully ripe mulberries. Unripe fruits will add unwanted tartness to your wine, while overripe ones may introduce off-flavors.
-
Freshness: Freshness ensures that your mulberries retain their natural sugars, acids, and aromas. Avoid using frozen or dried mulberries for this particular method, as they may not infuse well in alcohol.
-
Pesticides: If possible, source organic mulberries to avoid any residual pesticides that could compromise the taste and safety of your wine.
Section 2: Preparing the Mulberries
Once you’ve selected your mulberries, it’s time to prepare them for the infusion process:
-
Cleaning: Gently rinse the mulberries under cold running water to remove any dirt or debris. Pat them dry using a clean kitchen towel or let them air-dry completely.
-
Destemming and Crushing: Remove the stems from the mulberries. Crushing the fruit releases its juices, which are essential for flavor and fermentation. You can use a potato masher, a fork, or even your hands to crush the mulberries lightly. Be careful not to over-crush them, as this can lead to a cloudy wine.
Section 3: Selecting the Alcohol Base
The choice of alcohol base is crucial in determining the final taste and character of your mulberry wine:
-
Vodka or Neutral Spirit: For a cleaner, more refined taste, use vodka or a neutral spirit with a high proof (around 80-95% ABV). This allows the mulberry flavors to shine without being overshadowed by the alcohol.
-
Red Wine or Brandy: For a richer, more complex flavor profile, consider using a good-quality red wine or brandy as your base. These options add layers of depth and complexity to your mulberry wine.
Section 4: The Infusion Process
Now, it’s time to combine the mulberries with your chosen alcohol base:
-
Ratio: A good starting ratio is 1 part crushed mulberries to 2 parts alcohol. Adjust this ratio based on your personal preference for fruitiness and alcohol strength.
-
Jar Preparation: Use a clean, glass jar with a tight-fitting lid for the infusion. Ensure the jar is sterile by rinsing it with boiling water or running it through the dishwasher.
-
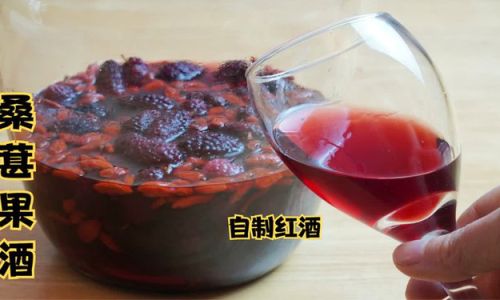
Infusion: Place the crushed mulberries into the jar and pour in the alcohol, ensuring all the fruit is fully submerged. Seal the jar tightly and shake it gently to mix the contents.
-
Storage: Store the jar in a cool, dark place away from direct sunlight. The infusion process can take anywhere from 2 weeks to a month, depending on the desired intensity of flavor. Shake the jar occasionally to ensure even extraction.
Section 5: Taste Testing and Adjustments
After the initial infusion period, it’s time to taste test your mulberry wine:
-
Sampling: Carefully open the jar and taste a small amount of the infused liquid. Note its sweetness, tartness, and mulberry flavor intensity.
-
Adjustments: If the wine is too tart, you can add a small amount of simple syrup (equal parts sugar and water, boiled until the sugar dissolves). For a sweeter wine, consider adding honey or maple syrup, which will also add complexity to the flavor.
-
Additional Infusion: If the mulberry flavor is not strong enough, you can let the wine infuse for another week or two before tasting again.
Section 6: Filtering and Bottling
Once you’re satisfied with the taste of your mulberry wine, it’s time to filter and bottle it:
-
Filtering: Use a fine-mesh strainer lined with cheesecloth or a coffee filter to remove the mulberry solids from the liquid. For a clearer wine, you can pass it through a second filter or let it settle further and decant the clear liquid.
-
Bottling: Pour the filtered mulberry wine into clean, sterile bottles. Use dark-colored bottles to protect the wine from light, which can degrade its flavor and color over time.
-
Storage: Store your mulberry wine in a cool, dark place. It will continue to develop and mature in the bottle, so feel free to experiment with different aging periods to find your preferred taste.
Conclusion
Crafting mulberry wine is a delightful and rewarding endeavor that combines the art of fermentation with the beauty of natural ingredients. By following this comprehensive guide, you’ll be able to create a unique and delicious mulberry wine that captures the essence of the fruit and the spirit of artisanal beverage-making. Whether you enjoy it as a refreshing summer sipper or a warming winter treat, mulberry wine is sure to become a cherished addition to your home-brewed collection. Happy crafting!



0 comments