Introduction
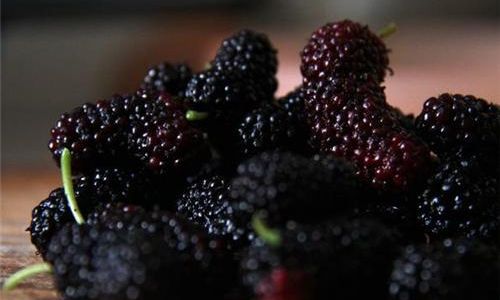
In the realm of homemade beverages, mulberry wine stands out as a delightful and nutritious elixir that combines the rich flavors of nature with the art of fermentation. Dried mulberries, known for their concentrated sweetness and deep purple hue, are a perfect base for crafting a unique and satisfying wine. This guide delves into the intricacies of making mulberry wine from dried mulberries, offering a step-by-step process that ensures a successful and enjoyable outcome. Whether you’re a seasoned winemaker or a novice enthusiast, the secrets to crafting exquisite mulberry wine lie within this comprehensive exploration.
Understanding Dried Mulberries
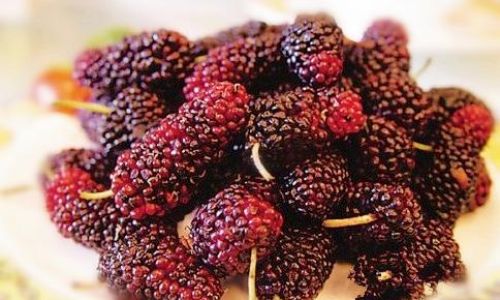
Before diving into the wine-making process, it’s crucial to understand the unique qualities of dried mulberries. These small, sweet fruits are a treasure trove of nutrients, including antioxidants, vitamins, and minerals. When dried, they concentrate their flavors and sugars, making them an excellent choice for wine production. Dried mulberries come in various grades, from organic to conventionally dried, and their quality will directly impact the final taste of your wine.
When selecting dried mulberries for wine-making, look for those that are uniformly dried, free from mold or insects, and have a pleasant aroma. Organic mulberries are often preferred due to their lack of chemical treatments, but ensure they are free from any added sugars or preservatives that could alter the fermentation process.
Preparing Your Equipment and Ingredients
Before starting, gather all necessary equipment and ingredients. Cleanliness is paramount in wine-making, so ensure all tools and surfaces are thoroughly sanitized. Here’s a list of what you’ll need:
- Dried mulberries: Approximately 2 kilograms (4.4 pounds) for a standard batch.
- Water: Purified or distilled water to cover the mulberries during soaking.
- Sugar: Approximately 1.5 kilograms (3.3 pounds) for a medium-sweet wine. Adjust based on personal preference.
- Yeast: Wine yeast specifically formulated for fruit wines.
- Pectic enzyme: Helps break down pectin in the mulberries, improving juice clarity.
- Campden tablets (Potassium Metabisulfite): To sterilize equipment and juice, preventing unwanted bacteria and wild yeast.
- Primary fermentation vessel: A large, food-grade plastic bucket or glass carboy with a capacity of at least 5 gallons.
- Secondary fermentation vessel: Smaller carboy or glass jug for aging the wine.
- Siphoning hose: For transferring wine without disturbing sediment.
- Hydrometer: Measures the specific gravity of the must (juice + sugar), indicating alcohol potential.
- Thermometer: Ensures fermentation temperatures remain within the optimal range.
- Funnel and fine-mesh strainer: For filtering juice and racking (transferring) wine.
- Clean cloth or airlock: To cover the fermentation vessel, allowing gases to escape while preventing contaminants.
Step-by-Step Guide to Making Mulberry Wine
Soaking the Mulberries
Begin by soaking the dried mulberries in purified water. This step rehydrates the fruit, making it easier to extract juices and flavors. Use enough water to fully submerge the mulberries and let them soak for 24-48 hours, stirring occasionally. The soaking water will take on a deep purple color and infuse with mulberry flavors.
Preparing the Must
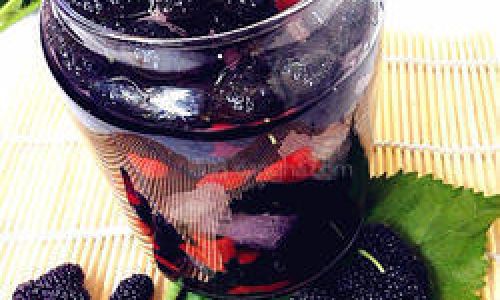
After soaking, strain the mulberries, reserving the liquid. Place the soaked mulberries in a large pot and add enough water to cover them again. Bring to a gentle simmer, stirring occasionally to prevent scorching. This gentle cooking helps release more juices and soften the fruit. Once the mulberries are soft, mash them lightly with a potato masher or immersion blender to break them up further.
Let the mixture cool slightly, then strain it through a fine-mesh strainer or cheesecloth, pressing gently to extract as much juice as possible. Combine this juice with the reserved soaking water. Measure the total volume of the liquid and note it down, as you’ll need this information for calculating sugar addition.
Adjusting Sugar and Acidity
The sweetness and alcohol content of your wine are largely determined by the amount of sugar you add. Use a hydrometer to measure the specific gravity (SG) of your must before adding sugar. The initial SG will give you an indication of the potential alcohol content. For a medium-sweet wine, aim for a final SG that, when fermented completely, will yield around 12-14% ABV.
Calculate the amount of sugar needed based on your desired alcohol level and the initial SG. Dissolve the sugar in a small amount of hot water before adding it to the must to ensure it dissolves evenly.
Mulberries can sometimes have a lower acidity than other fruits, which can affect the wine’s balance. If necessary, you can add a small amount of acid blend or lemon juice to adjust the acidity. Taste a small sample of the must and adjust accordingly.
Adding Yeast and Nutrients
Once the sugar is fully dissolved and the must is at room temperature, it’s time to add the yeast. Before doing so, activate the yeast by sprinkling it over a small amount of lukewarm water (about 100°F or 38°C) and letting it sit for about 10 minutes until it becomes frothy. This indicates the yeast is active and ready to ferment.
Also, add the pectic enzyme at this stage to help break down pectins, which will improve juice clarity during fermentation.
Pour the activated yeast into the must, stirring gently to distribute it evenly. Cover the fermentation vessel with a clean cloth or fit it with an airlock to allow carbon dioxide to escape while preventing contaminants from entering.
Primary Fermentation
Place the fermentation vessel in a cool, dark place where temperatures remain between 65-75°F (18-24°C). Fermentation will begin within 24-48 hours, evidenced by bubbling and a foamy head forming on the surface (krausen). Stir the must daily for the first few days to ensure even fermentation and to keep the yeast in suspension.
As fermentation progresses, the specific gravity will drop, indicating that sugar is being converted into alcohol and carbon dioxide. Use the hydrometer to monitor the fermentation, continuing to stir daily until the SG stabilizes and the bubbling slows significantly. This usually takes about a week but can vary depending on conditions.
Racking and Secondary Fermentation
Once primary fermentation is complete, it’s time to rack (transfer) the wine to a secondary fermentation vessel. Use a siphoning hose to carefully transfer the wine, leaving behind the sediment (lees) in the primary vessel. Rack the wine into a clean, sanitized carboy, fitting it with an airlock.
Secondary fermentation may continue slowly, with any remaining sugars being consumed by the yeast. Allow the wine to sit in the secondary vessel for at least a month, preferably longer, to allow flavors to meld and clarify naturally. During this time, you may notice a second layer of sediment forming at the bottom of the carboy.
Clarifying and Stabilizing
After aging, the wine may still contain some suspended particles, making it appear cloudy. To clarify the wine, you can use bentonite or gelatin, following the manufacturer’s instructions. Add the clarifying agent to the wine, stir gently, and let it sit for a few days before racking again, leaving the sediment behind.
To stabilize the wine, add a campden tablet to kill any remaining yeast and prevent future fermentation. Let the wine sit for another week after adding the campden tablet to ensure all yeast is inactivated.
Bottling and Aging
Once the wine is clear and stable, it’s ready to bottle. Use clean, sanitized bottles and a bottling wand to fill them without introducing air bubbles. Cork or cap the bottles tightly and store them in a cool, dark place.
Mulberry wine can continue to age and develop complex flavors over time. While it’s enjoyable to drink soon after bottling, allowing it to age for at least six months to a year will enhance its complexity and smoothness.
Conclusion
Crafting mulberry wine from dried mulberries is a rewarding endeavor that combines the art of fermentation with the rich flavors of nature. By following this comprehensive guide, you’ll be able to create a unique and satisfying wine that captures the essence of mulberries. From soaking and extracting juices to fermentation, aging, and bottling, each step is crucial in achieving a successful outcome.
Remember, patience and attention to detail are key in wine-making. Enjoy the process, experiment with different ingredients and techniques, and savor the fruits of your labor with friends and family. Happy wine-making!

0 comments