Table of content
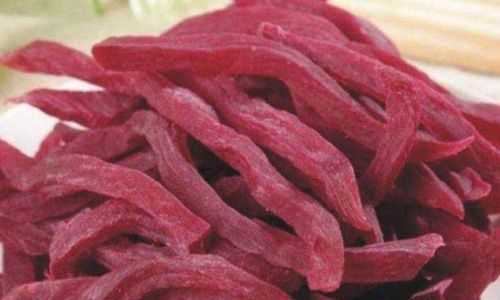
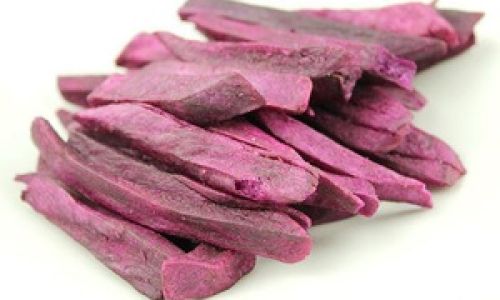
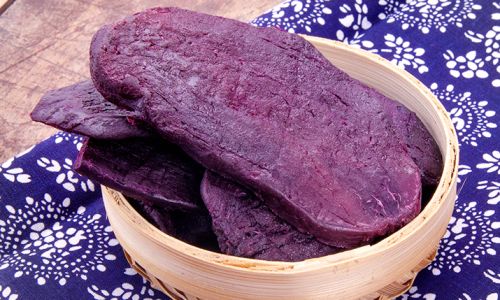
Purple sweet potatoes, known for their vibrant hue and earthy sweetness, have become a beloved ingredient in kitchens worldwide. When transformed into crispy dried snacks, they offer a delightful balance of crunch and natural flavor, making them a guilt-free treat for any occasion. This article delves into the intricate process of creating perfectly crispy dried purple sweet potatoes, from selecting the finest tubers to mastering drying techniques. Whether you’re a seasoned home cook or a curious food enthusiast, this guide will equip you with the knowledge to elevate your snacking game.

Understanding the Star Ingredient: Purple Sweet Potatoes
Before diving into the recipe, it’s essential to appreciate the unique qualities of purple sweet potatoes. Unlike their orange or white counterparts, these tubers boast a deep purple flesh rich in antioxidants, particularly anthocyanins, which contribute to their striking color and health benefits. They also offer a subtle floral sweetness and a starchier texture, making them ideal for drying. When properly prepared, purple sweet potato chips or strips achieve a satisfying crispiness while retaining their nutritional value.
Tools and Ingredients You’ll Need
To embark on this culinary adventure, gather the following:
- Fresh purple sweet potatoes: Choose firm, unblemished tubers with smooth skin.
- Sharp knife or mandoline slicer: For achieving uniformly thin slices.
- Cutting board and vegetable peeler: To prep the potatoes.
- Large pot for blanching: Optional but recommended for enhancing texture.
- Baking sheets or dehydrator trays: For even drying.
- Parchment paper or silicone mats: To prevent sticking.
- Cooling rack: For crisping post-drying.
- Optional add-ins: Olive oil, sea salt, cinnamon, or other seasonings.
Step-by-Step Preparation
Selecting and Washing the Potatoes
Begin by handpicking purple sweet potatoes that feel heavy for their size, indicating moisture content. Avoid tubers with soft spots, sprouts, or wrinkled skin, as these may affect the final texture. Rinse them under cool water to remove dirt, gently scrubbing with a vegetable brush if necessary.
Peeling and Slicing
Using a vegetable peeler, remove the skin to expose the vibrant purple flesh. For a rustic texture, leave the skin on—just ensure it’s thoroughly cleaned. The next step is critical: slicing. Aim for uniformity to guarantee even drying. A mandoline slicer set to 1/8-inch thickness is ideal, but a sharp knife will suffice with careful attention. Thinner slices yield crispier results, while thicker cuts may retain a chewier texture.
Blanching or Steaming (Optional but Recommended)
Blanching or steaming the slices before drying serves two purposes: it deactivates enzymes that could cause discoloration and begins the gelatinization of starches, leading to a crispier finish.
- Blanching: Submerge the slices in boiling water for 2–3 minutes, then transfer to an ice bath to halt cooking.
- Steaming: Steam for 5–7 minutes until slightly tender.
Pat the slices dry with a clean kitchen towel or paper towels to remove excess moisture.

Pre-Treatment for Enhanced Crispiness
To prevent browning and intensify crispiness, consider a pre-treatment solution. A mixture of water and lemon juice (1 teaspoon per cup) or ascorbic acid powder (1/4 teaspoon per cup) works wonders. Soak the slices for 10–15 minutes, then drain and pat dry. This step is optional but highly recommended for achieving a vibrant color and audible crunch.
Drying Methods: Oven, Dehydrator, or Air Fryer
The drying method you choose will significantly impact the texture and time required. Here’s a breakdown of each technique:
Oven Method:
- Preheat your oven to the lowest setting (ideally 150–170°F or 65–75°C). Higher temperatures may cook the potatoes rather than dehydrate them, leading to uneven crispiness.
- Arrange the slices in a single layer on baking sheets lined with parchment paper. Ensure no overlapping, as this traps moisture.
- Bake for 2–4 hours, flipping halfway through. The duration varies based on slice thickness and oven accuracy. Check periodically by cooling a slice and testing for crispness.
Dehydrator Method:
- If you own a food dehydrator, set it to 135°F (57°C) and dry for 6–8 hours. Dehydrators offer consistent airflow, reducing the risk of burning.
Air Fryer Method:
- For a quick fix, use an air fryer preheated to 120°F (49°C). Arrange slices in a single layer and dehydrate for 1–2 hours, shaking the basket occasionally. This method is faster but requires vigilance to prevent overcooking.
Testing for Doneness
The golden rule of drying is patience. Overdrying leads to brittleness, while underdrying results in chewiness. To test, remove a slice and let it cool for 1 minute—it should crackle when bent. If it bends without snapping, return to the heat source for 15–30 minute intervals.

Troubleshooting Common Issues
- Uneven Crispiness: Slice thickness inconsistency is the primary culprit. Use a mandoline for uniformity.
- Burnt Edges: Oven temperature is too high. Invest in an oven thermometer for accuracy.
- Soggy Centers: Insufficient drying time or overlapping slices. Extend drying in 15-minute increments.
- Dull Color: Skipping the pre-treatment soak. Ensure slices are thoroughly coated in the solution.
Storage and Shelf Life
Once cooled, store your crispy purple sweet potato slices in an airtight container away from sunlight and humidity. For added crispness, place a silica gel packet inside the container. Properly dried slices can last up to 2 weeks, though they’re best enjoyed within the first week for peak texture.
Creative Variations and Flavor Pairings
Elevate your snack with these twists:
- Sweet & Spicy: Toss dried slices in a mix of honey, cinnamon, and cayenne pepper before drying.
- Savory: Sprinkle with sea salt, garlic powder, or nutritional yeast post-drying.
- Chocolate-Dipped: Melt dark chocolate and dip one end of cooled slices for an indulgent treat.
- Shape Variations: Use cookie cutters to create fun shapes before drying—perfect for kids’ snacks.
The Science Behind the Crunch
Understanding the chemistry of drying sheds light on achieving the ideal crispiness. When purple sweet potatoes are dehydrated, moisture evaporates, concentrating sugars and starches. The low-and-slow drying process allows these compounds to recrystallize, creating a glass-like structure that shatters when bitten. Blanching or steaming initiates starch gelatinization, which further enhances crispness upon drying.
Health Benefits of Dried Purple Sweet Potatoes
Beyond their addictive crunch, these snacks pack a nutritional punch:
- Antioxidants: Anthocyanins combat oxidative stress, reducing inflammation.
- Fiber: Aids digestion and promotes satiety.
- Vitamins: Rich in vitamin A (for eye health) and vitamin C (immune support).
- Low-Calorie: A 1-ounce serving contains approximately 120 calories, making it a smart alternative to greasy chips.
Conclusion: A Snack Worth Savoring
Crafting crispy dried purple sweet potatoes is a labor of love that rewards with a wholesome, visually stunning, and undeniably delicious treat. By mastering the slicing, pre-treatment, and drying techniques outlined here, you’ll unlock a snack that rivals store-bought varieties in both texture and flavor. Experiment with seasonings, share your creations, and revel in the satisfaction of turning a humble tuber into a gourmet delight. Whether enjoyed straight from the container or paired with dips, these purple gems are sure to impress. Happy snacking!


0 comments