Table of content
Stir-frying chicken breast is a culinary skill that bridges simplicity and sophistication. A staple in countless kitchens worldwide, this dish thrives on balance—achieving a golden-brown sear while retaining the meat’s natural moisture. Yet, for many home cooks, the crux of the challenge lies in timing: how long should chicken breast cook in a stir-fry to avoid dryness or undercooking? This article demystifies the science and art of stir-frying chicken breast, exploring factors that influence cooking time, step-by-step techniques, and expert tips to elevate your results.
The Science of Cooking Chicken Breast: Why Timing Matters
Chicken breast, a lean cut of meat, is notoriously low in fat compared to dark meat or red meat. While this makes it a healthy choice, it also means less margin for error during cooking. Overcook by even a minute, and the protein fibers tighten excessively, squeezing out moisture and resulting in a rubbery, unappetizing texture. Undercook, and you risk food safety issues. Stir-frying, a high-heat, quick-cooking method, demands precision to achieve the ideal balance: a seared exterior and a tender, juicy interior.

The USDA recommends cooking chicken to an internal temperature of 165°F (74°C) to ensure harmful bacteria like Salmonella are destroyed. However, achieving this temperature without overcooking requires understanding how heat transfers during stir-frying. Unlike baking or pan-frying, stir-frying involves constant motion, exposing the meat to intense, direct heat while distributing oils and seasonings evenly.
Factors Influencing Cooking Time
No two stir-fries are identical, and several variables affect how long your chicken breast needs to cook:
-
Thickness of the Chicken Slices:
Thinly sliced chicken (¼-inch thick or less) cooks in 2–3 minutes per side. Thicker cuts (½-inch or more) may require 4–5 minutes per side. Uniform slicing ensures even cooking. -
Initial Temperature of the Meat:
Chicken taken straight from the refrigerator will take longer to cook than meat brought to room temperature (about 20–30 minutes on the counter). Cold meat lowers the pan’s temperature upon contact, prolonging cooking time. -
Stove Heat and Pan Material:
A ripping-hot carbon-steel wok or cast-iron skillet conducts heat far more efficiently than a nonstick pan. Gas stoves also offer quicker heat adjustment than electric coils. -
Protein Density:
Boneless, skinless chicken breast is denser than thighs or wings, requiring shorter cooking times but higher heat to prevent toughness. -
Desired Doneness:
While 165°F is the safety standard, many chefs prefer removing chicken at 160°F (71°C) and letting residual heat carry it to 165°F for juicier results.
Step-by-Step Guide to Stir-Frying Chicken Breast
Preparation: The Foundation of Flavor
-
Slicing Technique:
Cut chicken breast against the grain into uniform strips or bite-sized pieces. This disrupts tough muscle fibers, ensuring tenderness. -
Marination (Optional but Recommended):
A quick 15–30 minute marinade in soy sauce, rice wine, cornstarch, and baking soda can tenderize the meat and lock in moisture. The cornstarch also creates a protective coating during stir-frying.
-
Prep Your Mise en Place:
Have all vegetables (bell peppers, broccoli, snap peas, etc.) and aromatics (garlic, ginger, scallions) chopped and ready. Stir-frying moves fast—there’s no time to pause mid-cook.
Heating the Pan: Critical for Searing
-
Preheat the Wok/Skillet:
Add 1–2 tablespoons of high-smoke-point oil (peanut, avocado, or canola) to the pan. Heat over medium-high to high heat until the oil shimmers but doesn’t smoke. -
Test the Heat:
Flick a drop of water into the pan. If it evaporates instantly, the pan is ready. A properly heated surface ensures a Maillard reaction—the browning process that develops flavor.
Cooking the Chicken
-
Sear in Batches:
Overcrowding the pan lowers the temperature and steams the chicken instead of searing it. Cook in single layers, adding more oil if needed between batches. -
Timing:
- Thin Slices (¼-inch): 2–3 minutes per side.
- Thicker Slices (½-inch): 4–5 minutes per side.
- Cubes (1-inch): 3–4 minutes total, stirring occasionally.
-
Visual and Tactile Cues:
Cooked chicken breast turns opaque white with golden-brown edges. Press gently with a spatula—it should feel firm but springy, not stiff.
Testing Doneness
-
Thermometer Method:
Insert an instant-read thermometer into the thickest part of the meat. Aim for 160°F (71°C). -
Cut Test:
Slice the thickest piece. The juices should run clear, not pink, and the meat should show no translucent raw spots.
Resting and Serving
-
Rest the Chicken:
Transfer cooked chicken to a plate and tent with foil. Resting for 3–5 minutes allows juices to redistribute, preventing dryness.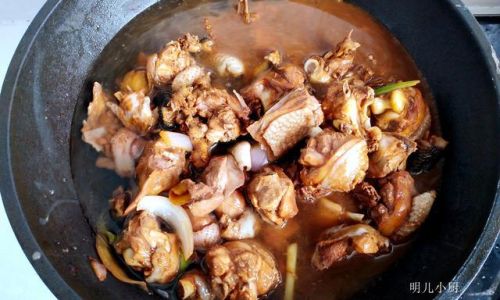
-
Combine with Vegetables:
Stir-fry vegetables separately, then toss with the chicken and sauce (oyster sauce, soy sauce, or a homemade blend) during the final minute of cooking.
Common Mistakes and How to Avoid Them
-
Overcrowding the Pan:
Result: Steamed, not seared, chicken. Solution: Cook in batches, using a large pan or wok. -
Not Preheating the Pan:
Result: Soggy chicken that sticks to the surface. Solution: Wait until the oil shimmers before adding meat. -
Using Too Much Oil:
Result: Greasy, heavy stir-fry. Solution: Use just enough oil to coat the pan—1–2 tablespoons suffice. -
Skipping the Marinade:
Result: Dry, bland chicken. Solution: Marinate even briefly for moisture and flavor. -
Overcooking Out of Fear:
Result: Rubbery texture. Solution: Trust the thermometer and visual cues.
Advanced Tips for Perfect Stir-Fried Chicken
-
Velveting Technique:
A Chinese method where chicken is marinated in egg white, cornstarch, and baking soda, then briefly blanched in oil or water before stir-frying. This seals in moisture, yielding silken results. -
Wok vs. Skillet:
A wok’s concave shape concentrates heat at the bottom, ideal for high-heat searing. A skillet works too, but ensure it’s preheated thoroughly. -
Pairing with Vegetables:
Add dense vegetables (carrots, broccoli) first, as they take longer to cook. Delicate greens (spinach, bok choy) go in last.
-
Sauce Basics:
A balanced stir-fry sauce combines salty (soy sauce), sweet (honey or sugar), umami (oyster sauce), and acidic (rice vinegar) elements. Thicken with cornstarch slurry if desired.
Frequently Asked Questions
Q: Can I stir-fry frozen chicken breast?
A: Avoid it. Frozen meat releases excess moisture, causing steaming. Thaw completely and pat dry before cooking.
Q: What if my chicken cooks too quickly?
A: Reduce heat to medium-high and stir more frequently. Thinner slices may also be the culprit—opt for slightly thicker cuts next time.
Q: How do I reheat leftover stir-fried chicken?
A: Reheat gently in a skillet over medium heat with a splash of water or broth to prevent dryness. Microwaving can toughen the meat.
Q: Can I substitute chicken breast with thighs?
A: Yes, but thighs have more fat and connective tissue, requiring longer cooking (5–7 minutes per side) and lower heat to render fat without burning.
Q: What’s the best oil for stir-frying?
A: Neutral oils with high smoke points, like peanut or grapeseed, are ideal. Avoid olive oil, which can burn at high temperatures.
Conclusion: The Pursuit of Perfection
Stir-frying chicken breast is a dance of heat, timing, and intuition. While guidelines provide a roadmap, mastery comes from practice—observing how your stove, pan, and ingredients interact. Experiment with marinades, vegetables, and sauces to personalize your dish. Remember: a perfectly cooked stir-fry isn’t just a meal; it’s a testament to patience and precision. So next time you stand at the stove, armed with sliced chicken and a sizzling wok, embrace the process. The perfect bite—tender, juicy, and bursting with flavor—awaits.

0 comments