Table of content
Pig skin jelly, a beloved delicacy in many cuisines, is celebrated for its unique texture, rich collagen content, and versatility in dishes. Often referred to as “aspic” in Western cooking or “pork jelly” in Eastern European traditions, this dish transforms humble pig skin into a gelatinous masterpiece. However, achieving the ideal consistency—a delicate balance between firmness and tenderness—hinges on one critical factor: boiling time. This article delves into the science, techniques, and cultural nuances of boiling pig skin jelly, providing a detailed roadmap to ensure culinary success.
The Science Behind Pig Skin Jelly
Before addressing boiling time, it’s essential to understand the transformation that occurs during cooking. Pig skin is composed primarily of collagen, a structural protein that gives skin its elasticity. When subjected to heat and moisture, collagen breaks down into gelatin, a protein that solidifies when cooled. This gelatin is responsible for the jelly’s signature wobbly texture. The goal during boiling is to extract maximum gelatin without overcooking the skin, which can lead to a mushy or grainy consistency.
Factors Influencing Boiling Time
The optimal boiling time for pig skin jelly is not a one-size-fits-all answer. Several variables affect the process, including:
- Thickness of the Pig Skin: Thicker skin requires longer boiling to ensure thorough collagen breakdown.
- Heat Source: Gas stoves, electric cookers, and induction hobs vary in heat distribution and intensity.
- Desired Texture: A firmer jelly (ideal for slicing) demands longer boiling, while a softer version (suitable for sauces or spreads) needs less time.
- Altitude: At higher elevations, water boils at lower temperatures, potentially extending cooking time.
- Additional Ingredients: Acidic components like vinegar or wine can accelerate collagen breakdown, while salt may tighten proteins if added too early.
Step-by-Step Boiling Process
Preparation: Cleaning and Cutting
- Cleaning: Rinse the pig skin thoroughly under cold water to remove impurities. Use a knife to scrape off residual fat or hair.
- Cutting: Slice the skin into uniform strips (2–3 inches wide) to ensure even cooking. Smaller pieces cook faster and release gelatin more efficiently.
Initial Simmering
- Place the pig skin in a large pot and cover with cold water (ratio: 1 part skin to 3 parts water).
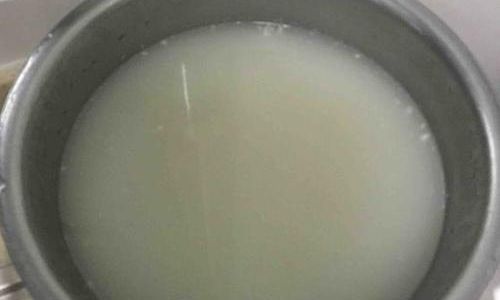
- Bring to a gentle simmer over medium heat. Avoid boiling vigorously, as this can cloud the broth and toughen the skin.
- Skim Off Foam: As impurities rise to the surface, use a spoon to remove the foam. This step ensures clarity in the final jelly.
Adjusting Heat and Timing
- Low and Slow: Reduce heat to low, maintaining a bare simmer. Cover the pot partially to prevent excessive evaporation.
- Boiling Time Range:
- 5–2 hours: For a soft, spreadable jelly.
- 2–3 hours: For a firm, sliceable texture.
- 3+ hours: For ultra-thick jelly (often used in terrines or molded dishes).
Testing for Doneness
- Texture Check: After 1.5 hours, remove a piece of skin and cool it. It should be translucent and easily crushed between fingers.
- Gelatin Test: Dip a spoon into the broth; when cooled, the liquid should coat the spoon and set slightly.
Seasoning and Straining
- Once the skin is tender, remove it from the broth. Discard the skin or reserve it for other dishes (e.g., stir-fries).
- Strain the broth through a fine-mesh sieve to remove any remaining particles.
- Season with salt, pepper, herbs (e.g., bay leaves, thyme), or aromatics (e.g., garlic, onions). Avoid over-salting, as the jelly will concentrate flavors as it sets.
Cooling and Setting
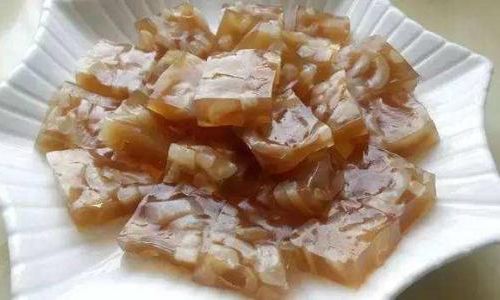
- Pour the strained broth into molds or containers. Refrigerate for at least 4–6 hours (or overnight) until fully set.
- For a clearer jelly, allow it to cool at room temperature before refrigerating, as rapid chilling can cause cloudiness.
Common Mistakes and How to Avoid Them
- Undercooking: Results in a grainy texture. Ensure the skin is tender before straining.
- Overcooking: Leads to a weak, watery jelly. Monitor the broth’s consistency during the final stages.
- Skipping the Skimming Step: Impurities create a murky appearance. Dedicate time to remove foam meticulously.
- Adding Salt Too Early: Salt can toughen proteins if added before collagen breakdown. Season after the skin is tender.
Advanced Techniques for Enthusiasts
- Pressure Cooker Method: Reduce boiling time by 50–60% using a pressure cooker. Cook on high pressure for 20–30 minutes, then release pressure naturally.
- Double Boiling: For a clearer jelly, simmer the broth twice. First, boil the skin for 1 hour, strain, then return the liquid to the pot and simmer again for 30–45 minutes.
- Flavor Infusions: Experiment with additions like ginger, star anise, or soy sauce during boiling for regional twists.
Cultural Significance and Serving Suggestions
Pig skin jelly holds a cherished place in global cuisines:
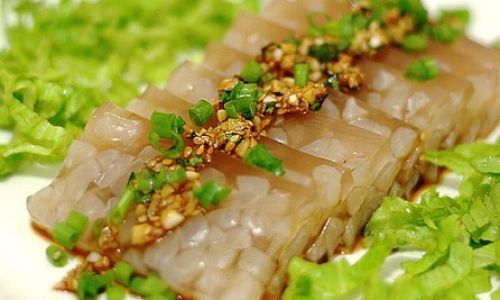
- Chinese Cuisine: Known as “pí dòng” (皮冻), it’s a staple during Lunar New Year, served with a vinegar-soy dipping sauce.
- Eastern Europe: In Poland, “galareta” is often garnished with vegetables and served as a festive appetizer.
- Modern Twists: Use pig skin jelly as a low-carb alternative to gelatin in desserts, or incorporate it into cocktails for a savory edge.
Health Benefits and Nutritional Profile
While pig skin jelly is relatively high in calories (approximately 150–200 per 100g), it offers:
- Collagen: Supports skin elasticity and joint health.
- Protein: A 100g serving provides ~25g of protein.
- Low Carbohydrate Content: Suitable for keto or paleo diets.
However, moderation is key due to its saturated fat content.
Troubleshooting Guide
| Issue | Solution |
|---|---|
| Jelly doesn’t set | Insufficient gelatin; boil longer or add commercial gelatin. |
| Cloudy appearance | Next time, skim foam thoroughly and avoid boiling vigorously. |
| Tough texture | Overcooked; reduce boiling time next batch. |
| Bland flavor | Enhance seasoning post-boiling with herbs or spices. |
Conclusion: The Alchemy of Time and Heat
Boiling pig skin jelly is a dance of patience and precision. While the general guideline is 1.5–3 hours, the exact time depends on your tools, ingredients, and desired outcome. Experimentation is encouraged—taste the broth periodically, adjust seasonings, and document your results. Whether you’re a home cook honing a family recipe or a chef pushing culinary boundaries, mastering the boil time unlocks the potential of this humble ingredient. So, simmer slowly, savor the process, and let the gelatinous magic unfold.

0 comments