Introduction
Spring rolls, a beloved dish across Asian cuisines and increasingly popular worldwide, are celebrated for their crispy exteriors and flavorful fillings. However, one common frustration for home cooks and even seasoned chefs is the tendency of these delicate treats to unravel during frying or baking. A perfectly wrapped spring roll should hold its shape, seal tightly, and maintain its integrity until it reaches the diner’s plate. This article delves into the nuances of spring roll assembly, offering expert advice on selecting ingredients, mastering wrapping techniques, and troubleshooting common pitfalls. By the end, you’ll be equipped to create spring rolls that are as visually stunning as they are delicious.
Understanding Spring Roll Wrappers
The foundation of a flawless spring roll lies in its wrapper. Two primary types dominate culinary landscapes: rice paper wrappers (common in Vietnamese cuisine) and wheat-based wrappers (used in Chinese and Thai dishes). Each has unique properties that demand different handling techniques.
Rice Paper Wrappers:
These translucent, circular sheets are made from rice flour, water, and salt. They require careful softening before use. Submerge them in warm water for 10–15 seconds until pliable but not overly soggy. Over-soaking leads to fragility, while under-soaking results in cracking. Lay them flat on a damp kitchen towel to prevent sticking.
Wheat-Based Wrappers:
Thicker and more forgiving, these wrappers (often labeled as “spring roll pastry” or “egg roll wrappers”) are pre-made and frozen. Thaw them in the refrigerator overnight, then separate gently to avoid tearing. Their sturdiness makes them ideal for beginners, as they tolerate slight overfilling better than rice paper.
Key Tip: Always cover unused wrappers with a damp cloth to prevent drying. A dry wrapper is brittle and prone to breaking.
Preparing the Filling: The Dry Advantage
The filling’s moisture content is the silent saboteur of spring roll cohesion. Excess liquid seeps into the wrapper, softening it and causing disintegration. To counter this:
- Sauté Vegetables First: Ingredients like cabbage, carrots, and mushrooms release water when cooked. Sautéing them until tender removes excess moisture. For example, shredded cabbage should wilt down to a fraction of its raw volume.
- Use Lean Proteins: Ground chicken, pork, or shrimp should be cooked thoroughly and drained of fat. Fatty meats release oil during frying, which can weaken the wrapper’s structure.
- Avoid Watery Sauces: Marinate proteins separately and pat them dry before adding to the filling. Steer clear of soy sauce or oyster sauce in the mix; instead, use dry seasonings like five-spice powder or white pepper.
- Balance Textures: Incorporate crunchy elements like jicama or water chestnuts after cooking to retain their texture without adding moisture.
Proportion Guide: Aim for a 3:1 ratio of vegetables to protein. This ensures the filling is cohesive but not dense.
The Wrapping Technique: Step-by-Step Mastery
Even with perfect ingredients, improper wrapping dooms spring rolls to failure. Follow this method for flawless results:
Step 1: Position the Wrapper
Lay the wrapper diagonally on a clean, dry surface. For rice paper, ensure it’s damp but not dripping. For wheat wrappers, lightly brush the edges with water or egg wash (a beaten egg mixed with 1 tbsp water) to enhance adhesion.
Step 2: Place the Filling
Spoon 2–3 tablespoons of filling into the center, forming a compact log. Leave 1.5–2 inches of wrapper exposed on all sides. Overfilling stresses the wrapper, while underfilling results in loose rolls.
Step 3: Fold the Sides
Gently lift the bottom edge of the wrapper over the filling, tucking it tightly to eliminate air pockets. Fold the left and right sides toward the center, like an envelope. This creates a sealed pocket.
Step 4: Roll Tightly
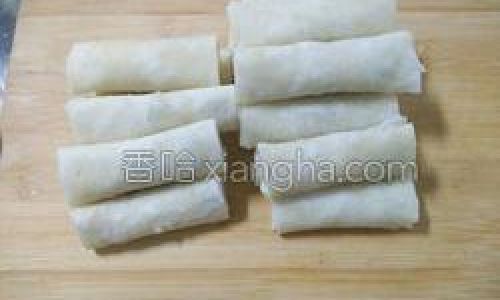
Roll the spring roll away from you, maintaining even pressure. The final roll should resemble a compact cylinder. Avoid pressing too hard, as this can tear the wrapper.
Visual Cue: The finished roll should be firm but not bulging. A loose roll is more likely to unravel.
Sealing Methods: Locking in Success
Even with precise wrapping, a weak seal spells disaster. Explore these sealing techniques:
Egg Wash:
The most reliable adhesive, egg wash creates a strong bond when brushed on the wrapper’s edges before rolling. For vegan alternatives, use cornstarch slurry (1 tbsp cornstarch + 2 tbsp water) or aquafaba (chickpea brine).
Double Sealing:
After the initial roll, brush the exposed edge with egg wash and press gently. This double layer reinforces the seal.
Rice Paper Overlap:
When using rice paper, overlap the edges slightly during rolling. The natural stickiness of the damp wrapper helps fuse the layers.
Troubleshooting Seals:
If the wrapper refuses to stick, it’s either too dry or too wet. Re-moisten with a fingertip dipped in water or pat dry with a paper towel.

Cooking Methods: Frying vs. Baking
The cooking process impacts structural integrity. Choose wisely:
Deep-Frying:
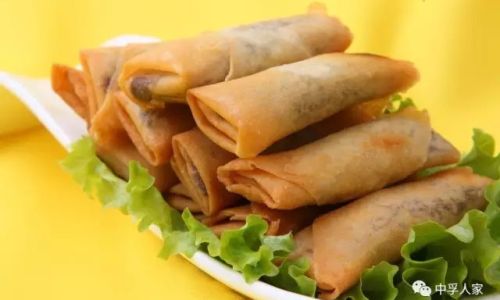
The gold standard for crispiness. Heat oil to 350–375°F (175–190°C). Fry spring rolls in batches to avoid overcrowding, which lowers oil temperature and causes sogginess. Flip them gently to ensure even browning.
Baking:
A healthier alternative, but requires care. Preheat the oven to 400°F (200°C). Lightly brush rolls with oil and bake on a wire rack (not a baking sheet) to promote airflow. Flip halfway through for even crisping.
Air Frying:
For a middle ground, air fry at 375°F (190°C) for 10–12 minutes, shaking the basket occasionally. This method mimics frying with less oil.
Key Tip: Regardless of the method, let spring rolls rest for 2–3 minutes after cooking. This allows steam to escape, preventing sogginess.
Troubleshooting Common Issues
Even with meticulous preparation, hiccups occur. Here’s how to fix them:
Problem 1: Spring Rolls Unravel During Frying
- Cause: Inadequate sealing or overfilled wrappers.
- Solution: Reinforce seals with extra egg wash and reduce filling volume by 20%.
Problem 2: Wrappers Tear While Rolling

- Cause: Overly dry or thin wrappers.
- Solution: Use wheat-based wrappers for beginners, or add a touch more water to rice paper soaking liquid.
Problem 3: Soggy Bottoms
- Cause: Insufficient oil drainage after frying.
- Solution: Place cooked rolls on a wire rack, not paper towels, which trap moisture.
Expert Tips and Tricks
Elevate your spring roll game with these insider secrets:
- Double Wrapping: For extra insurance, wrap the filled roll in a second dampened rice paper wrapper. This adds a protective layer.
- Freeze Before Frying: Arrange uncooked rolls on a baking sheet, freeze until solid, then transfer to a zip-top bag. Fry directly from frozen—this prevents bursting.
- Herb Infusions: Add mint, cilantro, or basil leaves between the filling and wrapper for a flavor burst without excess moisture.
- Diagonal Cutting: After cooking, slice rolls diagonally with a sharp knife. This not only enhances presentation but also creates a larger surface area for crispiness.
Storage and Reheating
Proper storage maintains texture. Cooked spring rolls keep in the fridge for 2 days or frozen for 2 months. Reheat in a 350°F (175°C) oven until heated through. Avoid microwaving, as this softens the wrapper.
Conclusion
Crafting spring rolls that stay intact is a blend of science and art. By selecting the right wrappers, controlling moisture, mastering wrapping techniques, and employing strategic sealing and cooking methods, you can eliminate the dread of unraveling rolls. Remember, practice makes perfect—each batch brings you closer to spring roll perfection. Whether you’re hosting a dinner party or craving a crispy snack, these tips ensure your creations will impress. So roll up your sleeves, embrace the process, and savor the satisfaction of spring rolls that hold their own from kitchen to table.


0 comments