Stir-frying shrimp is a culinary delight that combines the succulence of seafood with the artistry of swift, high-heat cooking. Whether you’re a seasoned chef or an aspiring home cook, mastering the technique to create mouthwatering stir-fried shrimp can elevate your dishes to new heights. This guide will take you through every step, from selecting the freshest shrimp to perfecting your stir-fry sauce, ensuring that your shrimp are not only cooked to perfection but also bursting with flavor.
Understanding Your Ingredients: The Importance of Fresh Shrimp
The foundation of any stir-fried shrimp dish lies in the quality of the shrimp itself. Freshness is paramount; look for shrimp that are firm, translucent, and have a mild, slightly sweet scent. Avoid shrimp that have a strong odor, are slimy, or have discolored shells.
Types of Shrimp:
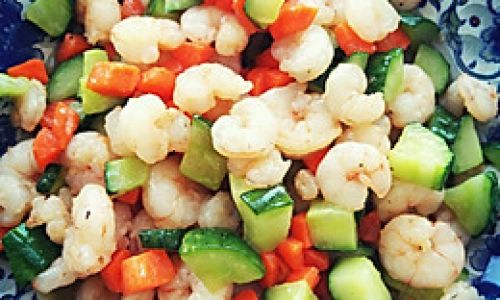
- White Shrimp: Commonly found in the United States, these have a slightly sweet flavor and firm texture.
- Brown Shrimp: Smaller and sweeter, often used in Asian cuisine.
- Tiger Shrimp: Larger and more robust in flavor, perfect for dishes that require a bit more substance.
When purchasing shrimp, you’ll often see them labeled by count per pound (e.g., U/15 means under 15 shrimp per pound). The smaller the number, the larger the shrimp. For stir-frying, medium-sized shrimp (around 26/30 count per pound) are ideal as they cook quickly and evenly.
Preparation: From Shell to Stir-Fry Ready
-
Deveining and Cleaning: While deveining shrimp is optional, it removes the digestive tract, which can sometimes contain sand or grit. Use a sharp paring knife to make a shallow cut along the back of the shrimp and gently pull out the dark vein.
-
Peeling: For stir-fries, you’ll typically want to peel the shrimp, leaving the tail on for a more presentable dish (this is optional but visually appealing). To peel, gently twist off the head and pull the shell away from the body.
-
Rinsing: Rinse the shrimp under cold running water to remove any remaining dirt or debris. Pat them dry thoroughly with paper towels. Wet shrimp will steam rather than stir-fry, leading to a soggy result.
-
Marinating (Optional): For added flavor, you can marinate the shrimp in a mixture of soy sauce, rice vinegar, garlic, ginger, and a pinch of sugar for about 15-30 minutes. This step isn’t essential but can enhance the final taste.
The Stir-Fry Essentials: Tools and Techniques
Tools:
- Wok or Large Skillet: A wok’s high sides and wide bottom are perfect for stir-frying, but a large, heavy-bottomed skillet works well too.
- Spatula or Wooden Spoon: These tools allow you to toss the shrimp and vegetables without damaging them.
- High-Heat Oil: Peanut oil, grapeseed oil, or vegetable oil are ideal for their high smoke points.
Techniques:
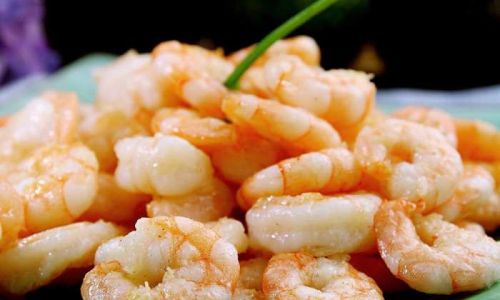
- Preheating the Pan: Ensure your wok or skillet is very hot before adding oil. This creates a sear that locks in juices and flavors.
- Controlling the Heat: Stir-frying requires rapid, even cooking. Adjust the heat as needed to maintain a high temperature without burning the ingredients.
- Stirring Constantly: This ensures even cooking and prevents sticking.
Creating a Balanced Stir-Fry Sauce
A good stir-fry sauce should complement the shrimp without overpowering its delicate flavor. Here’s a basic recipe you can adjust to your taste:
Ingredients:
- 3 tablespoons soy sauce
- 1 tablespoon oyster sauce (optional for added umami)
- 1 tablespoon rice vinegar or Shaoxing wine
- 1 teaspoon sesame oil
- 1 teaspoon sugar or honey
- 1 clove garlic, minced
- A pinch of white pepper
- 1 tablespoon cornstarch mixed with 2 tablespoons water (for thickening, optional)
Instructions:
- In a small bowl, whisk together the soy sauce, oyster sauce, rice vinegar, sesame oil, sugar, garlic, and white pepper.
- Taste and adjust as needed. If you prefer a thicker sauce, mix the cornstarch and water until smooth and stir it into the sauce.
Stir-Frying the Shrimp: Step-by-Step
-
Heat the Pan and Oil: Place your wok or skillet over high heat and add 2-3 tablespoons of oil. Swirl it around to coat the bottom evenly.
-
Cook the Aromatics: Once the oil is hot (but not smoking), add minced garlic, ginger, and any other aromatics like scallions or chili flakes. Stir-fry for about 10 seconds until fragrant but not burnt.
-
Add the Shrimp: Carefully add the shrimp in a single layer, if possible. This allows for even cooking. Stir-fry for about 2-3 minutes on each side, or until they turn pink and opaque. Avoid overcrowding the pan; if necessary, cook in batches.
-
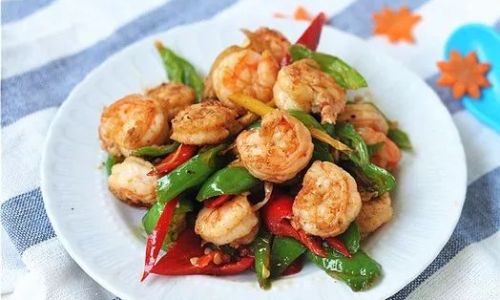
Add Vegetables: If you’re including vegetables like bell peppers, snap peas, or broccoli, add them now. Stir-fry for an additional 2-3 minutes until they are tender-crisp.
-
Pour in the Sauce: Give your sauce one final whisk and pour it over the shrimp and vegetables. Stir constantly to coat everything evenly and cook until the sauce has thickened slightly and everything is heated through.
-
Finish with a Touch of Green: For a burst of color and freshness, scatter chopped green onions or cilantro over the top just before serving.
Serving and Enjoying Your Stir-Fried Shrimp
Serve your stir-fried shrimp immediately while it’s hot and steaming. Pair it with steamed rice, noodles, or even a bed of crisp lettuce for a lighter option. Consider adding a side of pickled vegetables or a simple salad to balance the rich flavors of the stir-fry.
Tips for Perfect Stir-Fried Shrimp
- Don’t Overcook: Shrimp cook quickly, so keep a close eye on them to avoid drying out.
- Use High-Quality Ingredients: Fresh shrimp, high-quality oil, and authentic seasonings make a world of difference.
- Practice Makes Perfect: Stir-frying is a skill that improves with time. The more you practice, the better your control over heat and timing will become.
Conclusion
Stir-frying shrimp is a delightful way to enjoy this versatile seafood. By following these steps and tips, you can create dishes that are not only visually appealing but also bursting with flavor and texture. Whether you’re serving a family dinner or entertaining guests, mastering the art of stir-frying shrimp will undoubtedly impress and delight everyone at the table. Happy cooking!
0 comments