Introduction
In the vast culinary landscape of Asian cuisine, stir-frying stands as a testament to the art of rapid cooking that preserves the freshness, texture, and flavor of ingredients. Among the myriad of vegetables that lend themselves beautifully to this technique, lotus root (Nelumbo nucifera) holds a unique place. Its crisp, water chestnut-like texture and subtly sweet taste make lotus root slices an ideal candidate for stir-fries, where they can absorb the flavors of the seasoning and other ingredients while retaining their own distinct character.
This guide aims to demystify the process of stir-frying lotus root slices, ensuring that even the most novice cook can achieve a dish that is both visually appealing and delightfully tasty. From selecting the perfect lotus root to mastering the stir-fry technique, we will explore every step in detail, ensuring that your lotus root stir-fry becomes a cherished addition to your culinary repertoire.
Chapter 1: Understanding Lotus Root
1 What is Lotus Root?

Lotus root, derived from the rhizome of the lotus plant, is a staple in many Asian cuisines, particularly those of China, Japan, and Southeast Asia. It boasts a unique appearance, with long, cylindrical segments filled with hollow tubes that run lengthwise. These tubes give lotus root its characteristic appearance when sliced, creating a lacy pattern that is both visually striking and functionally beneficial, as they allow for even cooking and seasoning penetration.
2 Nutritional Benefits
Beyond its aesthetic appeal, lotus root is packed with nutritional benefits. It is a good source of dietary fiber, which aids in digestion, and contains essential vitamins and minerals such as vitamin C, iron, and copper. Its low-calorie content and high water content make it an excellent choice for those seeking to maintain a healthy diet.
3 Selecting and Storing Lotus Root
When selecting lotus root, look for firm, unblemished pieces with no signs of softening or mold. Fresh lotus root should have a slightly earthy aroma. Once purchased, it can be stored in the refrigerator wrapped in damp paper towels and placed in an airtight container for up to a week. For longer storage, lotus root can be blanched and frozen.
Chapter 2: Preparation Techniques
1 Cleaning and Peeling
Before slicing, lotus root must be thoroughly cleaned to remove any dirt or residue. Use a vegetable brush to scrub the exterior gently under running water. Once clean, use a sharp knife to peel away the outer layer, which can be tough and fibrous.
2 Slicing Techniques
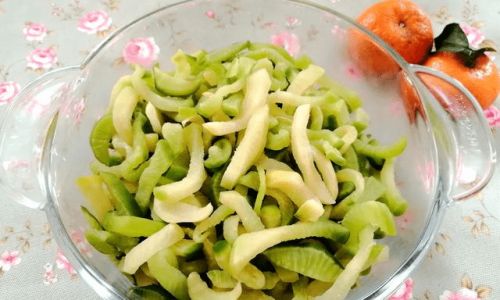
The key to a successful lotus root stir-fry lies in proper slicing. For maximum texture and flavor retention, slice the lotus root into thin, even rounds or half-moons. Alternatively, for a more intricate look, you can slice it into matchsticks or use a mandoline to achieve uniform thickness. The hollow tubes within the lotus root will create an intricate pattern on each slice, enhancing its visual appeal.

3 Soaking (Optional)
Some recipes recommend soaking lotus root slices in water with a little vinegar or lemon juice to prevent discoloration. While this step is optional, it can help maintain the vibrant white color of the slices, especially if you plan to cook with them later. Drain well before use.
Chapter 3: Stir-Fry Basics
1 Choosing the Right Pan
A wok or a large, flat-bottomed frying pan with high sides is ideal for stir-frying. These pans allow for even heat distribution and easy tossing of ingredients, ensuring that everything cooks uniformly.
2 Preheating the Pan
Preheat your pan over medium-high heat until it is very hot. This ensures that the lotus root slices will sear immediately upon contact, locking in juices and flavor.
3 Oil Selection
The type of oil you use can significantly impact the taste and texture of your stir-fry. Neutral oils like canola, grapeseed, or peanut oil are ideal because they have a high smoking point and do not overpower the flavors of the dish. For added flavor, a small amount of sesame oil can be added towards the end of cooking.
Chapter 4: Seasoning and Ingredients

1 Basic Seasonings
A well-stocked pantry is crucial for any stir-fry. Basic seasonings include salt, pepper, garlic, and ginger. These ingredients form the backbone of most stir-fry recipes, providing a savory and aromatic foundation.
2 Adding Complexity
To elevate your lotus root stir-fry, consider incorporating additional ingredients such as soy sauce, oyster sauce, or hoisin sauce for depth of flavor. A splash of rice vinegar or Shaoxing wine can add brightness and complexity. For a vegetarian option, use vegetable broth or dashi to create a light, flavorful sauce.
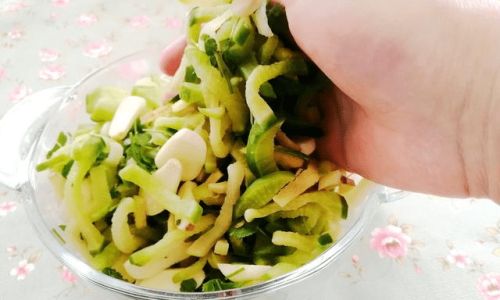
3 Aromatics and Garnishes
Aromatics like scallions, garlic, and ginger should be finely chopped to ensure they release their flavors quickly during stir-frying. Garnishes such as sesame seeds, chopped green onions, or cilantro can be added at the end to enhance the dish’s presentation and taste.
Chapter 5: Stir-Frying Lotus Root Slices
1 Preparing the Pan
Once your pan is preheated, add a tablespoon or two of oil and swirl it around to coat the bottom evenly. The oil should be hot but not smoking.
2 Cooking Aromatics

Add your chopped aromatics (garlic, ginger, and scallions) to the hot oil. Stir-fry for about 30 seconds until fragrant but not burnt. This step is crucial as it creates the flavor base for your dish.
3 Adding Lotus Root Slices
Arrange the lotus root slices in a single layer in the pan. Allow them to sear undisturbed for about 1-2 minutes on each side. This will create a nice caramelization on the surface, adding both color and flavor.
4 Stir-Frying
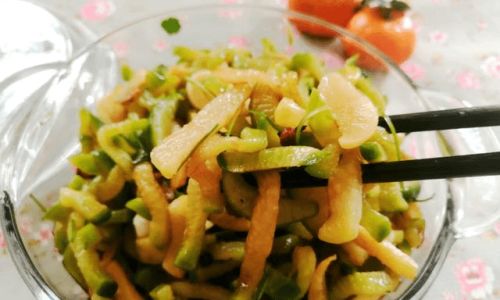
Once the slices have developed a golden-brown color, begin to stir-fry them, tossing frequently to ensure even cooking. If using a sauce, pour it over the lotus root slices and stir to coat evenly. Cook for an additional 2-3 minutes, until the lotus root is tender-crisp and the sauce has thickened slightly.
5 Adjusting Seasoning
Taste and adjust the seasoning as needed. If the dish seems too dry, you can add a splash of water or broth. Conversely, if it’s too wet, cook for a bit longer to reduce the sauce.
6 Finishing Touches
Before removing the stir-fry from the heat, add any garnishes such as sesame seeds, chopped green onions, or cilantro. Stir gently to combine and immediately transfer the dish to a serving plate to prevent overcooking.
Chapter 6: Serving and Enjoying

1 Serving Suggestions
Lotus root stir-fry pairs beautifully with a variety of dishes. Serve it as a side to a main protein like grilled chicken, stir-fried tofu, or even a simple bowl of rice. It can also be enjoyed as part of a larger meal featuring multiple stir-fried vegetables and proteins.
2 Presentation
For an elegant presentation, arrange the lotus root slices on a platter, garnishing with additional herbs or a drizzle of sesame oil. A sprinkle of toasted sesame seeds can add both texture and a nutty flavor.
3 Pairing Beverages
A refreshing glass of iced tea, a light beer, or a sake can complement the flavors of your lotus root stir-fry. For a non-alcoholic option, try a sparkling water infused with slices of lemon or lime.
Conclusion
Stir-frying lotus root slices is a delightful way to enjoy this unique vegetable’s crisp texture and subtle sweetness. By following the steps outlined in this guide, from selecting and preparing the lotus root to mastering the stir-fry technique, you can create a dish that is not only visually stunning but also bursting with flavor. Remember, the beauty of stir-frying lies in its simplicity and adaptability, allowing you to tailor the recipe to your personal preferences and dietary needs. With practice, your lotus root stir-fry will become a cherished family favorite, enjoyed by all who taste it. Happy cooking!

0 comments