Introduction
Cooking a pre-packaged steak to restaurant-quality perfection might seem daunting, but with the right techniques, even a frozen or vacuum-sealed cut can transform into a juicy, flavorful masterpiece. This guide demystifies the process, breaking down every step—from selecting the right steak to achieving a caramelized crust and tender interior. Whether you’re a busy professional, a novice cook, or a steak enthusiast, this article will equip you with the knowledge to elevate your searing game.
Chapter 1: Understanding Your Steak
1 Decoding Pre-Packaged Labels
Pre-packaged steaks often come labeled with terms like “USDA Choice,” “grass-fed,” or “aged.” These labels influence flavor and tenderness. For example, grass-fed beef tends to be leaner with a mineral tang, while grain-finished cuts offer richer marbling. Aging (wet or dry) enhances tenderness but may not always be specified on packaging.
2 Thickness Matters
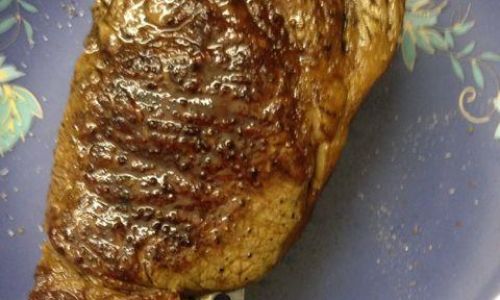
The ideal thickness for searing is 1.5–2 inches. Thinner steaks risk overcooking before a crust forms, while thicker cuts allow for better heat control. If your pre-packaged steak is thinner, adjust cooking time accordingly.
3 Fat Cap and Marbling
Inspect the steak’s fat distribution. A thin layer of external fat (fat cap) can be rendered for flavor, while intramuscular fat (marbling) ensures juiciness. Trim excess hard fat but leave a ¼-inch layer to melt during cooking.
Chapter 2: Pre-Cooking Preparations
1 Thawing Safely
If frozen, thaw the steak in the refrigerator for 24–48 hours, depending on weight. Avoid rapid thawing (e.g., microwave or hot water), as it disrupts texture and promotes bacterial growth. Place the steak on a wire rack inside a baking dish to catch drips.
2 Bringing to Room Temperature
Remove the steak from the fridge 30–60 minutes before cooking. This ensures even cooking, as cold meat can seize up when hitting a hot pan, leading to uneven doneness.
3 Pat Dry Thoroughly
Moisture is the enemy of searing. Use paper towels to blot the steak dry. Excess moisture creates steam, preventing the Maillard reaction—the chemical process responsible for that coveted brown crust.
4 Seasoning Strategically
- Salt: Liberally salt both sides 1 hour before cooking (or 15 minutes if time-constrained). Salt dissolves muscle proteins, enhancing tenderness. For a 10-oz steak, use 1–1.5 tsp kosher salt.
- Pepper: Apply freshly cracked black pepper just before searing to prevent burning.
- Optional Flavors: Garlic powder, smoked paprika, or rosemary can be added, but avoid acidic marinades (e.g., vinegar, citrus), which toughen the meat if left too long.
Chapter 3: Equipment and Heat Management
1 Choosing the Right Pan
- Cast Iron Skillet: Retains heat exceptionally well, crucial for high-temperature searing.
- Stainless Steel: A durable alternative if cast iron is unavailable.
- Non-Stick Pans: Avoid—they can’t withstand high heat and may release toxic fumes.
2 Oil Selection
Use an oil with a high smoke point (e.g., canola, grapeseed, or avocado oil). Avoid olive oil for searing, as it burns at lower temperatures. Apply a thin, even coat to the pan—not the steak—to prevent splattering.
3 Preheating the Pan
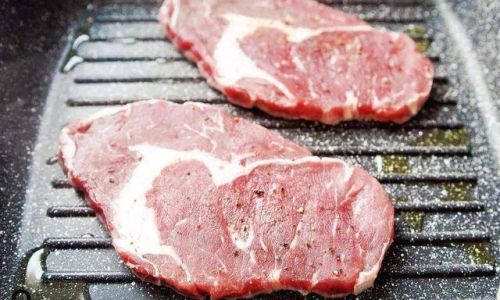
Heat the pan over medium-high to high heat until it’s screaming hot. To test, flick a few water droplets; they should evaporate instantly. A properly preheated pan ensures immediate sizzling upon contact with the steak, locking in juices.
Chapter 4: The Searing Process
1 Initial Searing
- Add Oil: Swirl 1–2 tbsp oil in the pan.
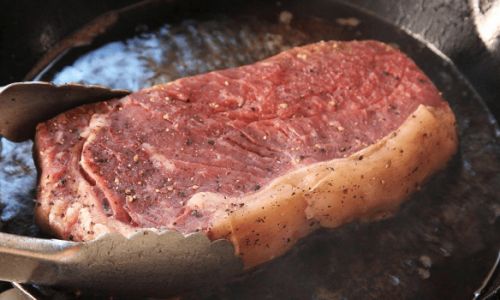
- Place the Steak: Use tongs to lay the steak away from you to prevent oil splashes.
- Listen for the Sizzle: A lack of sizzle means the pan isn’t hot enough.
2 Timing and Flipping
For a 1.5-inch steak:
- Rare (120–130°F): 2–3 minutes per side.
- Medium-Rare (130–135°F): 3–4 minutes per side.
- Medium (135–145°F): 4–5 minutes per side.
Flip only once using tongs (not a fork, which pierces the meat). Avoid pressing down on the steak—this squeezes out flavorful juices.
3 Basting with Butter (Optional)
For added richness, add 2 tbsp butter, a crushed garlic clove, and a sprig of thyme or rosemary during the last minute of cooking. Tilt the pan and spoon the foaming butter over the steak repeatedly.
Chapter 5: Achieving Doneness Precision
1 The Touch Test
- Rare: Soft with slight resistance.
- Medium-Rare: Springy with a firm center.
- Well-Done: Very firm with no give.
2 Using a Meat Thermometer
Insert the thermometer into the thickest part, avoiding bone or fat. Remove the steak 5°F before your target temperature, as carryover cooking will raise it by 5–10°F during resting.
3 Reverse Searing (For Thicker Cuts)
For steaks over 2 inches, consider the reverse-sear method:
- Slow-roast in a 275°F oven until 10°F below target temp.
- Finish with a quick sear in a hot pan.
Chapter 6: Resting and Carving
1 The Importance of Resting
Transfer the steak to a cutting board and tent loosely with foil. Rest for 5–10 minutes (longer for thicker cuts). Resting redistributes juices; cutting too soon causes them to spill onto the plate.
2 Slicing Against the Grain
Identify the meat’s grain (muscle fiber direction) and slice perpendicular to it. This shortens tough fibers, ensuring tenderness. For example, flank steak’s grain runs lengthwise, so slice across the width.
3 Presentation Tips
- Pour resting juices over the sliced steak.
- Garnish with flaky sea salt, fresh herbs, or compound butter.
- Serve with chimichurri, red wine reduction, or blue cheese butter.
Chapter 7: Troubleshooting Common Mistakes
1 Gray, Overcooked Exterior
Cause: Insufficient pan heat or overcrowding the pan.
Fix: Preheat longer and cook in batches if needed.
2 Chewy Texture
Cause: Overcooking or poor meat quality.
Fix: Opt for higher-grade steaks (e.g., Prime over Choice) and use a meat thermometer.
3 Lack of Flavor
Cause: Inadequate seasoning or resting.
Fix: Salt aggressively and let the meat rest properly.
Chapter 8: Pairing and Leftovers
1 Side Dish Pairings
- Creamy: Truffle mashed potatoes, goat cheese polenta.
- Crispy: Roasted Brussels sprouts with bacon, parmesan-crusted asparagus.
- Acidic: Grilled lemon wedges, balsamic-glazed carrots.
2 Storing and Reheating Leftovers
- Store sliced steak in an airtight container with juices for up to 3 days.
- Reheat gently in a low-oven (250°F) to prevent drying out.
- Use leftovers in sandwiches, tacos, or stir-fries.
Conclusion
Cooking a pre-packaged steak to perfection is an exercise in patience and precision. By mastering thawing, seasoning, searing, and resting, you can turn even a humble store-bought cut into a culinary triumph. Remember, the key lies in respecting the meat’s natural properties and controlling every variable—from pan temperature to resting time. With practice, you’ll achieve a steak that boasts a crust so crisp it shatters, a center so tender it melts, and a flavor profile that lingers long after the last bite. Fire up that skillet, and let the sizzle begin!




0 comments