Table of content
Introduction
Shrimp, with its delicate flavor and versatile cooking methods, is a staple in many cuisines worldwide. Whether grilled, boiled, fried, or sautéed, shrimp dishes can elevate any meal to a gourmet experience. However, one aspect of shrimp preparation that often trips up even the most seasoned cooks is the removal of the shrimp vein, also known as the digestive tract. This thin, dark line running along the shrimp’s back can contain sand, grit, and other unwanted particles, making it essential to remove before cooking. The challenge lies in doing so without breaking the vein, which can be frustrating and messy. In this comprehensive guide, we will explore various techniques and tips to ensure that removing shrimp veins becomes a seamless part of your culinary routine.
Understanding the Shrimp Vein
Before diving into the removal process, it’s crucial to understand what the shrimp vein is and why it needs to be removed. The shrimp vein is a dark, thin tube that runs along the shrimp’s back, from the head to the tail. It contains the shrimp’s digestive tract, which can harbor impurities picked up from the shrimp’s natural environment. While some people argue that the vein is harmless and can be eaten, most chefs and food enthusiasts prefer to remove it for a cleaner taste and appearance.
Moreover, the shrimp vein can contain a tough membrane that doesn’t break down during cooking, making it unpleasant to bite into. Removing the vein also allows for better seasoning penetration, enhancing the shrimp’s overall flavor.
Tools and Preparation
Before starting, ensure you have the right tools and shrimp prepared correctly. Here’s what you’ll need:
-
Fresh or Frozen Shrimp: Choose shrimp that is firm, has a slight odor (not overly fishy), and has intact shells. If using frozen shrimp, thaw them completely before beginning.
-
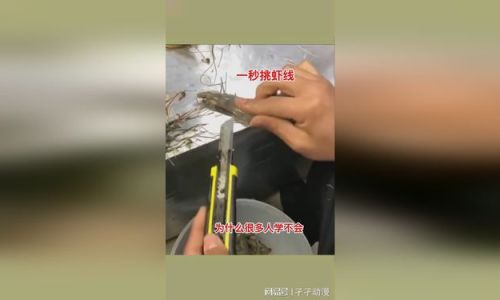
Sharp Knife: A sharp paring knife or a dedicated shrimp deveiner is ideal. A dull knife can crush the shrimp, making it difficult to remove the vein intact.
-
Paper Towels or Clean Cloth: To pat the shrimp dry and keep your workspace clean.
-
Cutting Board: A sturdy, non-slip cutting board will provide a stable surface for working.
-
Optional: Shrimp Deveining Tool: These specialized tools can make the process easier, especially for beginners.
Techniques for Removing Shrimp Veins
Technique 1: The Classic Method
-
Peel the Shrimp (Optional): Depending on your recipe, you may want to peel the shrimp first. If so, start by removing the legs and head, then peel off the shell from the tail end, leaving the tail intact if desired.
-
Locate the Vein: With the shrimp lying flat on the cutting board, locate the dark line running along its back.
-
Make a Shallow Cut: Using your sharp knife, make a shallow cut along the back of the shrimp, just deep enough to expose the vein. Be careful not to cut too deeply, as this can break the vein.
-
Lift and Pull: Gently lift the exposed edge of the vein with the tip of your knife or a shrimp deveining tool. Pull it out slowly and steadily, ensuring it doesn’t snap off inside the shrimp.
-
Rinse and Pat Dry: Rinse the shrimp under cold water to remove any debris and pat it dry with paper towels.
Technique 2: The Back-and-Forth Method
-
Prepare the Shrimp: Peel the shrimp if necessary, leaving the tail intact.
-
Insert the Knife: Place the knife at a slight angle along the shrimp’s back, just above the vein.
-
Rock the Knife Gently: Instead of making a single cut, gently rock the knife back and forth in a shallow motion. This will loosen the vein without cutting too deeply into the shrimp meat.
-
Pull Out the Vein: Once the vein is loose, use the knife or deveining tool to lift and pull it out in one piece.
-
Clean Up: Rinse and pat the shrimp dry as before.
Technique 3: The Tail-First Method
-
Leave the Shell On: This method works best with the shell still on, especially if you’re working with smaller shrimp.
-
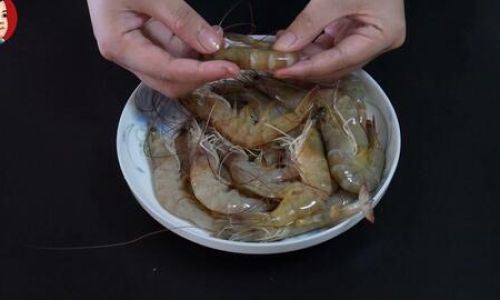
Pinch the Tail: Gently pinch the shrimp tail between your thumb and forefinger, then twist it slightly to loosen it from the body.
-
Pull Gently: With the tail still pinched, pull it towards the head of the shrimp. This action will pull the vein out through the tail end, leaving the shrimp meat intact.
-
Peel and Clean: Once the vein is removed, peel the rest of the shell off and clean the shrimp as usual.
Tips for Success
-
Use Fresh, High-Quality Shrimp: Older or poor-quality shrimp are more prone to breaking during deveining.
-
Keep Your Knife Sharp: A dull knife is your enemy when it comes to shrimp deveining. Invest in a good-quality knife and keep it sharp.
-
Practice Patience: Removing shrimp veins takes practice. Don’t rush the process; take your time to ensure a clean removal.
-
Work on a Clean Surface: A cluttered or greasy workspace can make the task more difficult. Keep your cutting board clean and free of distractions.
-
Consider the Cooking Method: Some recipes call for deveined shrimp, while others may not require it. Know your recipe before starting to avoid unnecessary work.
-
Store Properly: Once deveined, shrimp should be cooked immediately or stored in an airtight container in the refrigerator for no longer than a day.
Conclusion
Removing shrimp veins without breaking them can be a challenging task, but with the right tools, techniques, and patience, it becomes a manageable part of shrimp preparation. By understanding the shrimp’s anatomy, preparing your workspace correctly, and practicing different deveining methods, you can ensure that your shrimp dishes are both visually appealing and delicious. Remember, the key to success is a sharp knife, a clean workspace, and a steady hand. With these tips and techniques, you’ll be able to enjoy perfectly deveined shrimp in no time, elevating your culinary creations to new heights. Happy cooking!


0 comments