Introduction
Walnuts, known for their rich nutritional profile and delightful taste, are a staple in many diets worldwide. From being a key ingredient in baked goods to being enjoyed on their own as a healthy snack, walnuts offer a myriad of health benefits, including improved heart health, enhanced brain function, and rich antioxidant content. However, one aspect of enjoying walnuts that often deters enthusiasts is the time-consuming and sometimes frustrating task of removing the inner husk, or the thin, tannin-rich layer adhering to the nutmeat. This layer can be bitter and astringent, detracting from the overall flavor experience. In this comprehensive guide, we will explore various methods and techniques to quickly and efficiently remove walnut husks, ensuring that your culinary endeavors or snack time remains enjoyable and hassle-free.

Understanding the Walnut Structure
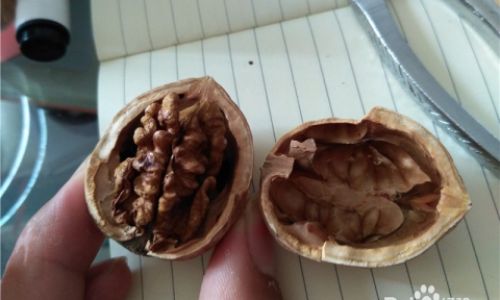
Before diving into the techniques for removing walnut husks, it’s crucial to understand the structure of a walnut. A walnut consists of three main parts: the outer hull (or shell), the inner husk, and the nutmeat. The outer hull is the hard, protective layer that encases the entire nut. Once cracked open, you’ll find the inner husk clinging tightly to the nutmeat. This husk is what we aim to remove to access the pure, delicious nutmeat.
Why Remove the Inner Husk?
Removing the inner husk is not just about aesthetics; it significantly impacts the taste and texture of your walnuts. The husk contains tannins, which can give the nutmeat a bitter, astringent flavor. By removing this layer, you unlock the nut’s natural sweetness and creamy texture, enhancing your culinary experience.
Traditional Methods: The Basics

-
Hand Peeling
- One of the most straightforward methods is peeling the husk off by hand. This method requires patience and a gentle touch to avoid crushing the nutmeat.
- Steps:
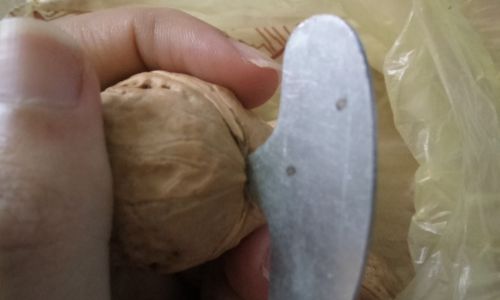
a. Crack open the outer shell carefully.
b. Use your fingers or a small knife to gently loosen and peel away the inner husk. - Pros: No special tools required.
- Cons: Time-consuming, especially for large quantities, and can be messy.
-
Blanching
- Blanching involves immersing the nuts in boiling water for a brief period to soften the husk, making it easier to remove.
- Steps:
a. Bring a pot of water to a rolling boil.
b. Add the cracked walnuts to the boiling water.
c. Let them simmer for about 1-2 minutes.
d. Remove the nuts using a slotted spoon and immediately plunge them into ice-cold water to stop the cooking process.
e. Peel off the softened husk. - Pros: Effective for softening the husk.
- Cons: Can alter the texture of the nutmeat slightly if overcooked.
-
Freezing
- Freezing walnuts before peeling can also make the husk more brittle and easier to remove.
- Steps:
a. Place the cracked walnuts in a freezer-safe container.
b. Freeze for at least 2 hours.
c. Remove the nuts and let them thaw slightly for a few minutes.
d. Peel off the husk using your fingers or a small knife. - Pros: Quick and relatively easy.
- Cons: Requires planning ahead and can still be time-consuming for large batches.
Advanced Techniques: For the Discerning Walnut Lover
-
Using a Food Processor

- A food processor can be a powerful ally in the battle against walnut husks, especially if you’re dealing with large quantities.
- Steps:
a. Crack open the outer shells of the walnuts.
b. Place the nuts in the bowl of a food processor fitted with the blade attachment.
c. Pulse the processor in short bursts until the husks begin to separate from the nutmeat. Be careful not to over-process, as this can turn the nutmeat into nut butter.
d. Sieve the mixture to separate the husks from the nutmeat. - Pros: Efficient for large batches.
- Cons: Risk of over-processing, requiring careful monitoring.
-
Chemical Solutions: Vinegar or Baking Soda
- Chemical treatments can be effective but require careful handling to avoid contamination and to ensure food safety.
- Vinegar Method:
a. Soak the cracked walnuts in a solution of water and white vinegar (about 1 tablespoon of vinegar per cup of water) for about 15-30 minutes.
b. Rinse the nuts thoroughly under running water.
c. Peel off the husk. - Baking Soda Method:
a. Create a baking soda solution by mixing 1-2 tablespoons of baking soda with enough water to fully submerge the nuts.
b. Soak the nuts for about 10-15 minutes.
c. Rinse thoroughly and peel. - Pros: Quick and can be effective for stubborn husks.
- Cons: Potential for residual chemical taste if not rinsed properly, and not suitable for those with chemical sensitivities.
-
Air-Popping
- An unconventional but effective method involves using an air popper, commonly used for popcorn, to separate the husks from the nutmeat.
- Steps:
a. Crack open the outer shells of the walnuts.
b. Place the nuts in an air popper.
c. Run the air popper for a few seconds until the husks begin to loosen.
d. Immediately remove the nuts and let them cool slightly.
e. Rub or blow the husks off the nutmeat. - Pros: Fun and innovative method that can be quick.
- Cons: Not all air poppers are suitable for this purpose, and the results can be inconsistent.
Innovative Tools: Making Life Easier
-
Walnut Husk Removers
- Specialty tools designed specifically for removing walnut husks are available on the market. These tools often feature a textured surface or small blades that help grip and peel the husk without damaging the nutmeat.
- Pros: Designed for the task, making it faster and easier.
- Cons: Can be expensive and may not be widely available.
-
Electric Peelers

- Electric peelers, similar to vegetable peelers but designed for nuts, can automate the peeling process.
- Steps:
a. Crack open the outer shells.
b. Place the nuts in the electric peeler.
c. Turn on the peeler and let it do the work. - Pros: Fast and efficient, especially for large-scale peeling.
- Cons: High initial cost and may require some practice to use effectively.
Conclusion
Removing walnut husks doesn’t have to be a tedious task. By understanding the various methods and techniques available, you can choose the one that best suits your needs, whether you’re dealing with a small handful of nuts or a large batch for a baking project. From traditional hand peeling and blanching to advanced techniques using food processors and innovative tools, there’s a solution for every walnut enthusiast. Remember, the key to success is patience, the right tools, and a bit of experimentation to find what works best for you. With these techniques in your arsenal, enjoying the pure, delicious flavor of walnut nutmeat has never been easier. Happy peeling!


0 comments