Introduction
In the realm of comfort foods, nothing quite compares to a steaming bowl of mung bean and rice porridge. This timeless dish, often cherished for its soothing texture and nutritious benefits, is a staple in many cuisines across Asia. Whether you’re looking to warm up on a chilly day or simply indulge in a hearty meal, mastering the art of quickly cooking mung bean and rice porridge can be a rewarding culinary endeavor.
However, achieving the perfect balance of cooked grains and tender beans in a short amount of time can seem like a daunting task. Fear not, for in this comprehensive guide, we’ll unravel the secrets and tips that seasoned chefs and home cooks alike rely on to whip up this nourishing dish in no time. From pre-soaking techniques to clever cooking methods, read on to discover how you can elevate your porridge-making skills and enjoy a delicious, nutritious bowl every time.
Section 1: Understanding the Ingredients
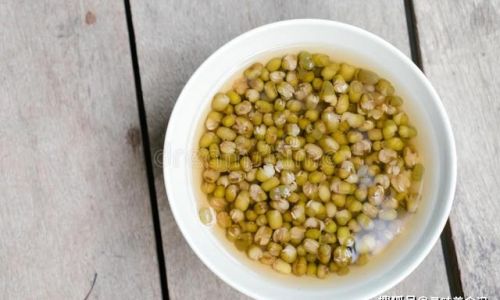
Before diving into the cooking process, it’s crucial to have a solid understanding of the ingredients you’ll be working with. Mung beans and rice are the cornerstone of this porridge, each contributing its unique flavor and texture.
Mung Beans: A Nutritious Legacy
Mung beans, also known as green grams or moong beans, are small, greenish-yellow legumes that boast a myriad of health benefits. They are rich in protein, fiber, vitamins, and minerals, making them an excellent choice for those seeking a nutritious meal. When cooked, mung beans transform into a creamy, tender consistency that complements the rice perfectly.
Rice: The Staple Grain
Rice, on the other hand, serves as the backbone of the porridge, providing structure and a mild, neutral flavor that allows the mung beans to shine. Short-grain rice, such as Japanese or Korean varieties, tends to work best for porridge due to its ability to absorb liquid and create a creamy texture. However, medium-grain or even some long-grain rice varieties can also be used, depending on your personal preference.
Water or Broth: The Liquid Base
The liquid base of your porridge can make a significant difference in its final flavor. While water is the simplest and most straightforward choice, using a light vegetable or chicken broth can add an extra layer of depth and complexity. If you’re aiming for a vegan or vegetarian option, vegetable broth is an excellent alternative.
Optional Ingredients: Enhancing Flavor and Nutrition
Feel free to experiment with various optional ingredients to tailor your porridge to your taste. A pinch of salt can enhance the flavors, while a drizzle of sesame oil or a sprinkle of chopped herbs like cilantro or parsley can add a fresh, aromatic touch. For added sweetness, a spoonful of honey, maple syrup, or even a few dates can be incorporated.
Section 2: Preparation Techniques for Quick Cooking
The key to quickly cooking mung bean and rice porridge lies in efficient preparation techniques. By taking a few extra steps before you start cooking, you can significantly reduce the overall cooking time and ensure a perfect result.
Pre-Soaking the Mung Beans
One of the most effective ways to speed up the cooking process is to pre-soak the mung beans. Soaking helps to soften the beans, making them cook faster and more evenly. Here’s how to do it:
- Rinse Thoroughly: Start by rinsing the mung beans under cold running water to remove any dirt or debris.
- Soak Overnight: Place the rinsed beans in a bowl or container and cover them with at least two inches of water. Allow them to soak for 6-8 hours, or overnight, for best results.
- Drain and Rinse: Once the soaking period is over, drain the beans and rinse them again under cold water. This removes any excess starch and helps prevent the porridge from becoming too thick.
Rinsing the Rice
While rice doesn’t necessarily need to be soaked like mung beans, rinsing it is an important step that should not be overlooked. Rinsing removes excess starch, which can prevent the porridge from becoming gluey or overly thick. Here’s how to do it:
- Use a Fine Mesh Strainer: Place the rice in a fine mesh strainer.
- Run Under Cold Water: Rinse the rice under cold running water, gently stirring it with your hands to ensure all grains are washed.
- Drain Well: Shake the strainer gently to drain off any excess water.
Section 3: Cooking Methods for Quick Results
Now that your ingredients are properly prepared, it’s time to cook your mung bean and rice porridge. Here, we’ll explore two effective cooking methods: the stovetop method and the pressure cooker method.
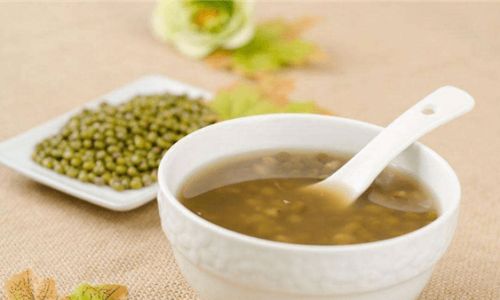
Stovetop Method: Classic and Reliable
The stovetop method is a straightforward, classic way to cook porridge. It requires a bit of patience and attention, but with the right techniques, you can achieve delicious results in no time.
Step-by-Step Guide:
- Combine Ingredients: In a heavy-bottomed pot or saucepan, combine the soaked and rinsed mung beans, rinsed rice, and enough water or broth to cover by about two inches.
- Bring to a Boil: Place the pot over medium-high heat and bring the mixture to a rolling boil.
- Reduce Heat and Simmer: Once boiling, reduce the heat to low and let the porridge simmer, uncovered, for about 20-25 minutes, stirring occasionally to prevent sticking.
- Check for Doneness: After 20-25 minutes, taste a few grains of rice and beans to check for doneness. They should be tender but not mushy. If needed, continue simmering for an additional 5-10 minutes.
- Season and Serve: Once cooked, remove the pot from heat and stir in any desired seasonings or additional ingredients. Allow the porridge to cool slightly before serving.
Pressure Cooker Method: Fast and Efficient
For those who prefer a faster cooking time, a pressure cooker is an invaluable tool. Pressure cooking significantly reduces the cooking time while preserving the flavors and nutrients of the ingredients.
Step-by-Step Guide:
- Prepare the Pressure Cooker: Add the soaked and rinsed mung beans, rinsed rice, and enough water or broth to your pressure cooker. The liquid level should be just below the maximum fill line.
- Seal and Cook: Secure the lid and set the pressure cooker to high pressure. Cook for about 10-12 minutes, depending on your pressure cooker model and the desired texture of the porridge.
- Natural Release: Once the cooking time is up, allow the pressure to release naturally for about 10-15 minutes. This helps to ensure that the beans and rice are tender and creamy.
- Quick Release (if Needed): If you’re in a rush, you can carefully perform a quick pressure release by opening the pressure valve. However, note that this may result in a slightly firmer texture.
- Stir and Serve: Open the lid, stir the porridge well, and add any desired seasonings or additional ingredients. Serve hot.
Section 4: Tips and Tricks for Perfect Porridge
Even with the right preparation and cooking methods, achieving the perfect mung bean and rice porridge can still be a bit of an art. Here are some expert tips and tricks to help you elevate your porridge-making skills:
Adjust the Liquid Ratio: The ratio of liquid to solid ingredients can make a big difference in the final consistency of your porridge. If you prefer a thicker porridge, reduce the amount of liquid slightly. For a thinner, soupier consistency, increase the liquid.
Add Aromatics: For an extra layer of flavor, consider adding aromatic ingredients like garlic, ginger, or onions while cooking. These can be sautéed in a bit of oil before adding the beans and rice, or simply added directly to the pot.
Use a Blender for Creaminess: If you prefer a smoother, creamier texture, you can use an immersion blender to blend a portion of the cooked porridge until smooth. Alternatively, you can transfer a portion to a regular blender and blend until smooth, then stir it back into the pot.
Experiment with Flavors: Don’t be afraid to experiment with different flavors and ingredients. For instance, adding a splash of coconut milk can create a rich, tropical taste, while a handful of spinach or kale can add a nutritious, earthy flavor.
Store and Reheat Properly: If you have leftovers, store them in an airtight container in the refrigerator for up to 3 days. When reheating, add a splash of water or broth to thin out the porridge if it has thickened during storage.
Conclusion
In conclusion, mastering the art of quickly cooking mung bean and rice porridge is a rewarding endeavor that can yield delicious, nutritious meals in no time. By understanding your ingredients, preparing them properly, and choosing the right cooking method, you can enjoy a perfect bowl of porridge

0 comments