Introduction
In the realm of baking, the process of transforming a simple mixture of flour, water, yeast, and other ingredients into a fluffy, airy loaf of bread or a delicate pastry is nothing short of magical. Yet, this magic doesn’t happen overnight or by chance; it requires meticulous attention to detail, patience, and an understanding of the fundamental principles involved. One crucial step in this journey is proofing, or waking, the dough. Proofing is the period during which yeast ferments, causing the dough to rise and develop the flavor, texture, and structure essential for a successful baked good. This comprehensive guide aims to demystify the art of proofing dough, offering insights into why it’s important, how to do it correctly, and troubleshooting common issues that bakers may encounter.
Understanding the Role of Yeast
Before diving into the specifics of proofing, it’s essential to grasp the role of yeast in dough fermentation. Yeast, a single-celled fungi, is the primary agent responsible for dough rising. When yeast comes into contact with moisture, sugar (naturally present in flour or added as an ingredient), and warm temperatures, it begins to consume the sugars, producing carbon dioxide and alcohol as byproducts. The carbon dioxide gas gets trapped within the gluten network formed by the flour’s proteins, causing the dough to expand and rise.

There are two main types of yeast used in baking: active dry yeast and instant yeast (also known as rapid-rise or bread machine yeast). Active dry yeast requires activation in warm water before being incorporated into the dough, while instant yeast can be added directly to the dry ingredients. Both types of yeast are viable options, but understanding their differences can help bakers make informed decisions based on their recipes and preferences.
The Importance of Proofing
Proofing serves several purposes in the baking process:
- Flavor Development: As yeast ferments, it breaks down complex sugars into simpler ones, enhancing the dough’s overall flavor profile.
- Texture Improvement: Proper proofing ensures that the gluten structure relaxes, making the dough easier to shape and resulting in a softer, more tender crumb.
- Volume Increase: The carbon dioxide produced during fermentation creates pockets of gas that expand the dough, contributing to its final rise and volume.
- Baking Uniformity: Well-proofed dough bakes more uniformly, reducing the risk of dense spots or uneven browning.
The Proofing Process: Step-by-Step
-
Initial Mixing and Kneading
- Begin by combining all dry ingredients, including flour, salt, and yeast (if using active dry, dissolve it in warm water first).
- Gradually add liquid ingredients, mixing until a shaggy dough forms.
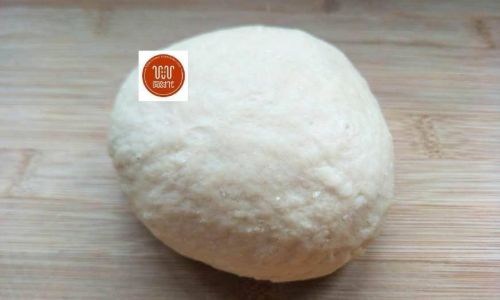
- Transfer the dough to a lightly floured surface and knead for about 8-10 minutes, or until it becomes smooth, elastic, and slightly tacky but not sticky.
-
First Proofing (Bulk Fermentation)
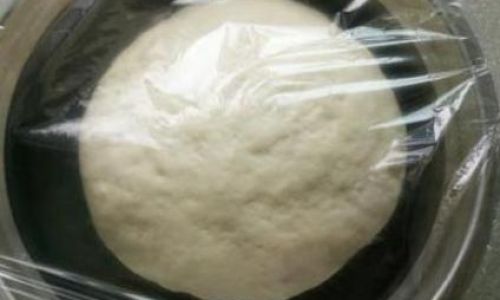
- Place the kneaded dough in a lightly oiled bowl, cover it with a damp cloth or plastic wrap, and let it rest in a warm, draft-free place.
- Ideal proofing temperatures range between 75°F to 85°F (24°C to 29°C). Too cold will slow down fermentation, while too hot can kill the yeast.
- Allow the dough to rise until it has doubled in size, which can take anywhere from 1 to 2 hours, depending on the ambient temperature and yeast activity.
-
Shaping and Second Proofing
- Once the dough has doubled, gently deflate it by pressing down with your拳头, then divide and shape it into your desired forms (e.g., loaves, rolls, or buns).
- Place the shaped dough on parchment paper or a lightly floured surface, cover with a clean kitchen towel, and let it proof again until it has risen to about 1.5 times its original size. This second proof, also known as final proofing, typically takes 30 minutes to 1 hour.
-
Baking
- Preheat your oven to the specified temperature called for in your recipe.
- Once the dough has finished proofing, carefully transfer it to the prepared baking surface (e.g., a greased loaf pan, baking stone, or parchment-lined sheet pan).
- Bake according to the recipe’s instructions, ensuring to rotate the pans halfway through for even baking.
Troubleshooting Common Proofing Issues

-
Dough Not Rising
- Cause: Dead yeast, incorrect temperature, insufficient moisture, or too much salt.
- Solution: Check the expiration date of your yeast and ensure it’s stored properly. Use warm water (not hot) to activate yeast. Adjust the dough’s hydration levels and salt content according to your recipe.
-
Dough Rising Too Quickly
- Cause: Too warm proofing environment.
- Solution: Reduce the proofing temperature or move the dough to a cooler spot.
-
Dense, Gummy Crumb
- Cause: Over-proofed dough or insufficient gluten development.
- Solution: Monitor proofing times closely and avoid over-handling the dough during shaping. Ensure adequate kneading to develop gluten.
-
Collapsed Dough After Baking
- Cause: Under-proofed dough, overheated oven, or sudden temperature change.
- Solution: Allow the dough to proof fully before baking. Use an oven thermometer to ensure accurate temperatures. Avoid opening the oven door frequently during baking.
-
Uneven Rising
- Cause: Uneven shaping or proofing in an uneven environment.
- Solution: Shape the dough evenly and proof it in a consistent environment, ideally using a proofing box or creating a makeshift one with a warm oven (turned off) and a bowl of hot water.
Conclusion
Proofing dough is a delicate balance of science and art, requiring patience, attention to detail, and a bit of practice. By understanding the role of yeast, the importance of proofing, and the steps involved in the process, bakers can achieve consistently successful results. Whether you’re a seasoned professional or a home baker just starting out, mastering the art of proofing will elevate your baking to new heights, transforming simple ingredients into delicious, fluffy creations that delight the senses. Happy baking!


0 comments