Table of content
- Key Enemies of Dried Shrimp
- 1. Source Selection
- 2. Sorting and Cleaning
- 1. Airtight Containers
- 2. Vacuum Sealing
- 3. Desiccant Packets
- 1. Temperature
- 2. Humidity Management
- 3. Light Protection
- 1. Oxygen Absorbers
- 2. Freeze-Drying
- 3. Curing with Salt or Sugar
- 1. Visual Cues
- 2. Olfactory Tests
- 3. Tactile Checks
- 1. Flavor Boosters
- 2. Pet Treats
- 1. Asian Techniques
- 2. Mediterranean Methods
- 1. Myth: “Refrigeration Is Unnecessary”
- 2. Myth: “Freezing Ruins Texture”
- 3. Myth: “Old Shrimp Is Safe If It Smells Fine”
- 1. Batch Preservation
- 2. Upcycling
Dried shrimp, a pantry staple in many cuisines, is prized for its intense umami flavor and versatility in dishes ranging from soups and stir-fries to sauces and condiments. However, preserving dried shrimp properly is crucial to maintain its texture, aroma, and nutritional value. Improper storage can lead to spoilage, loss of flavor, or even contamination. This comprehensive guide explores actionable techniques to extend the shelf life of dried shrimp while retaining its culinary appeal.
Understanding the Basics of Dried Shrimp Preservation
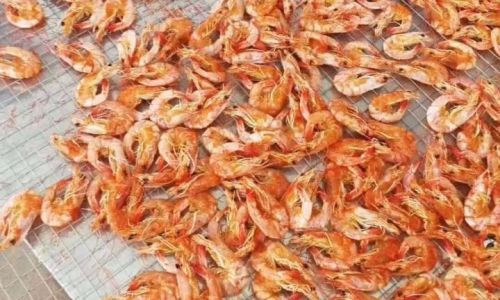
Dried shrimp is typically made by sun-drying or using commercial dehydrators to remove moisture from fresh shrimp. The absence of water inhibits microbial growth, but the product remains susceptible to environmental factors like humidity, oxygen, and light. Effective preservation hinges on controlling these elements to prevent oxidation, mold, and flavor degradation.
Key Enemies of Dried Shrimp
- Humidity: Even trace moisture can rehydrate shrimp, creating a breeding ground for bacteria and mold.
- Oxygen: Exposure to air accelerates oxidation, causing rancidity and a stale taste.
- Light: UV rays break down pigments and nutrients, fading color and reducing nutritional content.
- Temperature Fluctuations: Warm environments speed up chemical reactions that compromise quality.
Pre-Storage Preparation: Quality Matters
Before storing dried shrimp, ensure it is in optimal condition.
1. Source Selection
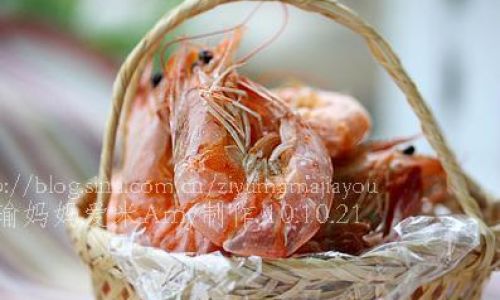
Purchase dried shrimp from reputable suppliers. High-quality products are uniformly dried, free from debris, and have a vibrant orange-pink hue. Avoid shrimp with a musty smell or sticky texture, as these indicate improper drying or contamination.
2. Sorting and Cleaning
- Remove Impurities: Gently pick out any shells, heads, or foreign particles.
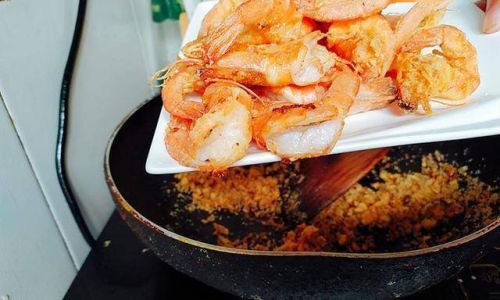
- Optional Roasting: For an extra layer of protection, lightly roast dried shrimp in a dry pan over low heat. This eliminates residual moisture and enhances flavor while killing potential pathogens.
Optimal Storage Containers
The right container creates a barrier against external threats.
1. Airtight Containers
- Glass Jars: Preferably amber or opaque to block light. Ensure jars are sterilized and completely dry before use.
- Metal Tins: Stainless steel or tin-plated containers with tight-fitting lids. Avoid reactive metals like aluminum.
- Plastic Containers: Use food-grade, BPA-free plastic with airtight seals. Avoid thin, flexible bags that allow air penetration.
2. Vacuum Sealing
Vacuum-sealed bags remove oxygen, drastically slowing oxidation. This method is ideal for long-term storage (6–12 months) when combined with refrigeration or freezing.
3. Desiccant Packets
Add food-safe silica gel or rice-based desiccants to absorb residual moisture. Replace packets every 3–4 months.
Environmental Control: Location, Location, Location
Where you store dried shrimp is as critical as how you store it.
1. Temperature
- Cool Environments: Store between 50–68°F (10–20°C). Avoid areas near stoves, ovens, or windows.
- Refrigeration: For prolonged freshness (up to 1 year), refrigerate in airtight containers.
- Freezing: Freeze dried shrimp for 18–24 months. Thaw in the refrigerator before use to prevent condensation.
2. Humidity Management
- Low-Humidity Zones: Use dehumidifiers in storage areas if you live in a humid climate.
- Avoid Basements/Attics: These areas are prone to temperature swings and dampness.
3. Light Protection
- Dark Cabinets: Store containers in cabinets away from direct sunlight.
- Opaque Bags: If using resealable plastic bags, opt for black or foil-lined varieties.
Advanced Techniques for Preservation
For enthusiasts seeking maximum shelf life, consider these methods.

1. Oxygen Absorbers
Place 50–100cc oxygen absorbers in airtight containers to eliminate oxygen. This method extends shelf life to 2–3 years when combined with cool storage.
2. Freeze-Drying
While labor-intensive, freeze-drying shrimp at home using dry ice or specialized equipment removes 98–99% of moisture, creating ultra-lightweight shrimp with a 5+ year shelf life.
3. Curing with Salt or Sugar
Toss dried shrimp lightly in sea salt or sugar before storing. This draws out residual moisture and adds a preservative layer. Rinse before use to avoid over-salting dishes.
Signs of Spoilage and How to Avoid Them
Regularly inspect stored shrimp for deterioration.
1. Visual Cues
- Discoloration: Fading to gray or brown indicates oxidation.
- Mold: Fuzzy patches (white, green, or black) are a clear sign of contamination.
2. Olfactory Tests
- Rancid Odor: A sharp, fishy, or ammonia-like smell suggests spoilage.
- Loss of Aroma: Fading fragrance indicates flavor degradation.
3. Tactile Checks
- Stickiness: Moisture absorption has occurred.
- Brittleness: Over-drying may cause shrimp to crumble, though this is less concerning than spoilage.
Creative Ways to Use Aging Dried Shrimp
Even slightly aged shrimp can be repurposed creatively.
1. Flavor Boosters
- Powdered Shrimp: Grind older shrimp into a powder for use as a seasoning.
- Broth Concentrate: Simmer in water to extract flavor for soups or sauces.
2. Pet Treats
Dehydrate further and offer as occasional treats to dogs or cats (ensure no added salt or spices).
Cultural and Regional Preservation Methods
Traditional practices offer time-tested wisdom.
1. Asian Techniques
- Lime Pickling: In Southeast Asia, shrimp is sometimes pickled in lime juice before drying to inhibit bacteria.
- Clay Pot Storage: Airtight clay pots regulate humidity naturally.
2. Mediterranean Methods
- Olive Oil Submersion: Store dried shrimp in olive oil with herbs like oregano or rosemary.
Debunking Common Myths
Separate fact from fiction in preservation lore.
1. Myth: “Refrigeration Is Unnecessary”
While dried shrimp lasts longer than fresh, refrigeration significantly extends its life, especially in humid climates.
2. Myth: “Freezing Ruins Texture”
Properly sealed, frozen shrimp retains crispness. Thaw slowly to prevent sogginess.
3. Myth: “Old Shrimp Is Safe If It Smells Fine”
Spoilage bacteria often produce toxins that aren’t detectable by smell or taste. When in doubt, discard.
Sustainability and Cost-Efficiency
Preserving dried shrimp reduces food waste and saves money.
1. Batch Preservation
Buy in bulk during sales and portion into vacuum-sealed bags for year-round use.
2. Upcycling
Use shrimp scraps (heads, shells) to make stock before discarding.
Final Thoughts: A Pantry Staple Reimagined
Dried shrimp is more than a flavor enhancer—it’s a culinary bridge between tradition and innovation. By mastering preservation techniques, you ensure this ingredient remains a reliable ally in your kitchen. Whether you’re a home cook or a professional chef, these methods empower you to harness the full potential of dried shrimp while minimizing waste.

Conclusion
Preserving dried shrimp requires a blend of science and practicality. By controlling humidity, oxygen, light, and temperature, and by using appropriate containers and additives, you can extend its shelf life to over two years. Regular inspections and creative repurposing further ensure nothing goes to waste. Embrace these techniques, and your dried shrimp will reward you with unparalleled flavor and versatility, dish after dish.

0 comments