Introduction
Hand-pulled pancakes, also known as shouzhua bing in Chinese cuisine, have gained immense popularity worldwide for their unique texture and versatility. These thin, layered flatbreads are a staple in street food and home kitchens alike, offering a delightful combination of crispy edges and soft, chewy interiors. While making hand-pulled pancakes from scratch requires skill and patience, store-bought versions provide a convenient shortcut for busy cooks. This article will guide you through transforming a supermarket-bought hand-pulled pancake into a restaurant-quality dish, complete with tips for customization and troubleshooting common pitfalls. Whether you’re a novice in the kitchen or a seasoned home chef, this guide will ensure your pancakes turn out golden, flaky, and utterly delicious every time.
Understanding Store-Bought Hand-Pulled Pancakes
Before diving into the cooking process, it’s essential to grasp what you’re working with. Most supermarkets offer frozen or refrigerated hand-pulled pancakes, which are pre-layered and ready to cook. These pancakes are typically made from wheat flour, water, oil, and salt, with some variations including dairy or spices. The key to their signature texture lies in the layering technique, which creates air pockets that puff up during cooking. Unlike traditional recipes that require stretching and folding the dough manually, store-bought versions eliminate the need for advanced dough-handling skills, making them accessible to everyone.
Ingredients and Tools You’ll Need
To prepare your hand-pulled pancake, gather the following:
- 1 store-bought hand-pulled pancake (frozen or refrigerated)
- 1–2 tablespoons of cooking oil (neutral oils like vegetable or canola work best, though sesame oil adds flavor)
- Optional toppings/fillings: eggs, scallions, cheese, spicy sauce, or cooked meats
- Tools:
- A non-stick skillet or cast-iron pan (10–12 inches in diameter)
- A spatula (preferably a fish spatula for flipping delicate pancakes)
- Tongs (for adjusting the pancake during cooking)
- A pastry brush (for even oil application)
- A plate lined with paper towels (to drain excess oil)
Step-by-Step Preparation Guide

Thawing the Pancake (If Frozen)
If your pancake is frozen, transfer it to the refrigerator 24 hours before cooking to thaw gradually. Avoid microwaving, as this can make the dough gummy. For same-day use, place the frozen pancake on a plate and defrost it at room temperature for 30–45 minutes. Gently separate any stuck layers with your fingers, but avoid pulling too aggressively, as this may tear the dough.
Preparing the Pan
Heat your skillet over medium-low heat. A common mistake is using high heat, which risks burning the exterior while leaving the interior raw. Allow the pan to warm for 2–3 minutes. If using a cast-iron pan, ensure it’s well-seasoned to prevent sticking.
Oil Application
Dip a pastry brush into the oil and lightly coat the pan’s surface. Alternatively, drizzle 1 teaspoon of oil and spread it with a wadded paper towel. Too much oil will make the pancake greasy, while too little will cause sticking. Aim for a thin, even layer.
Cooking the Pancake
- Laying the Dough: Carefully place the thawed pancake in the center of the pan. If the dough is stiff, let it sit for 30 seconds to soften before adjusting its shape.
- Initial Cooking: Cook the pancake for 2–3 minutes on medium-low heat. You’ll notice the edges beginning to curl and tiny bubbles forming on the surface.
- Flipping: Use a spatula to gently lift the edges and check for browning. Once the underside is golden, flip the pancake. Cook the second side for another 2–3 minutes.
- Pressing and Puffing: To encourage puffing, press the center of the pancake gently with the spatula. This helps distribute heat evenly and creates air pockets. If the pancake doesn’t puff, don’t worry—this often depends on the dough’s quality.
Achieving Crispy Layers
For extra crispiness, increase the heat to medium and cook for an additional 1–2 minutes per side. Monitor closely to prevent burning. Alternatively, brush the top layer with oil, flip, and cook until both sides are crisp.
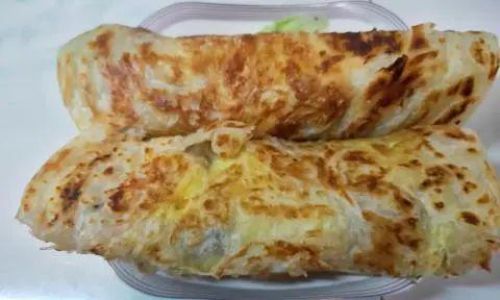
Adding Fillings (Optional)
For stuffed pancakes, follow these steps:
- Eggs: Crack an egg onto the pancake during the last minute of cooking. Spread it evenly with the spatula and cook until set.
- Scallions: Sprinkle chopped scallions over the pancake before flipping.
- Cheese: Add shredded cheese during the final 30 seconds and cover the pan to melt.
- Spicy Sauce: Brush the pancake with chili oil or sriracha before serving.
Final Touches
Transfer the cooked pancake to a plate. For a restaurant-style finish, brush the surface with a mixture of soy sauce, vinegar, and sesame oil, or sprinkle with sea salt and black pepper.
Tips for Perfect Hand-Pulled Pancakes
- Temperature Control: Maintain medium-low heat to ensure even cooking. High heat burns the exterior, while low heat dries out the dough.
- Oil Consistency: Use just enough oil to create a golden crust without making the pancake greasy.
- Flipping Technique: Avoid forceful flipping, which can deflate the layers. Use a gentle sliding motion with the spatula.
- Storage: If cooking multiple pancakes, keep them warm in a preheated oven (200°F/93°C) on a wire rack to prevent sogginess.
- Dough Quality: If the pancake tears during cooking, the dough may be too dry. Brush it lightly with water before frying.
Creative Variations
- Sweet Pancakes: Spread Nutella, honey, or fruit jam over the cooked pancake and roll it into a wrap.
- Vegetarian Delight: Top with sautéed mushrooms, spinach, and feta cheese.
- Breakfast Sandwich: Place a fried egg, bacon, and avocado between two pancakes for a hearty meal.
- Dessert Style: Dust with powdered sugar and cinnamon, then serve with whipped cream.
Troubleshooting Guide
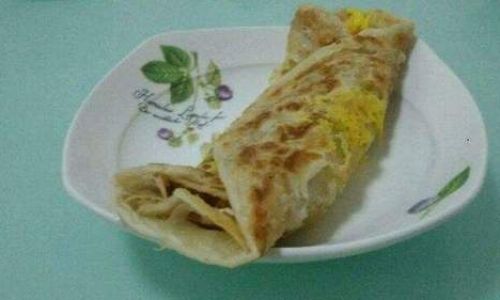
- Pancake is doughy inside: Increase cooking time by 1–2 minutes per side.
- Uneven browning: Rotate the pan halfway through cooking to distribute heat evenly.
- Sticking to the pan: Ensure the pan is adequately oiled and preheated.
- Too crispy: Reduce cooking time or lower the heat.
Serving Suggestions
Hand-pulled pancakes pair wonderfully with dipping sauces like soy sauce mixed with vinegar and chili flakes, or a creamy garlic aioli. For a complete meal, serve them alongside congee, stir-fried vegetables, or grilled meats. They also make excellent wraps for leftovers—try stuffing them with roasted chicken, cucumber slices, and hoisin sauce.
Storage and Reheating
Leftover pancakes can be stored in an airtight container in the refrigerator for up to 3 days. To reheat, wrap them in foil and bake at 350°F (175°C) for 5–7 minutes, or pan-fry briefly on both sides. Avoid microwaving, as this softens the texture.
Conclusion
Preparing store-bought hand-pulled pancakes is a rewarding culinary adventure that requires minimal effort but yields maximum flavor. By mastering the cooking techniques outlined in this guide, you can elevate a simple supermarket find into a gourmet dish that impresses family and friends alike. Experiment with fillings, sauces, and cooking methods to discover your signature style. Remember, practice makes perfect—so don’t be discouraged by a few imperfect pancakes along the way. With patience and creativity, you’ll soon be crafting hand-pulled pancakes that rival those from your favorite street vendor. Happy cooking!

0 comments