Table of content
Daikon radish, a root vegetable celebrated for its mild, slightly peppery taste and refreshing crunch, is a staple in Asian cuisine. When pickled, it transforms into a tangy, crispy delight that elevates meals, from rice bowls to sandwiches. Yet, achieving the perfect balance of flavor and texture requires precision, patience, and a deep understanding of the pickling process. This article delves into the science and craft of pickling daikon radish, ensuring your homemade batch is both delicious and satisfyingly crisp.
The Science Behind Crispy Pickled Daikon
Crispiness in pickled vegetables is not merely a textural preference—it’s a culinary achievement rooted in science. When daikon is pickled, its cell walls undergo a delicate interplay of dehydration and rehydration. Salt, a cornerstone of pickling, draws excess moisture from the radish through osmosis, preventing sogginess. Simultaneously, the acidity of vinegar or citrus juice denatures proteins in the vegetable, locking in firmness. Mastering this balance is key to avoiding limp, over-softened pickles.
Ingredients: The Foundation of Flavor
Selecting the right ingredients is the first step toward pickling success. Below is a breakdown of essential components and their roles:
-
Daikon Radish (1 large, approximately 1.5 pounds):
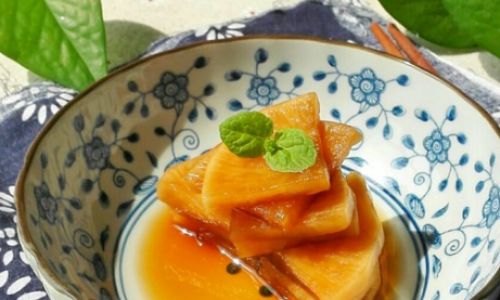
Choose firm, unblemished roots with vibrant white flesh. Avoid those with soft spots or wrinkled skin, as they may indicate age or improper storage.
-
Kosher Salt or Sea Salt (2 tablespoons):
Use non-iodized salt to prevent bitterness. Salt extracts moisture and seasons the radish.
-
Rice Vinegar or Apple Cider Vinegar (1 cup):
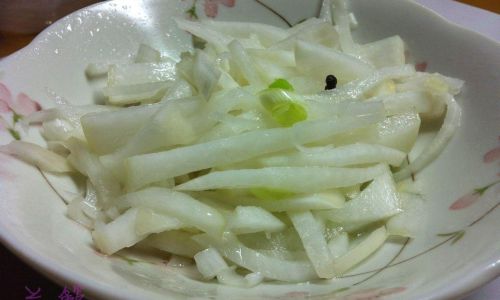
Rice vinegar imparts a mild, clean acidity, while apple cider vinegar adds a subtle fruity note. Avoid distilled white vinegar, which can be overly harsh.
-
Sugar (1/4 cup, adjust to taste):
Granulated sugar balances acidity and saltiness. For a low-sugar alternative, use honey or maple syrup sparingly.
-
Water (1 cup):
Use filtered water to avoid chlorine, which can inhibit fermentation (if using a fermentation method).
-
Optional Flavor Enhancers:
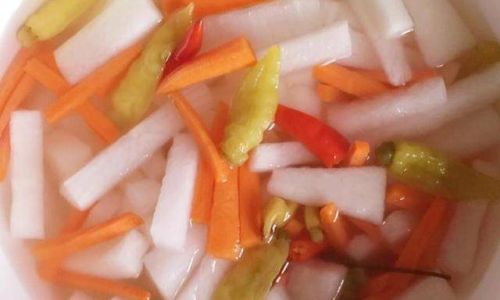
- Garlic (3 cloves, sliced): Adds aromatic depth.
- Ginger (1 tablespoon, julienned): Infuses a warm, peppery kick.
- Red Pepper Flakes (1/2 teaspoon): For a hint of heat.
- Bay Leaf or Mustard Seeds (1/2 teaspoon): Enhances complexity.
Step-by-Step Pickling Process
Preparing the Daikon
-
Wash and Peel: Rinse the daikon under cool water, scrubbing gently to remove dirt. Trim the ends, then peel using a vegetable peeler or knife. While peeling is optional, it eliminates bitterness from the outer skin.
-
Cutting Technique: The way you slice the daikon affects both texture and pickling time:
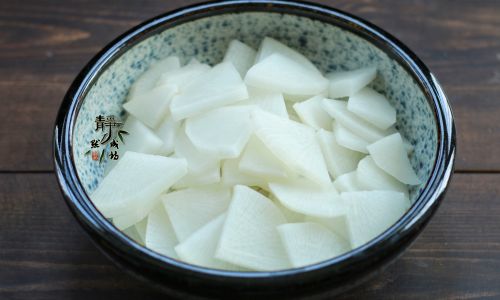
- Thin Rounds (1/8-inch thick): Quick to pickle, ideal for immediate use.
- Matchsticks (2-3 inches long): Retain crunch longer, perfect for storage.
- Half-Moons: A decorative option for garnishes.
Salting: The Crispness Catalyst
-
Layer and Salt: In a large bowl, layer the daikon slices with salt. Use your hands to massage the salt evenly, ensuring every piece is coated.
-
Rest and Drain: Let the daikon sit for 1–2 hours. During this time, salt draws out moisture, creating a brine. You’ll notice the radish slices softening slightly—this is normal.
-
Rinse and Dry: Thoroughly rinse the daikon under cold water to remove excess salt. Pat dry with a clean kitchen towel or paper towels. Proper drying prevents dilution of the pickling brine.
Preparing the Brine
-
Combine Liquids: In a saucepan, whisk together vinegar, water, sugar, and any optional seasonings (garlic, ginger, etc.).
-
Heat Gently: Bring the mixture to a simmer over medium heat, stirring until sugar dissolves. Avoid boiling, as high heat can reduce acidity and alter flavors.
-
Cool Slightly: Let the brine cool for 5 minutes before pouring it over the daikon. Hot brine jumpstarts the pickling process but can soften the radish if poured immediately off the stove.
Pickling Methods: Quick vs. Fermented
Quick Pickle (Refrigerator Method):
- Pack Jars: Place the dried daikon into sterilized jars, leaving 1/2-inch headspace.
- Pour Brine: Fill jars with the warm brine, ensuring all slices are submerged.
- Cool and Store: Let cool to room temperature, then seal and refrigerate. Crispness develops within 4–6 hours and peaks at 24–48 hours.
Fermented Pickle (Shelf-Stable Method):
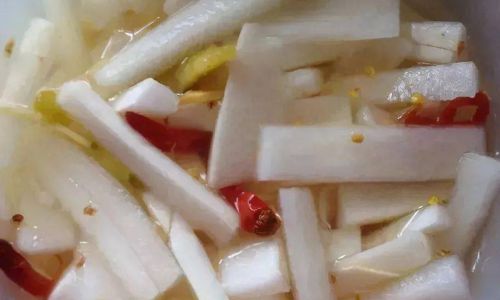
- Add Whey or Starter Culture (Optional): For probiotic benefits, mix 2 tablespoons of whey (from strained yogurt) or a saltwater brine starter into the brine.
- Pack Jars: Layer daikon and brine in jars, leaving 1-inch headspace.
- Ferment: Cover jars with airlock lids or cheesecloth secured with a rubber band. Store in a cool, dark place (60–70°F/15–21°C) for 3–7 days. Burp jars daily to release CO2.
- Refrigerate: Once desired tanginess is achieved, transfer to the fridge. Fermented pickles improve with age, lasting up to 6 months.
Achieving Maximum Crispiness: Pro Tips
- Use a Mandoline Slicer: Uniform thickness ensures even pickling and texture.
- Add Tannins: Include a grape leaf, oak leaf, or 1/4 teaspoon of black tea in the jar. Tannins firm the pectin in vegetables, enhancing crispness.
- Avoid Over-Processing: Do not boil the daikon; heat from the brine is sufficient.
- Store Properly: Always use clean utensils to prevent contamination. Submerged pickles stay crisp longer.
Troubleshooting Common Issues
- Soggy Texture: Over-salting or insufficient drying before brining. Next time, reduce salt by 25% and pat radish drier.
- Mushy Pickles: Over-fermentation or high storage temperatures. Use a thermometer to monitor fermentation environment.
- Cloudy Brine: Harmless in fermented pickles but indicates spoilage in refrigerator pickles. Discard if accompanied by off-odors.
Flavor Variations to Experiment With
- Spicy Daikon: Add 2–3 sliced Thai chilis or a teaspoon of gochugaru (Korean red pepper flakes).
- Citrus-Infused: Replace 1/4 cup vinegar with fresh lime or lemon juice.
- Sweet and Sour: Increase sugar to 1/3 cup and add 1 tablespoon of mirin.
- Umami Boost: Stir in 1 tablespoon of soy sauce or fish sauce into the brine.
Serving Suggestions
- Banh Mi Sandwiches: Layer pickled daikon with carrots, cilantro, and grilled pork.
- Rice Bowls: Top with a fried egg, avocado, and sesame seeds.
- Salads: Toss with cucumber, cherry tomatoes, and a sesame-ginger dressing.
- As a Condiment: Serve alongside grilled meats, dumplings, or spring rolls.
Health Benefits of Pickled Daikon
Beyond its culinary appeal, pickled daikon offers nutritional perks:
- Digestive Aid: Fermented varieties contain probiotics that support gut health.
- Low in Calories: A 1/4-cup serving provides just 10 calories, making it diet-friendly.
- Rich in Vitamins: Daikon is a source of vitamin C, folate, and potassium.
- Detox Support: Compounds in daikon may aid liver function and reduce inflammation.
Conclusion: The Joy of Homemade Pickles
Pickling daikon radish is both an art and a science—a dance of timing, temperature, and taste. Whether you prefer the instant gratification of refrigerator pickles or the complex flavors of fermentation, mastering this technique opens doors to endless culinary creativity. Experiment with spices, adjust sweetness, and share your crispy creations with friends and family. With practice, you’ll discover that the perfect pickle is not just a condiment but a testament to the joy of homemade food.
Final Tip: Label your jars with the pickling date and ingredients. This small step ensures you’ll replicate successes and avoid repeating any “flavor experiments” that miss the mark. Happy pickling!


0 comments