Introduction
Mantis shrimp, known for their vibrant colors and delicate flavor, are a prized delicacy in many coastal cuisines. However, their tough, spiked exoskeletons and unique anatomy make peeling them a daunting task for even seasoned cooks. Whether you’re preparing a seafood feast for guests or simply craving a taste of the ocean, mastering the art of peeling mantis shrimp efficiently is a skill worth acquiring. This article delves into proven techniques, tools, and secrets to streamline the process, ensuring you spend less time wrestling with shells and more time savoring the sweet, succulent meat. From kitchen hacks to little-known anatomical insights, we’ll equip you with everything you need to peel mantis shrimp like a pro.
Understanding Mantis Shrimp Anatomy
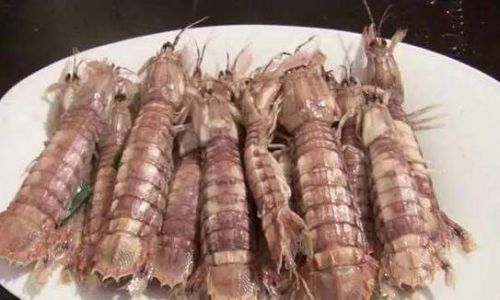
Before diving into peeling methods, it’s crucial to grasp the basic structure of mantis shrimp. Unlike traditional shrimp, these crustaceans have a robust, segmented carapace (head and thorax) fused with a long, flexible abdomen. Their tails are equipped with sharp spines, and their claws—though sometimes removed before sale—can deliver a painful nip if mishandled. The meat resides primarily in the tail section, with smaller morsels hidden beneath the carapace.
Key anatomical features to note:
- Carapace: The hard, armored shell covering the head and thorax.
- Abdomen: The flexible tail section containing the main meat.
- Telson: The尖端 of the tail, often pointed and spiky.
- Pereiopods: The legs and claws, which may require removal depending on the recipe.
By visualizing these parts, you’ll better understand where to apply pressure and which tools to use.
Essential Tools for Peeling Mantis Shrimp
While some chefs prefer minimalist approaches, the right tools can transform peeling from a chore into a breeze. Here’s a rundown of must-have items:
- Kitchen Shears: Heavy-duty scissors are indispensable for snipping through tough shells. Opt for models with serrated blades for better grip on slippery surfaces.
- Paring Knife: A small, sharp knife helps pry loose stubborn shells and remove veins.
- Cutting Board: Use a stable, non-slip board to prevent accidents.
- Gloves: Thick rubber or cut-resistant gloves protect your hands from spines and slippage.
- Bowl of Ice Water: Chilling the shrimp before peeling firms the meat, making it easier to remove intact.
Step-by-Step Peeling Guide
Follow this systematic approach to peel mantis shrimp with precision:
Step 1: Preparation
- Freeze Briefly: Place live mantis shrimp in the freezer for 10–15 minutes to numb them, reducing movement during handling.
- Rinse Thoroughly: Clean the shrimp under cold water to remove debris.
Step 2: Remove the Head
- Grasp the shrimp firmly by the carapace (head) with one hand and the abdomen (tail) with the other.
- Gently twist the head in a counterclockwise motion until it detaches. Discard the head or reserve it for stock.
Step 3: Devein
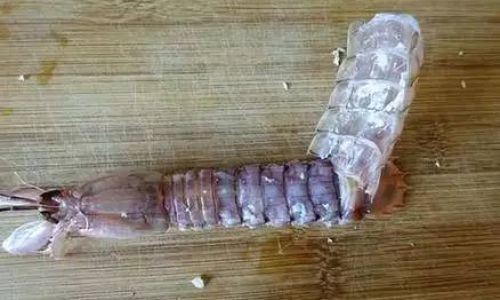
- Using a paring knife, make a shallow incision along the back of the tail (the “dorsal” side).
- Run the knife under the vein to lift it out. Rinse the tail to remove any residual grit.
Step 4: Peel the Shell
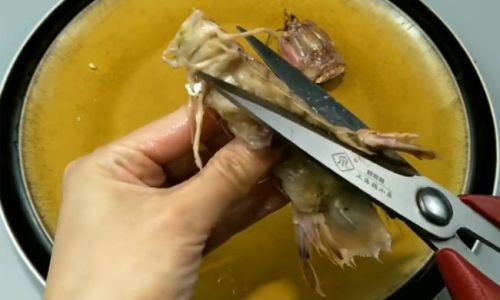
- Starting at the segment where the head was attached, use kitchen shears to cut through the shell on one side of the tail.
- Peel the shell away in sections, working from the incision toward the telson. For stubborn areas, use the shears to snip the shell into smaller pieces.
Step 5: Extract the Meat
- Once the shell is removed, gently squeeze the tail to loosen the meat.
- Pull the meat away from the telson, ensuring it detaches completely. If necessary, use the knife to sever any remaining attachments.
Step 6: Clean and Rinse
- Remove any remaining veins or internal organs.
- Rinse the meat under cold water and pat dry with paper towels.
Alternative Peeling Techniques
If the step-by-step method feels too laborious, try these time-saving hacks:
-
The Freeze-Thaw Method
Freeze mantis shrimp for 20–30 minutes, then thaw slightly. The expanding ice crystals loosen the meat from the shell, making peeling easier.
-
Boiling Briefly
Blanch the shrimp in boiling water for 30 seconds, then shock in ice water. The heat contracts the meat, separating it from the shell.
-
Using a Spoon
After removing the head, insert a sturdy spoon between the meat and the shell. Glide the spoon along the tail to release the meat in one piece.

Common Mistakes to Avoid
Even experts stumble occasionally. Here’s how to sidestep typical errors:
- Rushing the Process: Patience is key. Hasty peeling often results in torn meat or injuries.
- Neglecting Safety Gear: Always wear gloves—mantis shrimp spines are sharper than they appear!
- Overcooking: Boiling for too long toughens the meat. Stick to 30-second blanches if using heat.
- Discarding the Roe: Female mantis shrimp sometimes carry bright orange roe (eggs), a delicacy in some dishes. Check before discarding heads!
Creative Uses for Peeled Mantis Shrimp
Now that you’ve mastered peeling, explore these culinary applications:
- Stir-Fries: Toss peeled meat into a sizzling wok with garlic, ginger, and soy sauce for a quick weeknight meal.
- Ceviche: Marinate raw meat in citrus juices, chili, and herbs for a refreshing appetizer.
- Dumplings: Mince the meat and mix with pork fat for juicy shrimp dumplings.
- Salads: Combine with mango, avocado, and lime for a tropical twist.
Storage and Freshness Tips
Proper storage ensures your peeled mantis shrimp stays pristine:
- Short-Term: Place peeled meat in an airtight container with a damp paper towel. Refrigerate for up to 24 hours.
- Long-Term: Freeze in a single layer on a baking sheet, then transfer to a freezer bag. Consume within three months.
Conclusion
Peeling mantis shrimp need not be a battle of wits against a spiky adversary. With the right tools, techniques, and a dash of practice, you’ll soon find yourself effortlessly extracting plump, pristine meat. Whether you’re hosting a seafood banquet or experimenting with new recipes, these tips empower you to handle mantis shrimp with confidence. So next time you encounter these colorful crustaceans, embrace the challenge—and savor the rewards. Your taste buds (and dinner guests) will thank you!
Final Word: Like any culinary skill, peeling mantis shrimp improves with repetition. Don’t be discouraged by initial hiccups; every misstep is a lesson in disguise. Before long, you’ll wonder how you ever found this task intimidating. Happy peeling!




0 comments