Introduction
Peeling a hard-boiled egg should be a simple task, yet it often ends in frustration. One minute, you’re envisioning a perfectly smooth, oval canvas ready for salads, sandwiches, or deviled egg platters. The next, you’re left clutching a shell-mangled, pitted mess that resembles a moonscape more than a breakfast staple. The struggle is real—and it’s one that has puzzled home cooks and professional chefs alike for generations. But fear not! This comprehensive guide will unravel the mysteries of egg peeling, equipping you with science-backed methods, time-tested tricks, and innovative hacks to ensure your eggs emerge flawlessly every time. Say goodbye to sticky shells, wasted whites, and the sinking feeling of a ruined meal. Let’s dive into the world of egg peeling mastery.
Why Do Eggs Stick to Their Shells?
Before we tackle solutions, it’s essential to understand the enemy. Why do eggshells cling so tenaciously to the cooked white? The answer lies in a combination of factors:

- Egg Freshness: Fresh eggs have a lower pH level, which causes the inner membrane (the thin skin between the shell and the white) to adhere tightly to the white. As eggs age, their pH rises, loosening this bond.
- Cooking Method: Overcooking or rapid temperature changes can cause the egg white to bond with the shell.
- Cooling Process: Skipping the ice bath or improper shocking can leave the egg white vulnerable to sticking.
By addressing these root causes, you’ll be better equipped to prevent peeling disasters.
Preparation: The Foundation of Flawless Peeling
The journey to a perfectly peeled egg begins long before you crack the shell. Here’s how to set yourself up for success:
Choose Older Eggs
While fresh eggs are ideal for poaching or frying, older eggs (7–10 days old) are your best friends for hard-boiling. As eggs age, they lose moisture through their pores, creating a small air pocket between the shell and the white. This gap makes peeling easier.
Pro Tip: If you only have fresh eggs, add ½ teaspoon of baking soda to the cooking water. The alkaline solution raises the egg’s pH, loosening the membrane.
Storage Matters
Store eggs in their original carton, pointy end down. This position centers the yolk and reduces air pocket size, but don’t fret—even fresh eggs stored this way will age gracefully.
Room Temperature Eggs
Cold eggs dropped into boiling water are prone to cracking. Let them sit at room temperature for 15–30 minutes before cooking.
Cooking Methods: Boiling, Steaming, and Beyond
The way you cook your eggs can make or break your peeling game. Let’s explore three primary techniques:
Traditional Boiling
- Place eggs in a single layer in a saucepan.
- Cover with cold water by 1 inch.
- Add 1 teaspoon salt (to prevent cracking and raise water’s boiling point).
- Bring to a rolling boil, then cover, remove from heat, and let sit:
- 6 minutes for soft-boiled
- 8 minutes for medium
- 12 minutes for hard-boiled
- Immediately transfer to an ice bath.
Steaming
Steaming is gentler and more consistent than boiling, reducing the risk of overcooking:
- Place a steamer basket in a pot with 1 inch of water.
- Bring to a boil, add eggs, cover, and steam:
- 6 minutes for soft-boiled
- 11 minutes for hard-boiled
- Shock in ice water.
Sous Vide (For the Tech-Savvy)
Precision cooking ensures perfect results:
- Seal eggs in a vacuum bag (prick the wider end to prevent bursting).
- Cook at 194°F (90°C) for:
- 6 minutes (soft)
- 12 minutes (hard)
- Chill in ice water.
The Shocking Truth About Ice Baths
An ice bath isn’t just for cooling—it’s a peeling game-changer. Here’s why:
- Halts Cooking: Prevents overcooking, which makes whites rubbery and shell-adherent.
- Contracts the White: The sudden cold causes the egg white to shrink slightly, pulling away from the shell.
- Loosens Membranes: The shock weakens the bond between the shell and white.
Method:

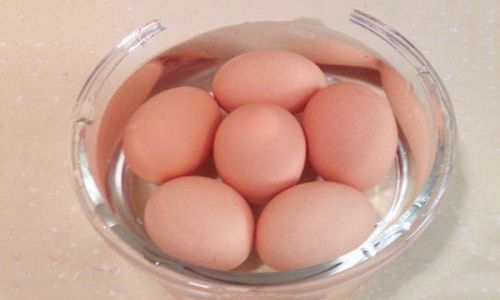
- Use a bowl large enough to submerge eggs completely.
- Add ice and cold water in a 1:1 ratio.
- Let eggs sit for 15 minutes.
Alternative: Run eggs under cold water for 5 minutes, shaking the colander gently to dislodge shells.
Peeling Techniques: From Novice to Ninja
Now for the main event—peeling. Master these methods, and you’ll never fear a hard-boiled egg again.
The Rolling Technique
Ideal for beginners, this method uses physics to your advantage:
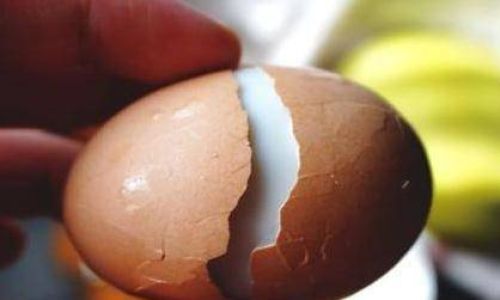
- Gently roll the egg on a hard surface to crack the shell all over.
- Peel from the wider end, where the air pocket resides.
- Rinse under running water to wash away debris.
Pro Tip: Use the edge of a spoon to nudge stubborn shells.
The Spoon Method
A bartender’s trick adapted for the kitchen:
- Crack the wider end.
- Slide a teaspoon between the shell and white, rotating the egg to loosen.
- The curved spoon edge glides smoothly, minimizing damage.
The Blowout Method
For the adventurous (and slightly messy):
- Crack the wider end.
- Peel a small circle around the air pocket.
- Place your lips over the hole and blow forcefully. The egg should pop out.
Warning: Have a napkin ready!
The Glass of Water Trick
A viral sensation for a reason:
- Fill a tall glass with water.
- Add the egg, cover, and shake vigorously for 20 seconds.
- The water seeps under the shell, lifting it away.
The Peel-Underwater Method
Perfect for delicate eggs:
- Fill a bowl with water.
- Peel the egg while submerged. The water acts as a lubricant, reducing friction.
Troubleshooting: When Eggs Fight Back
Even with the best techniques, you might encounter resistance. Here’s how to outsmart stubborn shells:
The Baking Soda Boost
Add ½ teaspoon to cooking water. The alkaline solution raises the egg’s pH, loosening membranes.
The Vinegar Soak
Soak cracked eggs in a vinegar-water solution (1:1) for 5 minutes. The acid dissolves calcium carbonate in the shell.

The Microwave Hack
For partially peeled eggs, microwave for 10 seconds. The heat expands the egg, pushing the shell away.
The “Crack and Soak” Method
- Crack the shell all over.
- Soak in cold water for 10 minutes.
- Peel under running water.
Advanced Tips: Elevate Your Egg Game
Ready to go pro? These tips will streamline your routine:
Batch Peeling
Peel multiple eggs at once by placing them in a sealed container with water. Shake gently—the shells will loosen collectively.
Egg Peelers
Invest in a handheld egg peeler or an electric model for high-volume tasks.
Freeze-Thaw
Freeze cooked eggs for 10 minutes, then thaw under warm water. The expansion/contraction loosens shells.
Score Before Cooking
Use a pin to prick the wider end before boiling. The tiny hole allows steam to escape, preventing cracks.
The Science of Peeling: A Deeper Dive
To truly master egg peeling, let’s explore the chemistry at play:
- Protein Denaturation: When heated, egg proteins (like ovalbumin) unwind and bond, creating a gel. Overcooking hardens this gel, making it stick to the shell.
- Calcium Carbonate Shells: Eggshells are 95% calcium carbonate. Acids (like vinegar) dissolve this mineral, weakening the shell.
- Membrane Structure: The inner membrane is made of keratin (like hair and nails). Higher pH levels (from baking soda or aging) break down keratin, reducing adhesion.
Creative Uses for Peel-Prone Eggs
Even if your egg isn’t picture-perfect, don’t toss it! These dishes hide imperfections:
- Egg Salad: Chop rough eggs and mix with mayo, mustard, and celery.
- Casseroles: Fold into breakfast stratas or frittatas.
- Curries: Simmer in coconut milk and spices for a hearty dish.
Conclusion: The Oval Odyssey
Peeling eggs doesn’t have to be a gamble. By understanding the science, mastering techniques, and arming yourself with troubleshooting hacks, you’ll transform this once-frustrating task into a source of pride. Whether you’re prepping a week’s worth of snacks or crafting a gourmet appetizer, your eggs will greet you with smooth, unblemished surfaces. So boil, steam, or sous vide your way to perfection—and remember, every cracked shell is a step closer to mastery. Happy peeling!
Final Thoughts
The next time you face a carton of eggs, approach the task with confidence. Experiment with these methods, adapt them to your kitchen, and share your successes (and maybe a mishap or two) with fellow egg enthusiasts. After all, even the most seasoned chefs have been known to fumble a peel or two. The key is to keep cracking—er, trying. Your future self (and your Instagram followers) will thank you.


0 comments