Introduction
In the realm of culinary delights, seafood dishes hold a special place, captivating the palate with their fresh, delicate flavors and the promise of a coastal adventure in every bite. Among these, oil-braised prawns, or shrimp, stand out as a dish that combines the essence of simplicity with the richness of flavors. Traditionally prepared on stovetops or in ovens, the advent of modern kitchen appliances like electric skillets has revolutionized the way we cook, making it easier to achieve restaurant-quality meals at home. This article will guide you through the process of making oil-braised prawns using an electric skillet, ensuring that every step is meticulously detailed for a perfect outcome.
Understanding the Electric Skillet
Before diving into the recipe, it’s crucial to familiarize yourself with the electric skillet. An electric skillet is a versatile kitchen appliance that combines the functionality of a frying pan and a slow cooker. It features adjustable temperature settings, allowing for precise control over the cooking process. Its non-stick surface ensures easy cleanup, while its compact design makes it ideal for small kitchens or those who prefer minimalistic cooking setups.
Choosing the Right Prawns
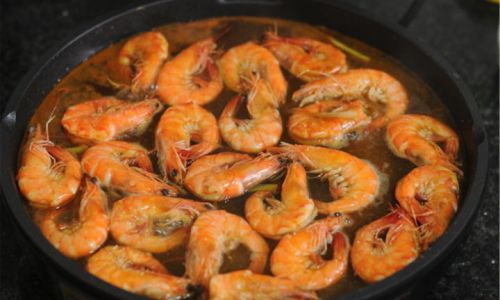
The quality of your prawns is paramount to the success of your dish. Look for fresh, firm prawns with a slight bend in their bodies and a bright, translucent appearance. Avoid those that are slimy, have a strong odor, or appear dull in color. For oil-braised prawns, medium to large-sized prawns work best as they offer a satisfying bite and hold onto the flavors well.
Ingredients and Preparation
To make oil-braised prawns in an electric skillet, you’ll need:
- 1 pound (about 450 grams) of fresh, peeled, and deveined prawns
- 3 tablespoons of vegetable oil (such as canola or grapeseed oil)
- 3 cloves of garlic, minced
- 1-inch piece of fresh ginger, finely chopped
- 2 green onions, chopped (white and green parts separated)
- 3 tablespoons of soy sauce
- 1 tablespoon of rice vinegar or white vinegar
- 1 tablespoon of sugar
- 1 teaspoon of sesame oil
- A pinch of white pepper
- Optional garnishes: chopped cilantro, sesame seeds, and sliced jalapeños
Step-by-Step Guide
Preheat the Electric Skillet

Begin by preheating your electric skillet to medium-high heat. Add the vegetable oil and allow it to heat up for a couple of minutes. This ensures that the prawns will sear beautifully, locking in juices and flavors.
Sauté the Aromatics
Once the oil is hot, add the minced garlic, chopped ginger, and the white parts of the green onions. Sauté for about 30 seconds to 1 minute until fragrant but not burnt. The key here is to cook the aromatics just enough to release their flavors without letting them turn bitter.
Add the Prawns
Carefully place the prawns in a single layer in the skillet. This allows for even cooking and ensures that each prawn gets a nice sear. Cook for about 2-3 minutes on one side, then flip them over and cook for another 2 minutes on the other side. The prawns should turn pink and opaque, indicating that they are cooked through.
Season and Braise
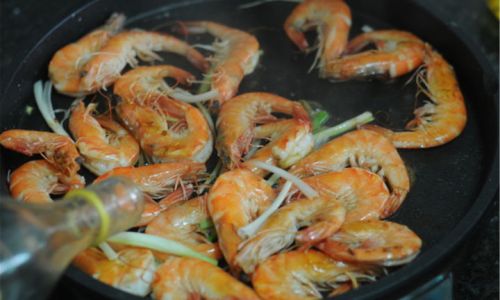
While the prawns are cooking, mix together the soy sauce, rice vinegar, sugar, sesame oil, and a pinch of white pepper in a small bowl. Once the prawns are cooked, pour this mixture over them in the skillet. Stir gently to coat the prawns evenly with the sauce. Reduce the heat to low, cover the skillet with a lid, and let the prawns braise for about 5 minutes. This step allows the flavors to meld together and the sauce to thicken slightly.
Finish with Garnishes
After the braising time is up, remove the lid and give the prawns a final stir. Add the green parts of the green onions and cook for another minute, just until wilted. Turn off the heat and transfer the prawns to a serving dish. Garnish with chopped cilantro, sesame seeds, and sliced jalapeños if using.
Serving Suggestions

Oil-braised prawns are versatile and can be enjoyed in various ways. Serve them as a main dish over a bed of steamed rice or noodles for a hearty meal. They also pair wonderfully with a side of stir-fried vegetables or a crisp salad. For a more indulgent experience, try serving them with a dipping sauce made from a blend of soy sauce, chili oil, and a squeeze of lime juice.
Storage and Reheating
Leftover oil-braised prawns can be stored in an airtight container in the refrigerator for up to 2 days. To reheat, place them in a microwave-safe dish and cover with a damp paper towel. Microwave on medium heat until warm, stirring occasionally to prevent overcooking. Alternatively, you can reheat them in a skillet over low heat, adding a splash of water if needed to prevent sticking.
Conclusion
Mastering the art of oil-braised prawns using an electric skillet is not only rewarding but also opens up a world of culinary possibilities. With its adjustable temperature control and non-stick surface, the electric skillet makes it easier to achieve perfectly cooked, flavorful prawns without the hassle of stovetop cooking. By following this guide, you’ll be able to enjoy a restaurant-quality dish right in your own kitchen, delighting your family and friends with every succulent bite. Happy cooking!





0 comments