Table of content
No-bake desserts have revolutionized home baking, offering a hassle-free alternative to traditional oven-based recipes. Among these, the no-bake cup cheesecake stands out as a crowd-pleaser—combining velvety texture, vibrant flavor, and the convenience of individual servings. Whether you’re a novice baker or a seasoned pro, this recipe promises consistent results with minimal effort. Below, we’ll explore the science behind no-bake cheesecakes, dissect every step of the process, and equip you with tips to customize this dessert for any occasion.
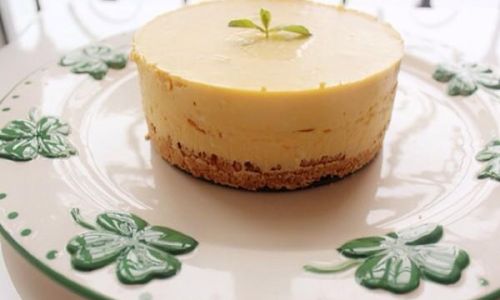
The Allure of No-Bake Cup Cheesecakes
No-bake cheesecakes bypass the oven entirely, relying on gelatin, whipped cream, or cream cheese’s natural thickness to set. This method preserves the tangy richness of cream cheese while eliminating risks like cracked surfaces or overbaking. Cup-sized portions add a modern twist, making them ideal for parties, picnics, or guilt-free indulgences.
Ingredients: Building Blocks of Perfection
To create 12 standard-sized cup cheesecakes, gather the following:
For the Crust
- 2 cups graham cracker crumbs (or digestive biscuits, Oreos, or ginger snaps for variation)
- 1/2 cup unsalted butter, melted
- 2 tbsp granulated sugar (optional, for sweetness)
- 1/4 tsp salt (to balance flavors)
For the Filling
- 16 oz (450g) full-fat cream cheese, softened to room temperature
- 1 cup powdered sugar (sifted to prevent lumps)
- 1 tsp pure vanilla extract
- 1 tbsp lemon juice (enhances tanginess)
- 5 cups heavy whipping cream (cold, for stiff peaks)
- Optional add-ins: 1/4 cup fruit puree, melted chocolate, or peanut butter
For Garnish
- Fresh berries, chocolate shavings, caramel drizzle, or crushed cookies
Crafting the Crust: A Foundation of Flavor
The crust acts as a buttery, crumbly base that complements the cheesecake’s creaminess. Follow these steps for perfection:
-
Prepare the Crumb Mixture
- If using whole cookies or biscuits, pulse them in a food processor until they resemble fine sand. Avoid over-processing, as this can release excess oil and make the crust greasy.
- Combine the crumbs with melted butter, sugar, and salt in a mixing bowl. The butter acts as a binder, while sugar and salt elevate the crust’s taste.
-
Portion the Crust
- Divide the mixture evenly among 12 cups (use muffin tins lined with paper liners for easy removal). Aim for 1.5–2 tablespoons of crumbs per cup.
- Press the crumbs firmly into the bottom using the back of a spoon or a tart tamper. This ensures the crust holds together when sliced.
-
Chill the Crust
Refrigerate the cups for 15–20 minutes while preparing the filling. Chilling solidifies the butter, preventing the crust from disintegrating when the filling is added.
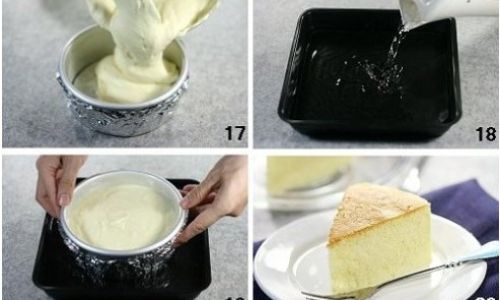
Whipping Up the Filling: The Heart of the Cheesecake
The filling’s success hinges on achieving the right balance of creaminess and stability. Here’s how:
-
Soften the Cream Cheese
Leave the cream cheese at room temperature for 1–2 hours. Cold cream cheese will result in lumpy filling, while over-softened cheese may become too runny.
-
Beat Until Smooth
- Using an electric mixer, beat the cream cheese on medium speed until fluffy (2–3 minutes). Scrape the bowl halfway to ensure even texture.
- Add powdered sugar, vanilla, and lemon juice. Mix until incorporated, then increase speed to medium-high for another minute. The mixture should be silky and lump-free.
-
Stabilize with Whipped Cream
- In a separate bowl, whip the cold heavy cream until stiff peaks form. Be careful not to over-whip, as this can lead to a grainy texture.
- Gently fold the whipped cream into the cream cheese mixture using a spatula. This step lightens the filling and provides structure without gelatin.
-
Flavor Customization
- For fruit-flavored cheesecakes, fold in 1/4 cup of strawberry, blueberry, or mango puree.
- For chocolate lovers, melt 4 oz of dark chocolate and mix it into the filling before adding the whipped cream.
- For nutty variations, stir in 1/4 cup peanut butter or Nutella.
Assembling the Cup Cheesecakes
-
Layering Technique
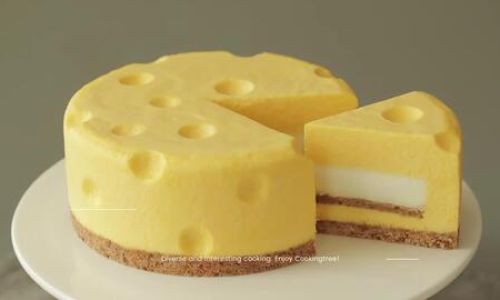
- Remove the chilled crusts from the fridge.
- Spoon the filling into a piping bag fitted with a large round tip (or use a zip-top bag with the corner snipped). Pipe the filling onto the crusts, filling each cup to the top.
- Alternatively, use a spoon to distribute the filling evenly. Smooth the tops with an offset spatula for a professional finish.
-
Chilling Time
Cover the cups loosely with plastic wrap and refrigerate for at least 4 hours, or overnight. Chilling allows the filling to set completely and mellows the flavors.
Serving and Storage
-
Garnishing Ideas
- Top each cup with fresh berries, a drizzle of salted caramel, or a sprinkle of crushed pistachios just before serving.
- For a decorative touch, use a kitchen torch to lightly brown marshmallow fluff or meringue on top.
-
Storage Tips
- No-bake cheesecakes keep well in the refrigerator for up to 5 days. Avoid freezing, as this can alter the texture.
- If transporting, place cups in a single layer in a cooler with ice packs to maintain freshness.
Troubleshooting Common Issues
- Soggy Crust: Ensure the crust is firmly pressed and chilled before adding the filling.
- Runny Filling: Use full-fat cream cheese and avoid over-softening it. If the filling remains too soft, mix in 1 tsp of gelatin dissolved in warm water (though this is optional).
- Lumpy Texture: Always sift powdered sugar and beat the cream cheese until completely smooth.
Creative Variations
- Vegan Option: Substitute cream cheese with vegan alternatives (e.g., cashew-based cheese) and use coconut cream instead of heavy whipping cream.
- Low-Carb Version: Use almond flour crusts and a sugar-free sweetener like erythritol.
- Boozy Twist: Add 1–2 tbsp of liqueur (e.g., Baileys, Grand Marnier) to the filling for adult-friendly cups.
The Science Behind No-Bake Cheesecakes
Unlike baked cheesecakes, which rely on eggs and heat to set, no-bake versions use emulsification and air incorporation. The fat in cream cheese coats the whipped cream’s air bubbles, creating a stable structure. Lemon juice not only adds flavor but also aids in setting by slightly thickening the mixture.
Conclusion: A Dessert for Every Occasion
No-bake cup cheesecakes are a testament to simplicity and versatility. Whether you’re hosting a birthday party, craving a midnight treat, or experimenting with gluten-free diets, this recipe adapts effortlessly. By mastering the crust-to-filling ratio and embracing creative freedom, you’ll soon find these cups becoming a staple in your repertoire. So, grab your apron, skip the oven, and dive into the world of no-bake bliss—one creamy bite at a time.
0 comments