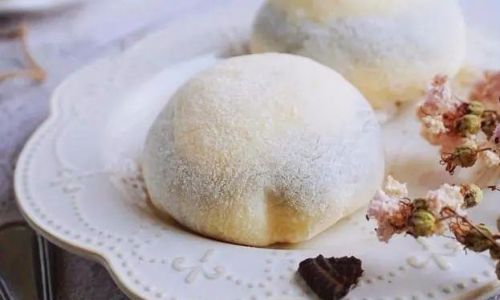
Creating delicious Snow Skin Mochi, or simply Snow Mochi, is an art form that combines precision, creativity, and a love for sweet treats. This Japanese dessert, known for its soft, chewy outer layer and a variety of sweet fillings, has gained immense popularity worldwide. Whether you’re a seasoned baker or a novice in the kitchen, mastering the art of making Snow Mochi can be both rewarding and enjoyable. In this comprehensive guide, we’ll delve into every aspect of crafting perfect Snow Mochi, from understanding the ingredients to mastering the technique and exploring innovative filling ideas. By the end, you’ll be equipped with the knowledge and skills to make Snow Mochi that’s not only visually appealing but also bursting with flavor.
Understanding the Ingredients
Before diving into the recipe, it’s crucial to understand the role each ingredient plays in creating the perfect Snow Mochi.
Mochiko (Glutinous Rice Flour):
The cornerstone of Snow Mochi, Mochiko is a finely milled flour derived from sweet rice (glutinous rice). It gives the mochi its signature chewy texture. When hydrated and cooked, Mochiko forms a stretchy dough that’s both pliable and elastic.
Sugar:
Granulated sugar or powdered sugar is used to sweeten the dough and enhance the overall flavor of the Snow Mochi. Powdered sugar is often preferred as it blends more evenly into the dough, creating a smoother texture.
Water or Milk:
Liquid is essential for hydrating the Mochiko and forming a dough. While water is traditional, some recipes call for milk to add a richer flavor. The amount of liquid needed may vary depending on the humidity and the specific brand of Mochiko used.

Cornstarch or Potato Starch:
This ingredient is used to prevent the dough from sticking to your hands or surfaces during rolling. A light dusting of cornstarch or potato starch keeps the Snow Mochi smooth and easy to handle.
Fillings:
The possibilities for Snow Mochi fillings are endless, ranging from classic options like sweetened red bean paste (anko) to modern twists like ice cream, fruit jams, and even chocolate ganache. The key is to choose fillings that complement the chewy texture of the mochi without overpowering it.
Basic Snow Mochi Recipe
Now that we’ve covered the ingredients, let’s dive into the basic recipe for Snow Mochi.
Ingredients:
- 1 cup Mochiko (glutinous rice flour)
- 1/2 cup granulated sugar (or 3/4 cup powdered sugar)
- 1 1/4 cups water (or milk)
- Cornstarch or potato starch for dusting
Fillings:
- Your choice of fillings (e.g., sweetened red bean paste, ice cream, fruit jam)
Instructions:
-
Prepare the Dough:
- In a medium mixing bowl, whisk together the Mochiko and sugar until well combined. If using powdered sugar, sift it to remove any lumps before mixing.
- Gradually add the water (or milk), stirring constantly with a whisk or chopsticks to avoid lumps. The mixture should be thick and pourable, resembling a thick pancake batter.
-
Steam the Dough:
- Line a steaming basket or a heatproof dish with parchment paper or a silicone mat to prevent sticking.
- Pour the mochi batter into the prepared steaming basket, spreading it out evenly with a spatula. The thickness should be around 1/2 inch for easy handling.
- Place the steaming basket over a pot of simmering water, making sure the water doesn’t touch the bottom of the basket. Cover the pot and steam for about 25-30 minutes, or until the dough is translucent and cooked through.
- To check for doneness, insert a toothpick into the center of the dough; it should come out clean.
-
Cool and Prepare for Rolling:

- Once cooked, remove the steaming basket from the pot and let the dough cool slightly. Transfer the dough to a clean work surface dusted lightly with cornstarch or potato starch.
- Using a spatula or knife, gently loosen the dough from the parchment paper or silicone mat. Let it cool completely until it’s no longer hot to the touch but still pliable.
-
Roll and Fill:
- Dust your hands and the work surface generously with cornstarch or potato starch to prevent sticking.
- Using your hands, gently knead the dough until it becomes smooth and elastic. If the dough is too sticky, add more cornstarch as needed.
- Divide the dough into equal portions, depending on the size of the Snow Mochi you want to make.
- Flatten each portion into a disc shape using your palms. Place a spoonful of your chosen filling in the center of each disc.
- Carefully seal the edges of the dough around the filling, pinching and twisting to ensure no filling leaks out. Gently roll the sealed dough ball between your palms to smooth out any cracks or seams.
-
Serve and Enjoy:
Your Snow Mochi is now ready to serve. You can enjoy it immediately or store it in an airtight container in the refrigerator for up to a few days. Note that refrigerated Snow Mochi may become slightly harder, so you may need to let it sit at room temperature for a few minutes before serving.
Tips for Perfect Snow Mochi
While the basic recipe provides a solid foundation, there are several tips and tricks to elevate your Snow Mochi to the next level.
Precision in Measurement:
Accurate measurement of ingredients is crucial. Too much water can make the dough too sticky, while too little can result in a dry, crumbly texture.
Temperature Control:
The temperature of the dough during rolling is essential. If it’s too hot, it will be sticky and difficult to handle. Letting it cool completely before rolling ensures a smoother, easier process.
Experiment with Fillings:
Don’t be afraid to experiment with different fillings. While traditional options like sweetened red bean paste are delicious, modern twists like matcha ice cream, Nutella, or even fresh fruit can add exciting new flavors.
Creative Presentation:
Snow Mochi is not only about taste but also about presentation. Consider dusting the finished mochi with a light sprinkling of powdered sugar, adding a drizzle of chocolate sauce, or topping with colorful edible glitter for a festive touch.
Storage:
Store Snow Mochi in an airtight container to prevent it from drying out. If refrigerating, let it sit at room temperature for a few minutes before serving to restore its soft texture.

Advanced Techniques and Variations
Once you’ve mastered the basics, it’s time to explore advanced techniques and variations to keep your Snow Mochi creations exciting.
Layered Snow Mochi:
Create layered Snow Mochi by dividing the dough into different colors or flavors before steaming. Once cooked, stack the layers together with a thin layer of filling between each, creating a beautiful marbled effect.
Stuffed Snow Mochi:
For an extra treat, stuff Snow Mochi with multiple fillings. For example, place a small ball of ice cream inside a layer of sweetened red bean paste, then wrap it in the mochi dough. The contrast of textures and flavors will delight your taste buds.
Decorative Techniques:
Use food coloring to add a pop of color to your Snow Mochi. You can also create intricate designs using edible markers or stamps for a visually stunning presentation.
Incorporating Flavors:
Infuse your Snow Mochi dough with flavors like matcha, vanilla, or coconut extract. This will add an extra layer of complexity to your dessert.
Non-Traditional Fillings:
Think outside the box with fillings like savory options (e.g., umeboshi paste or mashed potatoes with cheese), yogurt, or even whipped cream with fresh berries. The possibilities are endless.
Conclusion
Making delicious Snow Skin Mochi is a delightful culinary endeavor that combines precision, creativity, and a love for sweet treats. By understanding the role of each ingredient, mastering the basic recipe, and exploring advanced techniques and variations, you can create Snow Mochi that’s not only visually appealing but also bursting with flavor. Whether you’re enjoying it as a traditional Japanese dessert or incorporating it into a modern fusion dish, Snow Mochi is sure to delight your taste buds and impress your guests. So, gather your ingredients, roll up your sleeves, and start crafting your perfect Snow Mochi today!


0 comments