Table of content
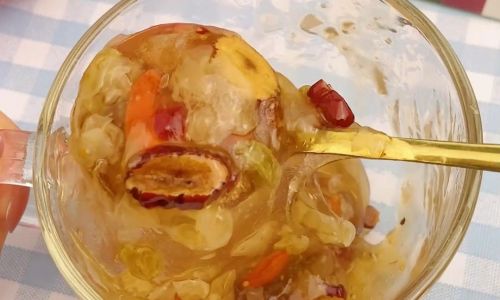
Pickled sweet garlic, a delightful and tangy condiment often found in Asian cuisines, is a treat for the taste buds. Its unique blend of sweetness, sourness, and garlic’s inherent pungency makes it an ideal accompaniment to various dishes, from noodles to grilled meats. While the process of pickling garlic may seem straightforward, achieving that perfect balance of flavors requires attention to detail and a few key steps. In this article, we will delve into the intricacies of how to泡 (prepare, in this context) sugar garlic that is not only tasty but also preserves the garlic’s natural goodness.
Understanding the Ingredients
Before diving into the preparation, let’s first understand the essential ingredients and their roles:
-
Fresh Garlic Bulbs: Choose firm, tightly closed bulbs with no signs of mold or sprouting. Freshness is crucial as it affects both the taste and texture of the final product.
-
Sugar: This adds sweetness to counterbalance the acidity of the vinegar, creating a harmonious flavor profile. Granulated sugar is commonly used, but you can experiment with brown sugar or honey for a richer taste.

-
Vinegar: The acidity of vinegar helps preserve the garlic and adds a tangy note. Rice vinegar, apple cider vinegar, or white vinegar can be used, each contributing a slightly different flavor.
-
Salt: A pinch of salt enhances the overall flavor, bringing out the natural sweetness of the garlic.
-
Spices and Herbs (Optional): Star anise, cinnamon sticks, or bay leaves can be added for an aromatic twist. These spices not only infuse the garlic with additional layers of flavor but also make the pickling process more enjoyable.
Preparation Steps
Step 1: Preparing the Garlic
-
Peeling the Garlic: Begin by separating the individual cloves from the bulb. Peel each clove carefully, ensuring no outer skin remains. This can be a tedious task, but it’s worth the effort for a clean, professional-looking final product.
-
Blanching (Optional): To soften the garlic slightly and help it absorb the pickling liquid more evenly, you can blanch the peeled cloves. Boil a pot of water, add the garlic, and cook for about 1-2 minutes. Immediately plunge them into ice water to stop the cooking process. Pat them dry before proceeding.
Step 2: Making the Pickling Liquid
-
Combining Ingredients: In a large saucepan, combine the sugar, vinegar, salt, and any optional spices or herbs. The ratio can be adjusted to taste, but a good starting point is 1 cup of sugar, 2 cups of vinegar, and a pinch of salt for every 10-12 garlic cloves.
-
Heating the Mixture: Heat the mixture over medium heat, stirring occasionally, until the sugar is fully dissolved and the liquid begins to simmer. Allow it to simmer gently for about 5 minutes to meld the flavors.
-
Cooling Down: Remove the saucepan from heat and let the pickling liquid cool to room temperature. This is crucial as adding hot liquid to the garlic could cook it further, altering its texture and flavor.
Step 3: Pickling the Garlic
-
Jar Preparation: Choose a clean, sterile glass jar with a tight-fitting lid. Ensure it’s large enough to comfortably hold all the garlic cloves and the pickling liquid with some headspace for expansion.
-
Packing the Garlic: Pack the peeled and (optionally) blanched garlic cloves tightly into the jar. Packing them closely helps them stay submerged in the liquid, preventing mold growth.

-
Pouring the Liquid: Carefully pour the cooled pickling liquid over the garlic, ensuring all cloves are fully submerged. If necessary, use a small weight, like a clean stone or a smaller jar filled with water, to keep the garlic down.
Step 4: Sealing and Storing
-
Sealing the Jar: Tightly close the jar’s lid and shake gently to distribute the spices and herbs evenly if used.
-
Storing: Place the jar in a cool, dark place away from direct sunlight. The ideal temperature for pickling is between 60-70°F (15-21°C). Allow the garlic to pickle for at least 2 weeks before tasting. The longer it sits, the more flavors will meld and develop.
Tips for Perfect Pickled Sweet Garlic
-
Patience is Key: The longer the garlic sits in the pickling liquid, the more its flavor will develop. For best results, wait at least 3-4 weeks before enjoying.
-
Experiment with Flavors: Don’t be afraid to experiment with different types of vinegar, sugars, or spices. Each combination will yield a unique flavor profile.
-
Sterilization: Ensure all equipment, including the jar, spoon, and any weights used, are clean and sterile to prevent contamination.
-
Checking for Mold: Occasionally check the jar for signs of mold, especially during the first few days. If mold appears, discard the batch immediately and start anew with fresh ingredients.
-
Serving Suggestions: Pickled sweet garlic can be enjoyed on its own as a snack, used as a topping for salads, or added to stir-fries and grilled dishes for an extra burst of flavor.
Conclusion
Making pickled sweet garlic is a rewarding culinary endeavor that combines simple ingredients to create a complex, delicious condiment. By following the steps outlined above and paying attention to detail, you can achieve a product that balances sweetness, tanginess, and garlic’s bold flavor perfectly. Whether you’re a seasoned chef or a home cook eager to experiment, pickling garlic offers a fun and flavorful way to preserve this versatile ingredient. So, gather your ingredients, roll up your sleeves, and start your journey toward mastering the art of making delicious pickled sweet garlic today!
0 comments