Introduction

In the vast culinary landscape of global gastronomy, simple yet deeply satisfying dishes often hold a special place. Among these, oil pancakes—a staple in many cuisines across Asia and beyond—stand out for their crispy exterior, tender interior, and the rich, aromatic flavor that seems to encapsulate the essence of comfort food. Whether you know them as youtiao, gyoza, or simply fried dough, oil pancakes are a versatile delight that can be enjoyed at any time of the day. But how do you elevate this humble treat to a culinary masterpiece? This article delves into the intricacies of making delicious oil pancakes, from selecting the right ingredients to perfecting your frying technique.
The Importance of Ingredients
The foundation of any great dish lies in its ingredients, and oil pancakes are no exception. Here’s a breakdown of the essentials and how they contribute to the final product:
-
Flour: Choose a high-quality all-purpose flour for a balanced texture. Whole wheat flour can add a nutty flavor and nutritional depth but may require slight adjustments in liquid content due to its higher fiber content.
-
Water: The liquid component is crucial for achieving the desired dough consistency. Room temperature water is ideal as it allows for better gluten development without overheating the dough.
-
Salt: A pinch of salt enhances flavor and helps in the gluten formation, making the dough more elastic.
-
Baking Powder/Soda: A small amount of baking powder or baking soda can be added for a slight lift and a softer interior. However, be mindful of the quantity as too much can make the pancakes taste bitter.
-
Oil: For frying, neutral oils like vegetable, canola, or peanut oil are preferred. They have a high smoking point, which means they can be heated to higher temperatures without burning, thus ensuring a crispy exterior.
The Dough: The Heart of the Pancake
Creating the perfect dough is a blend of science and art. Here’s a step-by-step guide:
-
Mixing: In a large bowl, combine the flour, salt, and baking powder (if using). Create a well in the center and pour in the water gradually, mixing with a wooden spoon or your hands until a shaggy dough forms.
-
Kneading: Transfer the dough onto a lightly floured surface and knead for about 8-10 minutes until it becomes smooth and elastic. This process develops the gluten, which gives the pancakes their structure.

-
Resting: Cover the dough with a damp cloth and let it rest for at least 30 minutes. This allows the gluten to relax, making the dough easier to roll out without shrinking back.
Shaping the Pancakes
The shape and thickness of your oil pancakes can vary depending on personal preference and the recipe. Here are a few popular methods:
-
Classic Strips: Roll the rested dough into a log about 1 inch in diameter. Cut this log into pieces, each about 3-4 inches long. Flatten each piece slightly and then roll it out into a thin strip, about 1/4 inch thick.
-
Round Pancakes: Alternatively, you can roll the entire dough into a flat circle, about 1/2 inch thick, and then use a cookie cutter or a knife to cut out rounds.
-
Twisted Rope: For a more intricate design, roll the dough into two thin ropes and twist them together before frying.
Frying to Perfection
Frying is the critical step that transforms your dough into golden, crispy oil pancakes. Here’s how to do it right:
-
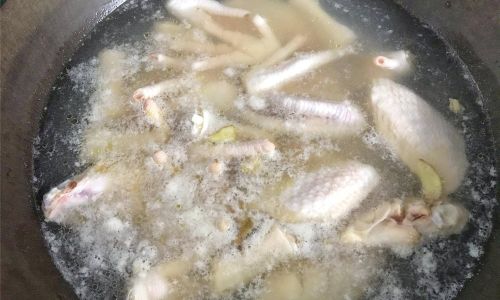
Heating the Oil: Pour enough oil into a deep frying pan or a wok to fully submerge the pancakes. Heat the oil to around 350°F (175°C). You can test the readiness by dropping a small piece of dough into the oil; it should sizzle immediately and rise to the surface.
-
Frying: Carefully place the shaped dough into the hot oil, ensuring not to overcrowd the pan. Use a slotted spoon or chopsticks to gently flip the pancakes halfway through cooking, until both sides are evenly golden brown and crispy. This usually takes about 2-3 minutes per side.
-
Draining: Once cooked, remove the pancakes from the oil using a slotted spoon and let them drain on paper towels to remove excess oil.
Enhancing Flavor and Texture

While the basic recipe is delicious on its own, there are several ways to elevate your oil pancakes:
-
Seasonings: Sprinkle a pinch of sea salt, black pepper, or even a light dusting of sesame seeds over the dough before frying for an added layer of flavor.
-
Dipping Sauces: Serve your oil pancakes with a variety of dipping sauces such as soy sauce, chili oil, or a tangy vinegar-based dressing to complement their crispy texture.
-
Stuffings: For a more filling experience, you can incorporate fillings like shredded vegetables, minced meat, or cheese into the dough before shaping and frying.
-
Glazing: After frying, brush the pancakes with a glaze made from honey, maple syrup, or a mixture of soy sauce and honey for a sweet-savory contrast.
Storage and Reheating
Proper storage and reheating can keep your oil pancakes tasting fresh even when enjoyed later. Here’s how:
-
Storage: Let the pancakes cool completely before storing them in an airtight container. They can be kept at room temperature for up to a day or refrigerated for up to three days. For longer storage, freeze them in single layers between parchment paper, then transfer to a freezer bag.
-
Reheating: To reheat, you can either place the pancakes in a preheated oven at 350°F (175°C) for about 5-7 minutes or warm them up in a toaster oven until crispy. For a quick fix, you can also microwave them for a few seconds, but be mindful that this might soften their texture slightly.
Conclusion
Making delicious oil pancakes is a rewarding culinary endeavor that combines precision with creativity. By paying attention to ingredient selection, dough preparation, shaping, frying techniques, and flavor enhancements, you can transform a simple dough into a culinary delight that satisfies both the palate and the soul. Whether enjoyed as a snack, breakfast, or a part of a larger meal, oil pancakes offer a versatile and delicious way to celebrate the art of frying. So, roll up your sleeves, heat up the oil, and embark on a journey to mastering the perfect oil pancake. Happy cooking!


0 comments