Introduction

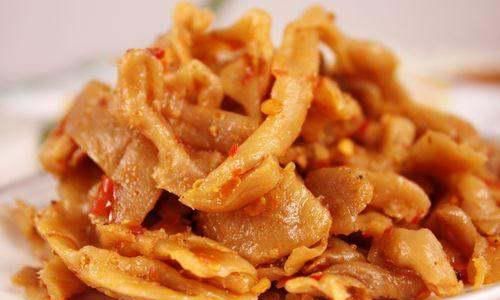
Dried radish strips, a timeless culinary delight hailing from various regions across Asia, particularly China, Korea, and Japan, offer a unique blend of flavors that can elevate any dish from mundane to extraordinary. These crunchy, slightly sweet, and tangy snacks or ingredients are not only a testament to the art of preservation but also a celebration of simplicity in cuisine. Making dried radish strips at home might seem like an intimidating task, but with the right techniques and ingredients, you can create a batch that is not only delicious but also bursting with authentic flavors. This comprehensive guide will walk you through the entire process, from selecting the perfect radishes to achieving the ideal texture and taste.
Section 1: Understanding the Ingredients
Before diving into the preparation, it’s crucial to understand the star of our dish: the radish. There are several varieties of radishes suitable for drying, but the most commonly used are the daikon (white radish) and the smaller, more pungent red or green varieties. Daikon radishes are preferred for their mild flavor and large size, which makes them ideal for slicing into strips. Here’s what you’ll need:
- Fresh Radishes: Choose firm, fresh radishes with smooth, unblemished skin. Avoid those that are soft, wrinkled, or have spots.
- Salt: For drawing out excess moisture and preserving the radishes.
- Sugar: Optional, but it adds a touch of sweetness that balances the tanginess.
- Spices and Seasonings: Depending on your preference, you can use chili flakes, garlic powder, sesame seeds, or soy sauce to enhance the flavor.
- Vinegar or Lemon Juice: To add a tangy note and help preserve the radishes.
- Sunlight or Dehydrator: For drying the radish strips.
Section 2: Preparation and Slicing
-
Cleaning the Radishes: Start by thoroughly washing the radishes under running water. Scrub them gently to remove any dirt or residue. Pat them dry using a clean kitchen towel or let them air-dry.
-
Peeling: While some recipes call for leaving the skin on for added texture and nutrients, peeling the radishes can result in a smoother, more uniform finished product. Use a vegetable peeler to remove the skin.
-
Slicing: The thickness of the slices will determine the drying time and final texture. For dried radish strips, aim for slices that are about 1/8 to 1/4 inch thick. A sharp knife or mandoline is essential to achieve consistent thickness. Cut the radishes lengthwise into strips.

Section 3: Initial Treatment
-
Salting: In a large bowl, toss the radish strips with a generous amount of salt. The salt will draw out moisture, which is crucial for the drying process. Let the radishes sit for about 30 minutes to an hour, stirring occasionally. You’ll notice the radishes becoming softer and releasing liquid.
-
Draining: After the salting period, drain the radishes in a colander, rinsing them briefly under cold water to remove excess salt. Pat them dry again with paper towels or a clean cloth.
Optional Step: Blanching
- Blanching: While not traditional for all dried radish recipes, blanching can help retain some color and texture. To blanch, bring a large pot of water to a boil. Add the radish strips and cook for about 1-2 minutes, then immediately transfer them to an ice bath to stop the cooking process. Drain and pat dry.
Section 4: Seasoning
- Flavoring: In a large bowl, combine the radish strips with your chosen seasonings. This could be as simple as a pinch of sugar and a squeeze of lemon juice, or more complex with a mix of chili flakes, garlic powder, and sesame seeds. If using soy sauce, add it sparingly as it can darken the color and increase the drying time. Mix well to ensure even coating.
Section 5: Drying the Radish Strips
-
Air-Drying (Natural Method):

- Layout: Spread the seasoned radish strips in a single layer on clean, dry baking sheets or bamboo mats. Ensure they are not overlapping to allow for even drying.
- Sunlight: Place the sheets in direct sunlight. The drying process can take anywhere from 1 to 3 days, depending on the weather and thickness of the strips. Check them regularly, turning them over occasionally to ensure even drying.
-
Using a Dehydrator:
- Preheating: Set your dehydrator to a temperature between 125°F to 135°F (52°C to 57°C).
- Layout: Arrange the radish strips on the dehydrator trays in a single layer.
- Drying Time: Dehydrate for about 6 to 12 hours, checking every few hours. The strips should be dry and slightly translucent, with a crunchy texture when fully dried.
Section 6: Storing Your Dried Radish Strips
-
Cooling: Once dried, let the radish strips cool completely on the trays or mats. This helps them firm up and ensures they are fully dry.
-
Storing: Store the dried radish strips in an airtight container, preferably one made of glass or stainless steel, to prevent any off-flavors. A zip-top plastic bag can also be used, but ensure it is well-sealed. Place the container in a cool, dark place away from direct sunlight and heat. Properly stored, dried radish strips can last for several months.
Section 7: Cooking with Dried Radish Strips
-
Rehydrating: If you plan to use the dried radish strips in cooked dishes, you may need to rehydrate them first. Soak them in warm water for about 10-15 minutes, or until they reach your desired texture. Drain well before using.
-
Using as a Snack: Dried radish strips are delicious on their own as a healthy snack. You can enjoy them plain or sprinkle them with additional seasonings like sea salt, black pepper, or a light dusting of nutritional yeast.

-
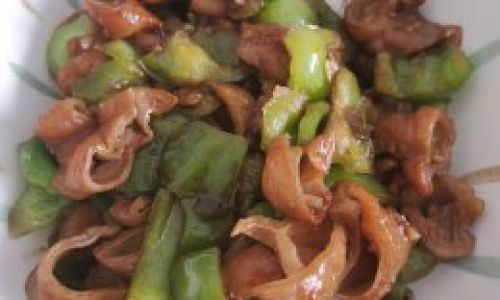
Incorporating into Dishes: They can be added to stir-fries, soups, salads, or used as a garnish. Their crunchy texture and tangy flavor make them a versatile ingredient in many Asian dishes.
Section 8: Troubleshooting and Tips
- Moisture Content: If your dried radish strips seem a bit damp after storage, you can place them back in the dehydrator or sun for a few more hours.
- Texture: Over-dried strips can become too brittle. If this happens, you can lightly mist them with water and let them sit for a few minutes before using.
- Flavor Balance: Taste a small piece of a dried strip before storing to ensure the seasoning is to your liking. You can always add more seasoning after drying, but it’s harder to remove excess.
- Preservation: To extend the shelf life, consider vacuum sealing the dried radish strips or adding a desiccant packet to the storage container.
Conclusion
Making delicious dried radish strips is a rewarding culinary endeavor that combines the art of preservation with the joy of creating something delicious from scratch. By following the steps outlined in this guide, you’ll be able to produce crunchy, flavorful strips that can be enjoyed as a snack or incorporated into a variety of dishes. Remember, the key to success lies in patience, attention to detail, and a willingness to experiment with different seasoning combinations. Happy drying!
This comprehensive guide should provide you with a thorough understanding of how to make delicious dried radish strips. From selecting the right radishes to storing your finished product, each step is crucial in achieving the perfect texture and flavor. Enjoy the process and the delicious results!


0 comments