Table of content
Introduction
Mochi, a beloved Japanese rice cake, has captivated taste buds worldwide with its uniquely chewy, glutinous texture and delicate sweetness. The term q弹 (Qiū dàn) in Mandarin perfectly describes its bouncy, springy consistency—a quality that makes mochi both a delight to eat and a challenge to master. Whether you’re a seasoned baker or a curious novice, crafting mochi at home allows you to experiment with flavors, fillings, and textures while honing your culinary skills. This article will guide you through the process of making mochi from scratch, focusing on achieving that coveted q弹 texture. We’ll explore the science behind its chewiness, essential ingredients, tools, and troubleshooting tips to ensure your mochi turns out flawlessly every time.
What Makes Mochi So Chewy?
The secret to mochi’s signature texture lies in its primary ingredient: glutinous rice flour (also known as sweet rice flour or mochiko). Unlike regular rice flour, glutinous rice flour contains minimal amylose and high amounts of amylopectin, a starch molecule that gelatinizes when heated. This gelatinization creates a sticky, elastic dough that stretches rather than breaks, resulting in that iconic q弹 bounce. The process of steaming or microwaving the flour with liquid activates this starch, transforming the mixture into a soft, pliable mass. Achieving the perfect balance of moisture, heat, and kneading is critical—too little liquid, and the mochi becomes dry and crumbly; too much, and it turns into a gluey mess.
Ingredients and Tools You’ll Need
Before diving into the recipe, gather the following ingredients and equipment to streamline the process:
Ingredients
- Glutinous Rice Flour (Mochiko): 1½ cups (200g). Opt for a high-quality brand like Koda Farms or Bob’s Red Mill for consistent results.
- Sugar: ¼ cup (50g). White granulated sugar works best, but coconut sugar or brown sugar can add a caramel-like depth.
- Water: 1 cup (240ml). Use room-temperature water to ensure even mixing.
- Cornstarch: ½ cup (60g). This is crucial for dusting your workspace and preventing sticking.
- Optional Fillings: Red bean paste, sesame paste, Nutella, or fresh fruit (e.g., strawberries, mango).
- Food Coloring (optional): Gel-based colors yield vibrant hues without altering texture.
Tools
- Microwave-Safe Bowl or Steamer: A large glass or ceramic bowl for microwaving, or a bamboo steamer for traditional steaming.
- Whisk or Spatula: For mixing the batter smoothly.
- Silicone Spatula: Ideal for scraping sticky dough from bowls.
- Rolling Pin: To flatten the mochi dough.
- Plastic Wrap: To prevent the dough from drying out during kneading.
- Cookie Cutters or a Knife: For shaping the mochi.
Step-by-Step Guide to Making Chewy Mochi
Preparing the Batter
In a microwave-safe bowl, whisk together the glutinous rice flour and sugar until evenly combined. Gradually pour in the water while stirring continuously to avoid lumps. The mixture should resemble a thick, glossy pancake batter. For colored mochi, add a drop or two of food coloring at this stage and mix thoroughly.
Pro Tip: If using a steamer, transfer the batter to a heat-resistant dish (e.g., a glass pie plate) and cover tightly with foil to prevent condensation from dripping into the dough.

Cooking the Mochi
Microwave Method (Quickest):
- Cook the batter on high for 2 minutes.
- Remove the bowl (caution: it will be hot!) and stir vigorously with a silicone spatula to distribute heat.
- Return to the microwave and cook in 30-second intervals, stirring after each interval, until the dough becomes translucent and pulls away from the bowl’s sides (typically 4–5 minutes total).
Steaming Method (Traditional):
- Bring a pot of water to a rolling boil and place the batter-filled dish in the steamer.
- Steam for 15–20 minutes, or until the dough is glossy and no raw flour remains.
- Check doneness by inserting a toothpick into the center—it should come out clean.
Kneading the Dough
This step is pivotal for achieving q弹 texture. Generously dust your work surface and hands with cornstarch to prevent sticking. Scrape the hot dough onto the surface and knead it like bread dough for 5–7 minutes. The dough will initially be very sticky, but persistent kneading will transform it into a smooth, elastic ball.
Why Kneading Matters: The mechanical action aligns the starch molecules, creating a network that traps moisture and enhances chewiness. Over-kneading can make the mochi tough, so stop once the dough feels springy and resembles Play-Doh.
Shaping and Filling
Roll the dough into a log and cut it into 12–16 equal pieces. For filled mochi, flatten each piece into a 3-inch circle, place a teaspoon of filling in the center, and pinch the edges to seal. Roll the filled mochi between your palms to smooth out seams.
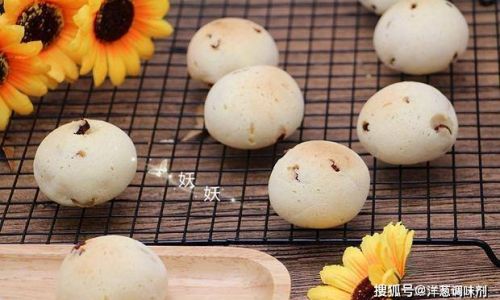
Variation Idea: For daifuku (stuffed mochi), use a light dusting of cornstarch to prevent the filling from oozing. Classic fillings include anko (sweet red bean paste) or kinako (roasted soybean flour).
Cooling and Serving
Place the shaped mochi on a cornstarch-dusted tray and let them cool at room temperature for 10–15 minutes. This resting period allows the starch to set, firming up the texture. Serve mochi slightly warm or chilled, paired with green tea, cocoa, or fresh fruit.
Troubleshooting Common Issues
Even experienced bakers encounter hiccups. Here’s how to fix them:
-
Sticky Dough:
- Cause: Insufficient cornstarch or undercooking.
- Solution: Dust your hands and surface generously with cornstarch. If the dough remains sticky after kneading, microwave it for an additional 30 seconds to evaporate excess moisture.
-
Dry, Crumbly Mochi:
- Cause: Overcooking or too much kneading.
- Solution: Reduce cooking time by 1–2 minutes next time. For immediate rescue, wrap the mochi in a damp paper towel and microwave for 10 seconds to soften.
-
Tough Texture:
- Cause: Over-kneading or using low-quality flour.
- Solution: Knead until just smooth (5–7 minutes). Invest in premium glutinous rice flour for optimal results.
-
Uneven Cooking:
- Cause: Thick batter layers in the microwave.
- Solution: Stir the batter thoroughly halfway through cooking to ensure even heating.
Creative Variations and Flavor Pairings
Mochi’s versatility lends itself to endless experimentation. Try these twists:
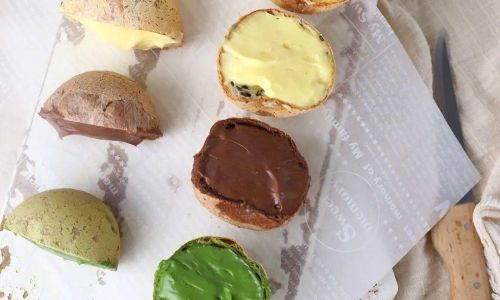
- Fruity Mochi: Add 1 tablespoon of matcha powder or freeze-dried fruit powder to the batter for color and flavor.
- Chocolate Mochi: Substitute 2 tablespoons of cocoa powder for an equal amount of glutinous rice flour.
- Savory Mochi: Omit sugar and stuff with spicy tuna or cheese for a unique appetizer.
- Ice Cream Mochi: Wrap a small scoop of ice cream in mochi dough and freeze for a refreshing dessert.
Storing and Freezing Mochi
Mochi is best enjoyed fresh, but it can be stored for later use:
- Room Temperature: Up to 24 hours in an airtight container (though texture may stiffen).
- Refrigerator: Up to 3 days. Wrap individually in plastic wrap to prevent drying.
- Freezer: Up to 3 months. Thaw at room temperature or microwave for 10–15 seconds.
Reheating Tip: To revive stale mochi, steam it for 2–3 minutes or microwave with a damp paper towel.
The Cultural Significance of Mochi
Beyond its culinary appeal, mochi holds deep cultural meaning in Japan. During New Year’s (Oshogatsu), families gather to pound steamed glutinous rice into mochi using large wooden mallets—a tradition called mochitsuki. The rhythmic pounding symbolizes unity and prosperity, while the soft, round shape of mochi represents the sun and the hope for a fruitful year ahead. Modern mochi-making simplifies this process, but the spirit of sharing and craftsmanship endures.
Conclusion
Creating mochi with that perfect q弹 texture is a rewarding blend of science and art. By understanding the role of glutinous rice flour, mastering kneading techniques, and embracing experimentation, you can craft mochi that rivals artisanal confections. Whether you prefer classic anko-filled treats or avant-garde flavors like yuzu-matcha, the key lies in patience and practice. So, roll up your sleeves, dust your workspace with cornstarch, and embark on a mochi-making journey that will delight your palate and impress your loved ones. Remember—every sticky moment is a step closer to chewy perfection.



0 comments