Introduction
Fried cashews are a beloved snack enjoyed across the globe, prized for their crunchy texture, rich flavor, and versatility. Whether served as an appetizer at gatherings, a topping for salads or stir-fries, or simply savored as a guilt-free indulgence, these nuts offer a delightful combination of sweetness and nuttiness. While store-bought options are convenient, crafting them at home allows you to control the quality of ingredients, adjust seasonings to taste, and ensure a fresh, aromatic batch every time. This article delves into the timeless technique of stir-frying cashews at home, offering tips, tricks, and creative twists to elevate this simple yet satisfying culinary skill.
Why Fry Cashews at Home?
- Freshness: Homemade fried cashews retain their crispiness longer than pre-packaged varieties, which often lose texture due to added preservatives.
- Customization: Experiment with spices, sweetness levels, or even exotic flavors like chili-lime or honey-ginger.
- Cost-Efficiency: Raw cashews are more affordable than pre-seasoned options, and frying them in small batches reduces waste.
- Healthier Options: By controlling the amount of oil and salt, you can create a lighter snack tailored to dietary preferences.
Ingredients and Tools You’ll Need
Before diving into the frying process, gather the following:
-
Ingredients:
- 2 cups raw, unsalted cashews (preferably whole for even cooking).
- 2–3 tablespoons neutral cooking oil (vegetable, peanut, or avocado oil work best).
- 1 teaspoon sea salt (or to taste).
- Optional seasonings: paprika, chili powder, brown sugar, cinnamon, or roasted cumin.
-
Tools:
- A heavy-bottomed skillet or wok (to distribute heat evenly).
- A wooden spatula or heat-resistant spoon.
- Paper towels (for draining excess oil).
- A large mixing bowl (for tossing cashews with seasonings).
Step-by-Step Guide to Frying Cashews
Preparing the Cashews
Start by selecting high-quality raw cashews. Avoid salted or roasted varieties, as they may burn during frying and limit seasoning flexibility. Rinse the cashews under cool water to remove any debris, then pat them dry thoroughly. Excess moisture can cause the oil to splatter, so ensure they are completely dry before proceeding.
Heating the Oil
Place your skillet or wok over medium-low heat. Add the oil and allow it to warm gently—avoid high heat, as cashews cook quickly and can turn bitter if scorched. Swirl the pan to coat the surface evenly.
Frying the Cashews
Once the oil shimmers (but before it smokes), add the cashews to the pan. Spread them in a single layer to ensure even cooking. Stir continuously using a wooden spatula to prevent sticking and uneven browning.
Key Tip: The frying process should take 8–12 minutes. Listen for a gentle sizzling sound—this indicates the cashews are releasing moisture and beginning to toast.
Monitoring Doneness
Observe the cashews closely as they fry:
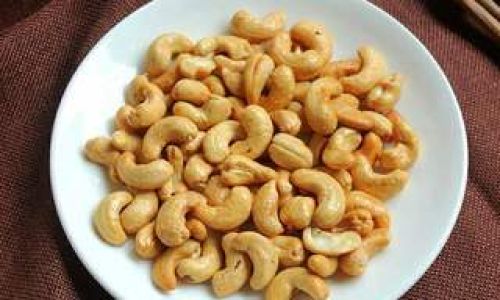
- Color Change: They will transition from pale beige to a golden-brown hue.
- Aroma: A nutty, toasted scent will fill the kitchen.
- Texture: Cashews will develop a slight sheen as the oil coats them.
Important: Remove a cashew from the pan and let it cool for 30 seconds. If it’s crunchy (not soft or chewy), they’re ready. Overcooking will result in a burnt taste.
Draining and Seasoning
Transfer the fried cashews to a plate lined with paper towels to absorb excess oil. While still warm, toss them in a mixing bowl with salt and any desired seasonings. The residual heat will help the spices adhere.
Cooling Completely
Allow the cashews to cool at room temperature for 15–20 minutes. This step is crucial for achieving maximum crispiness. Store them in an airtight container once cooled.
Expert Tips for Perfect Fried Cashews
- Low and Slow Wins the Race: Resist the urge to crank up the heat. Medium-low heat ensures even toasting without burning.
- Test Batch: Fry a small handful of cashews first to gauge cooking time and adjust seasonings.
- Oil Choice: Neutral oils prevent overpowering the cashews’ natural flavor. Avoid olive oil, which has a low smoke point.
- Stir Constantly: Neglecting the pan for even a minute can lead to uneven browning.
- Seasoning Timing: Add salt and spices while the cashews are warm but not piping hot to prevent clumping.
Creative Seasoning Variations
- Sweet and Spicy: Toss cashews with 1 tbsp brown sugar, 1 tsp chili powder, and a pinch of cayenne.
- Honey-Roasted: Drizzle 1 tbsp honey over warm cashews and sprinkle with sea salt.
- Garlic Parmesan: Mix with 1 tsp garlic powder, 2 tbsp grated Parmesan, and 1 tsp dried herbs.
- Smoky Chipotle: Combine 1 tsp smoked paprika, ½ tsp chipotle powder, and a pinch of lime zest.
Storage and Shelf Life
Homemade fried cashews retain their crunch for up to two weeks when stored in an airtight container in a cool, dry place. For longer freshness (up to one month), refrigerate them. Avoid exposure to humidity, as it softens the texture.
Health Benefits of Cashews
Beyond their irresistible taste, cashews pack a nutritional punch:
- Heart-Healthy Fats: Rich in monounsaturated fats, which lower bad cholesterol.
- Protein Powerhouse: A 1-ounce serving provides 5 grams of plant-based protein.
- Mineral-Rich: High in magnesium (for bone health) and copper (for immunity).
- Fiber Content: Aids digestion and promotes satiety.
Common Mistakes to Avoid
- Using Salted Cashews: This leads to overly salty results and limits seasoning flexibility.
- Crowding the Pan: Overfilling the skillet causes uneven cooking and steaming instead of frying.
- Skipping the Cooling Step: Premature storage traps moisture, resulting in sogginess.
- Adding Seasonings Too Late: Spices won’t stick if cashews are too hot or already cooled.
Troubleshooting Guide
- Burnt Cashews: Reduce heat next time and stir more frequently.
- Soft Texture: Extend frying time by 2–3 minutes, ensuring even browning.
- Bland Flavor: Increase seasonings gradually or add a touch of acidity (lime juice) to brighten the taste.
Beyond the Basics: Advanced Techniques
- Oven-Roasted Alternative: For a hands-off approach, roast cashews on a baking sheet at 350°F (175°C) for 10–12 minutes, tossing halfway.
- Caramelized Cashews: Prepare a simple caramel sauce (1/4 cup sugar, 1 tbsp water) and coat cashews before baking at 300°F (150°C) for 15 minutes.
- Spicy Coating: Dredge cashews in a mixture of cornstarch, chili powder, and salt before frying for an extra-crunchy exterior.
Conclusion
Frying cashews at home is a rewarding culinary endeavor that transforms a simple ingredient into a gourmet treat. By mastering the balance of heat, timing, and seasoning, you can create batches tailored to your palate—whether sweet, savory, or spicy. This versatile snack not only elevates meals but also serves as a thoughtful homemade gift. So, grab your skillet, embrace the sizzle, and savor the satisfaction of crispy, golden cashews crafted with care.
Final Thought: The beauty of homemade fried cashews lies in their adaptability. Once you’ve mastered the basics, let your creativity soar. From exotic spice blends to unexpected sweet-salty combinations, every batch is a chance to refine your skills and delight your taste buds. Happy frying!


0 comments