Introduction
Dumplings, a beloved culinary treasure spanning continents and cultures, owe much of their delightful texture and versatility to the foundation of their creation: the dough. Whether you’re crafting Chinese jiaozi, Italian tortellini, or Polish pierogi, the process of kneading dumpling dough is a delicate dance between science and tradition. Achieving the ideal balance of elasticity, tenderness, and strength in your dough requires precision, patience, and a deep understanding of the ingredients at play. This article delves into the intricacies of dumpling dough preparation, focusing on the critical step of kneading. From selecting the right flour to mastering the tactile cues that signal readiness, we’ll explore every facet of this age-old technique.
The Science Behind Dumpling Dough
At its core, dumpling dough is a simple mixture of flour, water, and sometimes salt or fat. Yet, within this simplicity lies a complex interplay of gluten development and hydration. Wheat flour contains proteins—gliadin and glutenin—that, when hydrated and agitated, form gluten. Kneading accelerates this process, aligning the proteins into a stretchy network that traps gases (from leavening agents or steam during cooking) and provides structure. For dumplings, the goal is not to overdevelop gluten—as in bread—but to create a dough that is pliable yet resilient, capable of holding fillings without tearing.
Ingredients and Tools: Building Blocks of Perfection
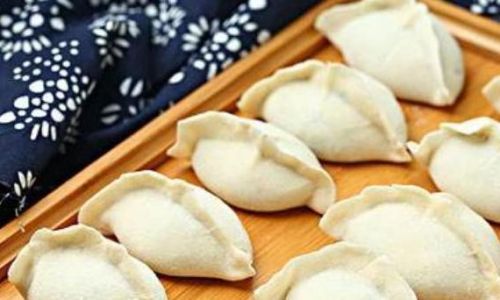
Before diving into kneading, gather your ingredients and tools. The quality of your flour matters: all-purpose flour works well for most dumplings, while bread flour’s higher protein content yields chewier wrappers. For delicate Asian dumplings, consider using pastry flour or a blend of all-purpose and cake flour for tenderness.
Essential Ingredients:
- Flour (all-purpose, bread, or pastry)
- Water (room temperature or slightly warm)
- Salt (optional, for flavor)
- Fat (e.g., vegetable oil, for added suppleness)
Tools:
- Large mixing bowl
- Wooden spoon or dough scraper
- Rolling pin (for shaping)
- Plastic wrap or damp cloth (for resting dough)
- Kitchen scale (for precision)
The Kneading Process: Step-by-Step Mastery
Measuring and Mixing
Begin by measuring your flour. A common ratio is 2 cups flour to ¾ cup water, though adjustments may be needed based on humidity and flour type. Place the flour in a bowl, create a well in the center, and gradually add water while stirring with a wooden spoon. If using salt or oil, incorporate them into the water before adding. The mixture will initially resemble shaggy crumbs—this is normal.
Initial Hydration
Once the dough comes together in a rough mass, transfer it to a clean, lightly floured surface. Avoid adding excess flour at this stage, as it can dry out the dough. Use a dough scraper to fold and press the dough, ensuring all flour is incorporated. The goal here is to evenly hydrate the flour without overworking the dough.
Hand Kneading Technique
Kneading by hand develops a tactile connection with the dough, allowing you to sense changes in texture. Start by pushing the dough away from you with the heel of your hand, then fold it back over itself. Rotate the dough 90 degrees and repeat. This folding and stretching motion aligns gluten strands.
Key Indicators of Progress:
- Early Stage (0–5 minutes): Dough feels sticky, shaggy, and uneven.
- Mid Stage (5–10 minutes): Dough becomes smoother, with some elasticity.
- Final Stage (10–15 minutes): Dough is silky, springy, and bounces back when poked.
Machine Kneading (Stand Mixer Method)
For efficiency, use a stand mixer with a dough hook attachment. Start on low speed to prevent flour from escaping, then increase to medium. Kneading times are shorter with machines—typically 8–10 minutes. Stop periodically to check the dough’s temperature (overheating can break gluten) and consistency.
The Windowpane Test
To assess gluten development, pinch off a small piece of dough and gently stretch it between your fingers. If it stretches into a thin, translucent membrane without tearing, the gluten is sufficiently developed. This “windowpane” indicates the dough is ready for resting.
Resting the Dough (Proofing)
After kneading, wrap the dough in plastic or cover it with a damp cloth. Let it rest for 30–60 minutes at room temperature. Resting allows gluten strands to relax, making the dough easier to roll and less prone to shrinking. For colder environments, a slightly longer rest may be needed.
Troubleshooting Common Kneading Issues
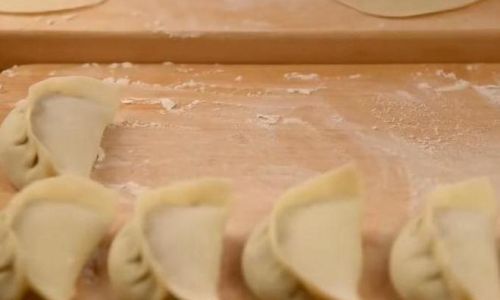
Sticky Dough
- Cause: Insufficient flour or overhydration.
- Solution: Lightly flour your work surface and hands, then knead briefly to incorporate. Avoid adding excessive flour, as it toughens the dough.
Dry, Crumbly Dough
- Cause: Too much flour or underhydration.
- Solution: Sprinkle water droplets over the dough and knead until it regains suppleness.
Over-Kneaded Dough
- Cause: Excessive agitation beyond gluten’s tolerance.
- Solution: Over-kneaded dough becomes tough and hard to roll. To mitigate, rest it longer to allow gluten to relax. Use for sturdier dumplings like potstickers.
Uneven Texture
- Cause: Inconsistent hydration or poor mixing.
- Solution: Tear the dough into pieces, rehydrate any dry spots, and knead until uniform.
Advanced Techniques for Perfect Wrappers
Hot Water Dough (Tang Mian)
Common in Chinese cuisine, hot water dough uses boiling water to partially gelatinize starch, resulting in softer, more pliable wrappers. Mix hot water with flour, stir until cooled, then knead. Rest for at least 30 minutes before rolling.
Cold Water Dough
Ideal for chewy textures, cold water dough requires less kneading. Use ice water and minimal handling to keep gluten development in check.
Adding Color and Flavor
Incorporate natural dyes like beet juice (pink), spinach puree (green), or turmeric (yellow) for visually striking dumplings. Herbs, spices, or roasted garlic can elevate flavor profiles.
Regional Variations and Cultural Nuances
Chinese Jiaozi
Traditional jiaozi dough uses cold water and a moderate kneading time. The wrappers are thin yet durable, with a slight chew. Some recipes add an egg yolk for richness.
Japanese Gyoza
Gyoza dough is thinner and more delicate, often requiring a longer rest for extensibility. A touch of rice vinegar in the dough enhances tenderness.
Italian Tortellini
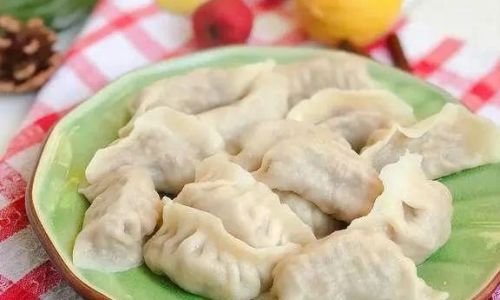
Tortellini dough includes eggs, creating a rich, golden wrapper. Kneading is brief but thorough, as egg proteins contribute to structure.
Eastern European Pelmeni
Pelmeni dough is robust, with a higher fat content (often sour cream or butter) for richness. Kneading is vigorous to develop gluten for boiling.
Storing and Preparing Dumpling Dough Ahead of Time
Refrigeration
Wrap kneaded dough tightly in plastic and refrigerate for up to 24 hours. Let it come to room temperature for 30 minutes before rolling.
Freezing
Divide dough into portions, flatten into disks, and wrap in plastic and foil. Freeze for up to 3 months. Thaw overnight in the refrigerator.
Pre-Rolled Wrappers
Roll dough into thin sheets, cut into circles, and layer with parchment paper. Freeze in an airtight container for quick weeknight dumplings.
The Art of Rolling: Extending Kneading Principles
Even after perfect kneading, improper rolling can ruin dumpling wrappers. Use a small, tapered rolling pin and apply even pressure. Start from the center, rolling outward in all directions to maintain a circular shape. For uniform thickness, rotate the wrapper frequently.
Conclusion: The Journey to Dumpling Mastery
Kneading dumpling dough is a meditative act, a conversation between baker and ingredients. Each fold, stretch, and rest imbues the dough with character, transforming simple elements into a canvas for culinary creativity. Whether you prefer the rustic charm of hand-kneaded dough or the precision of machine-aided methods, the principles remain the same: hydrate, agitate, and respect the rhythm of gluten development. With practice, you’ll learn to read the dough’s subtle cues—a tacky surface, a springy bounce, a translucent windowpane—and soon, every dumpling you craft will be a testament to your newfound expertise. So gather your flour, ready your hands, and embark on a journey where tradition and technique converge, one perfect wrapper at a time.
0 comments