Table of content
- Ingredients
- Tools
- Step 1: Cleaning and Patting Dry
- Step 2: Marinating (Optional)
- Step 3: Cutting and Seasoning
- Technique 1: Classic Flour Dredge
- Technique 2: Beer Batter
- Technique 3: Double Coating
- Step 1: Heating the Oil
- Step 2: Frying in Batches
- Step 3: Monitoring Temperature
- Step 4: Draining and Resting
- Double Frying Method
- Air Fryer Alternative
Introduction
Fried crispy fish is a culinary delight that transcends borders, beloved in kitchens from coastal towns to bustling cities. Achieving that coveted golden-brown crust with tender, flaky fish inside requires precision, patience, and a dash of culinary know-how. Whether you’re a novice cook or a seasoned home chef, this comprehensive guide will walk you through every step of creating restaurant-quality fried fish right in your own kitchen. From selecting the freshest catch to mastering the frying technique, we’ll explore the science behind crispiness and share tips to elevate your dish to gourmet status.
Chapter 1: Choosing the Right Fish
The foundation of exceptional fried fish lies in selecting the right type of fish. Ideal candidates are firm-fleshed, mild-tasting species that hold their shape during frying. Popular choices include:
- Cod: A classic choice with a delicate flavor and meaty texture.
- Tilapia: Affordable and mild, perfect for absorbing seasonings.
- Catfish: A Southern favorite with a slightly sweet taste and firm texture.
- Haddock: Similar to cod but with a slightly sweeter profile.
- Trout: For a richer, more robust flavor.
Fresh vs. Frozen: Whenever possible, opt for fresh fish. Look for clear eyes, shiny skin, and a mild, briny scent. If frozen, ensure it’s been properly thawed in the refrigerator overnight to prevent moisture loss.
Chapter 2: Essential Ingredients and Tools
Ingredients
- Fish Fillets: 1.5–2 pounds, skinless and boneless, cut into 4–6 oz portions.
- Batter or Coating:
- All-Purpose Flour: For a light, crispy crust.
- Cornstarch: Adds extra crunch and reduces gluten formation.
- Baking Powder: Creates airiness in batters.
- Seasonings: Salt, black pepper, paprika, garlic powder, or cayenne for heat.
- Liquid Base:
- Buttermilk: Tenderizes the fish and adds tanginess.
- Beer: For a effervescent, light batter (use a lager or pale ale).
- Club Soda: A non-alcoholic alternative to beer.
- Oil: Vegetable, canola, or peanut oil for high-heat frying.
Tools
- Deep Fryer or Heavy-Bottomed Pot: Ensures even heat distribution.
- Thermometer: Essential for maintaining oil temperature (350–375°F/175–190°C).
- Tongs or Slotted Spoon: For safely flipping and removing fish.
- Wire Rack: Placed over a baking sheet to drain excess oil.
- Paper Towels: For blotting (use sparingly to avoid sogginess).
Chapter 3: Preparing the Fish
Step 1: Cleaning and Patting Dry
- Rinse fillets under cold water to remove scales or debris.
- Pat dry thoroughly with paper towels. Moisture is the enemy of crispiness!
Step 2: Marinating (Optional)
Marinating enhances flavor and tenderness. Try these quick options:
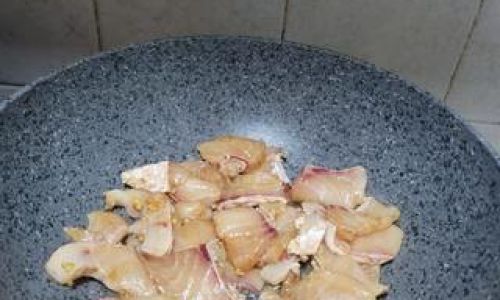
- Buttermilk Marinade: Soak fish in buttermilk mixed with 1 tsp salt and 1/2 tsp pepper for 20–30 minutes.
- Lemon-Herb: Combine olive oil, lemon zest, minced garlic, and chopped parsley.
- Asian-Inspired: Use soy sauce, rice vinegar, ginger, and a pinch of sugar.
Step 3: Cutting and Seasoning
- Cut fillets into uniform pieces for even cooking.
- Season both sides with salt, pepper, and your choice of spices. Let rest 10 minutes to absorb flavors.
Chapter 4: Crafting the Perfect Coating
The coating is where magic happens. Experiment with these techniques:
Technique 1: Classic Flour Dredge
- Combine 1 cup flour, 1/4 cup cornstarch, 1 tsp salt, 1 tsp paprika, and 1/2 tsp pepper.
- Dredge each fillet in the mixture, shaking off excess.
Technique 2: Beer Batter
- Whisk 1 cup flour, 1 tsp baking powder, 1/2 tsp salt, and 1 cup cold beer until smooth.
- Let batter rest 10 minutes to activate leavening agents.
Technique 3: Double Coating
For extra crunch:
Dredge fish in flour, then dip in batter, then back into flour.
Pro Tip: For gluten-free options, substitute rice flour or chickpea flour.
Chapter 5: Frying Mastery
Step 1: Heating the Oil
- Fill your pot with 2–3 inches of oil. Do not overfill!
- Heat oil to 350°F (175°C). Use a thermometer—guesswork leads to greasy or burnt fish.
Step 2: Frying in Batches
- Fry 2–3 fillets at a time to avoid overcrowding, which lowers oil temperature.
- Gently lower fish into oil using tongs to prevent splattering.
Step 3: Monitoring Temperature
- Adjust heat as needed to maintain 350–375°F (175–190°C).
- Fry until golden brown, about 4–6 minutes per side, depending on thickness.
Step 4: Draining and Resting
- Transfer fried fish to a wire rack (not paper towels!) to drain.
- Let rest 3–5 minutes before serving. This allows the crust to set.
Chapter 6: Troubleshooting Common Issues
- Soggy Coating: Oil wasn’t hot enough, or fish was overcrowded.
- Burnt Exterior: Oil too hot; reduce heat next time.
- Greasy Fish: Oil temperature dipped during frying; use a thermometer.
- Uneven Cooking: Fillets varied in thickness; pound thicker pieces gently.
Chapter 7: Serving Suggestions
Fried crispy fish shines when paired with complementary flavors:
- Tartar Sauce: Mix mayo, pickles, capers, and lemon juice.
- Malt Vinegar: A British staple for fish and chips.
- Coleslaw: Creamy or vinegar-based for a crunchy contrast.
- Lemon Wedges: A bright squeeze enhances freshness.
- Fries or Hush Puppies: Classic Southern-style sides.
Garnish Ideas: Chopped parsley, dill, or a sprinkle of smoked paprika.

Chapter 8: Advanced Techniques
Double Frying Method
- First Fry: Cook fish at 325°F (160°C) for 4–5 minutes until lightly golden.
- Rest: Let cool 10 minutes.
- Second Fry: Reheat oil to 375°F (190°C) and fry until deeply golden and crisp.
Air Fryer Alternative
For a healthier twist:
- Coat fish as usual.
- Preheat air fryer to 400°F (200°C).
- Cook 10–12 minutes, flipping halfway. Spritz with oil for extra crisp.
Chapter 9: Cultural Variations
Fried fish is a global favorite, with regional twists:
- British Fish and Chips: Served with thick-cut fries and mushy peas.
- Japanese Tempura: Light, delicate batter made with ice-cold water.
- Southern US Catfish: Fried in cornmeal and served with hush puppies.
- Thai Fried Fish: Spiced with lemongrass, chili, and basil.
Chapter 10: Storage and Reheating
- Leftovers: Store in an airtight container in the fridge for up to 2 days.
- Reheating: Avoid microwaving! Reheat in a 350°F (175°C) oven until crisp.
Conclusion
Creating the perfect crispy fried fish is an art that balances science and intuition. By mastering ingredient selection, coating techniques, and frying temperature, you’ll consistently deliver a dish that wows. Remember, practice makes perfect—don’t be discouraged by a few trial runs. Soon, you’ll be frying fish like a pro, impressing family and friends with every golden, crunchy bite. Bon appétit!

Final Pro Tip: Pair your creation with a crisp lager, chardonnay, or a refreshing iced tea. The right beverage elevates the meal from ordinary to extraordinary. Now, grab your apron and let’s get frying!

0 comments