Introduction
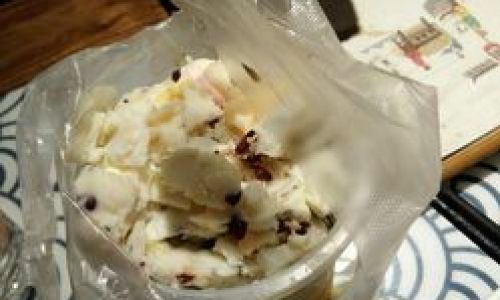
Fried yogurt, a beloved street food sensation originating from China, has captured the hearts and taste buds of dessert enthusiasts worldwide. Often referred to as “stir-fried ice cream” or “rolled ice cream” in some regions, this treat combines the creaminess of frozen yogurt with the satisfying crunch of mix-ins, all prepared in a matter of minutes using a simple yet fascinating technique. Unlike traditional ice cream, which requires churning and hours of freezing, fried yogurt relies on a cold plate (typically maintained at -20°C to -30°C) to instantly freeze the base, allowing for endless customization. This guide will demystify the process, ensuring you can recreate this delightful dessert at home with minimal effort and maximum flavor. Whether you’re a seasoned home cook or a curious beginner, this article will equip you with the knowledge to master fried yogurt, from selecting the finest ingredients to perfecting your presentation.

Understanding the Basics: What Makes Fried Yogurt Unique?
At its core, fried yogurt is a frozen dessert made by spreading a thin layer of yogurt mixed with sweeteners and flavorings onto an ultra-cold surface. As the mixture freezes almost instantly, it’s scraped and folded into delicate rolls or chopped into bite-sized pieces, then topped with an array of textures and tastes. The “frying” here is metaphorical—there’s no actual cooking involved. Instead, the term refers to the rapid freezing process that mimics the sizzling sound of a pan. This method ensures a lighter, less sugary alternative to ice cream, with a refreshingly tangy undertone from the yogurt.
Ingredients: Building Your Flavor Foundation
The beauty of fried yogurt lies in its adaptability. You can tailor every component to suit your palate, dietary needs, or seasonal availability. Here’s a breakdown of the essentials:
-
Yogurt Base:
- Greek Yogurt: Offers a thick, creamy texture and tangy flavor. Opt for full-fat for richness or low-fat for a lighter option.
- Regular Yogurt: Provides a slightly thinner consistency, ideal for softer rolls.
- Dairy-Free Alternatives: Coconut, almond, or oat yogurt work well for vegan or lactose-intolerant guests.
-
Sweeteners:
- Honey or Agave Syrup: Add natural sweetness without overpowering the yogurt’s tang.
- Powdered Sugar: Dissolves easily and creates a smoother base.
- Stevia or Monk Fruit: For a sugar-free version.
-
Flavor Enhancers:
- Vanilla Extract: A classic choice that complements most toppings.
- Cocoa Powder: For a chocolatey twist.
- Matcha or Fruit Purees: Infuse vibrant flavors and colors.
-
Mix-Ins (Add Before Freezing):
- Fresh Fruits: Strawberries, mango, or kiwi add bursts of juiciness.
- Nuts & Seeds: Chopped almonds, pistachios, or chia seeds for crunch.
- Chocolate Chips or Cookies: For indulgent variations.
-
Toppings (Add After Rolling):
- Fresh Berries, Diced Mango, or Sliced Bananas.
- Granola, Shredded Coconut, or Crushed Graham Crackers.
- Drizzles: Chocolate syrup, caramel, or fruit coulis.
Equipment: Simplifying the Process
While traditional fried yogurt vendors use specialized cold plates, you can replicate the magic at home with accessible tools:

-
Cold Plate Substitutes:
- Metal Baking Tray: Pre-freeze it for at least 4 hours. The larger the surface area, the better.
- Granite or Marble Slab: If you own one, place it in the freezer overnight.
-
Essential Tools:
- Spatula or Scraper: A sturdy, flat-edged tool to spread and roll the yogurt.
- Mixing Bowls: For preparing the base and toppings.
- Parchment Paper: To prevent sticking if using a tray.
Step-by-Step Guide: Crafting Perfect Fried Yogurt
Step 1: Preparing the Yogurt Base
In a large bowl, combine 2 cups of yogurt with 2–3 tablespoons of sweetener (adjust to taste). Add 1 teaspoon of vanilla extract or your chosen flavoring. For a richer taste, fold in 1/4 cup of heavy cream or coconut cream. If using fruits or cocoa, mix them in gently. Aim for a consistency slightly thicker than pancake batter—too runny, and it won’t freeze properly; too thick, and it’ll be hard to spread.
Step 2: Preparing Your Workspace
Place your frozen tray or plate on a stable surface. Keep a bowl of ice water nearby to cool your spatula if it starts to warm up during scraping. Line a cutting board or plate with parchment paper to transfer the finished rolls.
Step 3: Spreading and Freezing
Pour the yogurt mixture onto the cold surface. Using the spatula, spread it into a thin, even layer (about 1/8 inch thick). Work quickly to prevent partial thawing. The mixture should start to freeze within 30 seconds, becoming opaque and firm.
Step 4: Scraping and Rolling
Once the yogurt is fully frozen, use the spatula to scrape it into ribbons. For rolls, angle the spatula at a 45-degree angle and push the yogurt forward while lifting the edge to create a curl. For chunkier textures, chop the yogurt into small pieces. If the yogurt starts to soften, refreeze the tray briefly.
Step 5: Adding Toppings
Transfer the rolls or pieces onto your serving dish. Immediately sprinkle with toppings—the cold yogurt will slightly harden any liquid toppings, creating a crunchy shell. For a finishing touch, drizzle with sauce and garnish with herbs like mint or edible flowers.

Pro Tips for Perfect Results
- Temperature Control: Ensure your cold surface is adequately frozen. If using a home freezer, rotate trays every 2 hours for even chilling.
- Timing is Key: Work swiftly but gently. Rushing may cause the yogurt to crack, while拖延 may lead to thawing.
- Customization: Experiment with layering flavors. Spread a thin layer of chocolate yogurt, freeze it, then add a layer of strawberry on top for a marbled effect.
- Storage: Fried yogurt is best enjoyed immediately. If you must save leftovers, store them in an airtight container in the freezer for up to 24 hours. Let it thaw for 5 minutes before serving.
Creative Variations to Elevate Your Game
- Tropical Paradise: Mix pineapple yogurt with shredded coconut and toasted macadamia nuts. Top with mango cubes and a lime zest drizzle.
- Decadent Chocolate Lover: Blend cocoa powder into Greek yogurt, add dark chocolate chunks, and finish with a raspberry coulis.
- Berry Bliss: Fold mixed berries into honey-sweetened yogurt. Top with granola and a dollop of whipped cream.
- Vegan Delight: Use coconut yogurt, swirl in date syrup, and top with toasted pecans and banana slices.
- Spiced Chaat: For a savory-sweet twist, add chaat masala to mango yogurt, then top with crushed papadum and cilantro.
Troubleshooting Common Issues
- Yogurt Too Sticky: If the mixture clings to your spatula, dip it in ice water or sprinkle a tiny amount of cornstarch on the cold surface.
- Rolls Falling Apart: Ensure the yogurt layer is thin enough. Thicker layers are prone to cracking.
- Icy Texture: Overmixing the base or using low-fat yogurt can result in iciness. Opt for full-fat varieties and avoid excessive stirring.
- Bland Flavor: Amplify sweetness gradually. Taste the base before freezing and adjust accordingly.
Healthier Twists and Dietary Adaptations
- Low-Calorie Option: Use non-fat Greek yogurt, stevia, and fresh fruit.
- Protein-Packed: Add a scoop of protein powder to the base.
- Keto-Friendly: Substitute honey with erythritol and use nuts as toppings.
- Gluten-Free: Ensure all mix-ins and toppings are certified gluten-free.
Serving Suggestions and Presentation Ideas
- Cones vs. Bowls: Serve rolls in crispy waffle cones for a portable treat or in bowls for a sit-down dessert.
- Plating Aesthetics: Arrange rolls in a spiral pattern, intersperse with berries, and dust with edible glitter for a Instagram-worthy finish.
- Pairings: Pair with a shot of cold espresso, a glass of sparkling water, or a slice of homemade pie.
The Cultural Phenomenon: Fried Yogurt Beyond the Kitchen
Fried yogurt’s rise to global fame is a testament to its versatility and visual appeal. From bustling night markets in Beijing to food festivals in New York, this dessert has become a symbol of culinary innovation. Its interactive preparation—where customers often watch their treats being made—adds a layer of theater to the dining experience. By mastering this recipe, you’re not just learning to cook; you’re joining a movement that celebrates creativity, simplicity, and the joy of sharing food.
Conclusion: Embrace the Joy of Homemade Fried Yogurt
Creating fried yogurt at home is a rewarding endeavor that demands minimal ingredients but yields maximum satisfaction. Whether you’re hosting a dinner party, craving a midnight snack, or seeking a fun activity with kids, this recipe adapts to every occasion. Remember, perfection comes with practice—don’t be discouraged if your first few attempts aren’t picture-perfect. Over time, you’ll develop an intuition for texture, timing, and flavor balances. So, gather your ingredients, pre-freeze your tray, and embark on a frozen adventure that promises to delight your senses and impress your guests. After all, the best desserts are those made with love, creativity, and a touch of culinary curiosity. Happy frying!


0 comments