Introduction
In the realm of healthy eating, tri-color brown rice stands out as a nutritious and visually appealing grain option. This unique blend combines the earthy flavors and textures of red, black, and brown rice, offering a symphony of nutrients that cater to those seeking a balanced diet. Unlike its polished white counterpart, tri-color brown rice retains its bran and germ layers, making it a rich source of fiber, vitamins, minerals, and antioxidants. However, cooking tri-color brown rice perfectly can be a challenge for even the most seasoned chefs. This comprehensive guide aims to demystify the process, ensuring that you can enjoy fluffy, aromatic, and perfectly cooked tri-color brown rice every time.
Understanding Tri-Color Brown Rice
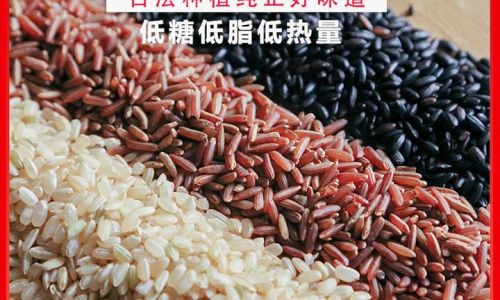
Before diving into the cooking process, it’s crucial to understand what makes tri-color brown rice special. Each variety brings its own set of nutrients and flavors:
- Red Rice: Often known for its high anthocyanin content, which gives it its vibrant hue, red rice is rich in antioxidants and may support heart health.
- Black Rice: Also known as forbidden rice due to its rarity and royal history in ancient China, black rice boasts an exceptionally high antioxidant level, particularly in the form of anthocyanins. It’s also a good source of fiber and essential amino acids.
- Brown Rice: The most familiar of the trio, brown rice is a whole grain that provides a balanced mix of carbohydrates, fiber, vitamins, and minerals. Its nutty flavor and chewy texture make it a versatile base for many dishes.
Together, these grains create a meal that is not only nutritious but also visually striking, making it an excellent addition to any meal plan.
Preparing Your Ingredients and Equipment
Before starting the cooking process, ensure you have the following:
- Tri-Color Brown Rice: Measure out the desired amount. Generally, 1 cup of uncooked rice yields approximately 3 to 4 cups of cooked rice.
- Water or Broth: Use a ratio of approximately 2 to 2.5 cups of liquid per cup of rice. For added flavor, you can use vegetable, chicken, or beef broth instead of water.
- Salt: A pinch or two to taste.
- A Heavy-Bottomed Pot or Rice Cooker: A heavy-bottomed pot distributes heat evenly, preventing the rice from burning. A rice cooker simplifies the process and ensures consistent results.
- Fine-Mesh Strainer: For rinsing the rice.
- Wooden Spoon or Rice Paddle: Avoid using metal utensils, which can scratch the pot and potentially release unwanted metals into your food.
Step-by-Step Cooking Instructions
-
Rinsing the Rice
Begin by rinsing the tri-color brown rice under cold running water using a fine-mesh strainer. This removes any surface starch, which can cause the rice to stick together during cooking. Rinse until the water runs clear. -
Soaking (Optional but Recommended)
Soaking the rice for 30 minutes to an hour before cooking can significantly reduce the cooking time and make the grains more tender. Use cold water and ensure the rice is fully submerged. After soaking, drain the rice well. -
Bringing the Liquid to a Boil
In your heavy-bottomed pot or rice cooker, combine the rinsed and soaked (if soaked) rice with the measured water or broth and a pinch of salt. Place over medium-high heat and bring to a rolling boil. If using a rice cooker, simply follow the manufacturer’s instructions for adding ingredients. -
Simmering
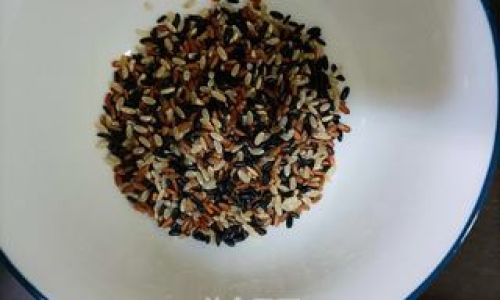
Once the liquid reaches a boil, reduce the heat to low, cover the pot tightly with a lid, and let the rice simmer. For stovetop cooking, create a steam vent by placing a wooden spoon handle or a folded kitchen towel under one side of the lid to prevent excessive condensation from dripping back into the rice, which can make it mushy.If using a rice cooker, set it to the “cook” setting and let it do its job.
-
Cooking Time
Tri-color brown rice typically takes longer to cook than white rice due to its higher fiber content. Expect a cooking time of around 40 to 50 minutes, or until the liquid is absorbed and the rice is tender but still slightly chewy. Start checking the rice around the 35-minute mark to avoid overcooking. -
Resting the Rice
Once the rice is cooked, turn off the heat and let it sit, covered, for an additional 10 minutes. This resting period allows the grains to absorb any remaining moisture and firm up, resulting in fluffier, more separated rice. -
Fluffing and Serving
After resting, use a fork or rice paddle to gently fluff the rice, separating the grains. Serve immediately or let it cool to room temperature for use in salads or other dishes.
Troubleshooting Common Issues
- Sticky Rice: This often happens due to excess starch or not enough cooking liquid being absorbed. Ensure you rinse the rice thoroughly and avoid stirring too much during cooking, as this can release more starch.
- Crunchy Rice: If the rice is still crunchy after the recommended cooking time, add a bit more water (a few tablespoons), re-cover, and let it steam for an additional 5 to 10 minutes.
- Mushy Rice: Overcooking or too much liquid can turn rice mushy. Always check the rice early and consider removing it from heat if it looks nearly done.
Storage Tips
Cooked tri-color brown rice can be stored in an airtight container in the refrigerator for up to 4 days. To reheat, steam it gently or microwave in small portions, adding a splash of water if needed to prevent drying out.
Conclusion
Cooking tri-color brown rice may require a bit more patience and attention than white rice, but the nutritional benefits and delicious flavor make it well worth the effort. By following these steps, you’ll be able to enjoy perfectly cooked tri-color brown rice that’s not only nutritious but also a beautiful addition to your meals. Whether you’re incorporating it into a hearty bowl, using it as a side dish, or simply enjoying it on its own, tri-color brown rice is a versatile and healthy grain choice that should be a staple in your kitchen. Happy cooking!


0 comments