Table of content
Rice porridge, a comforting and versatile dish enjoyed across cultures, is a staple in many cuisines. From the silky Chinese congee to the hearty Japanese okayu and the fragrant Indian khichdi, this humble dish adapts to endless flavor profiles and textures. Yet, for both novice cooks and seasoned home chefs, one question persists: How long should rice porridge be cooked to achieve the ideal consistency? The answer lies in a delicate balance of time, heat, and technique. This article explores the science and craft behind cooking rice porridge, offering detailed guidance on duration, methods, and troubleshooting to ensure a flawless bowl every time.
Understanding the Basics: What Determines Cooking Time?
The time required to cook rice porridge hinges on several factors, including the type of rice, desired texture, cooking method, and equipment used. Below, we break down these variables to demystify the process.

Rice Variety
- Short-Grain Rice: Sticky and starchy, short-grain varieties like sushi rice or Japanese calrose require less liquid and cook faster, typically in 20–30 minutes. The starch content helps create a creamy texture.
- Medium-Grain Rice: Examples include Arborio (used in risotto) or jasmine rice. These absorb liquid more gradually, needing 30–40 minutes to soften fully.
- Long-Grain Rice: Basmati or jasmine rice falls here. Long-grain types stay firmer and require longer cooking (40–50 minutes) to achieve porridge-like tenderness.
- Brown Rice: Due to its fibrous bran layer, brown rice demands 50–60 minutes of simmering to soften. Pre-soaking can reduce time by 10–15 minutes.
Desired Consistency
- Thin Porridge: For a broth-like consistency (e.g., Chinese jook), use a 1:8 rice-to-water ratio and cook until rice grains disintegrate, typically 1.5–2 hours on low heat.
- Medium Consistency: A 1:6 ratio yields a thick yet pourable texture, ready in 45–60 minutes.
- Thick Porridge: For a spoon-coating consistency (e.g., Korean juk), a 1:4 ratio and 60–75 minutes of simmering are ideal.
Cooking Method
- Stovetop: The traditional method, requiring constant stirring to prevent sticking.
- Slow Cooker: A hands-off approach that takes 4–6 hours on low heat.
- Pressure Cooker (Instant Pot): Reduces time to 15–20 minutes under high pressure.
- Oven-Baked: A lesser-known technique that takes 2–3 hours but imparts a unique depth of flavor.
Stovetop Method: Step-by-Step Guide
The stovetop method offers maximum control but demands attention. Here’s how to master it:
- Rinse the Rice: Place 1 cup of rice in a fine-mesh strainer and rinse under cold water until the water runs clear. This removes excess starch, preventing clumping.
- Soak (Optional): For shorter cooking times, soak the rice in 2 cups of water for 20–30 minutes. Drain before cooking.
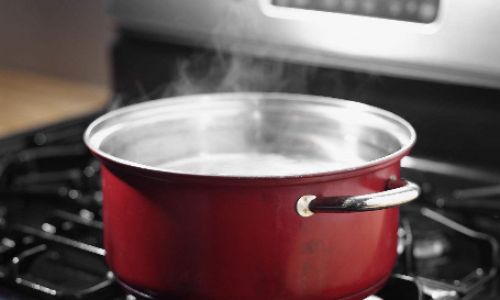
- Combine Ingredients: In a heavy-bottomed pot, add 1 cup rice to 6–8 cups water or broth (adjust for desired thickness). For added flavor, include a pinch of salt, a knob of ginger, or a splash of sesame oil.
- Bring to a Boil: Over medium-high heat, stir occasionally to prevent sticking. Once boiling, reduce heat to low.
- Simmer Gently: Cover partially and simmer, stirring every 5–7 minutes. Adjust heat if bubbling becomes vigorous.
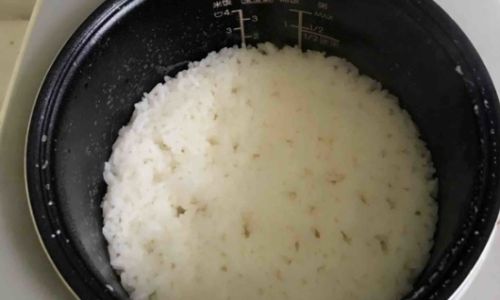
- Monitor Texture: After 20 minutes, test the rice. For porridge, grains should be soft but not mushy. Continue simmering, adding liquid if needed, until desired consistency is reached (30–50 minutes total).
- Finish with Toppings: Remove from heat and stir in toppings like chopped scallions, soft-boiled eggs, or a drizzle of soy sauce.
Pro Tip: For congee-style porridge, extend cooking time to 1.5–2 hours, stirring frequently to break down grains.
Slow Cooker Method: Set-It-and-Forget-It Convenience
Ideal for busy cooks, the slow cooker method requires minimal effort but ample patience:
- Prep Rice: Rinse 1 cup rice and add to the slow cooker.
- Add Liquid: Pour in 6–8 cups liquid (water, broth, or coconut milk).
- Season: Add aromatics like garlic, ginger, or star anise.
- Cook: Set to low for 6–8 hours or high for 3–4 hours. Stir occasionally if possible.
- Adjust Consistency: Near the end, mash grains with a spoon or whisk to thicken. Add more liquid if too thick.
Note: Slow cookers vary; check after 5 hours on low to avoid overcooking.
Pressure Cooker (Instant Pot) Method: Speed Without Sacrifice
The Instant Pot slashes cooking time while preserving nutrients:
- Rinse and Soak: Rinse 1 cup rice. Soaking for 10 minutes is optional but reduces cooking time.
- Combine Ingredients: Add rice, 6–8 cups liquid, and seasonings to the pot.
- Pressure Cook: Seal the lid and cook on high pressure for 15 minutes (white rice) or 20 minutes (brown rice).
- Natural Release: Allow pressure to release naturally for 10 minutes, then quick-release any remaining steam.
- Stir and Serve: Fluff with a fork and blend in toppings like cilantro, chili oil, or fried shallots.
Caution: Overcooking in a pressure cooker can lead to a gluey texture. Start with shorter times and adjust as needed.
Troubleshooting Common Issues
Even seasoned cooks encounter hiccups. Here’s how to fix them:
- Porridge Is Too Thick:
- Solution: Gradually stir in hot water or broth (1/4 cup at a time) until desired consistency is reached.
- Porridge Is Too Thin:
- Solution: Simmer uncovered for 10–15 minutes to reduce liquid. For instant thickening, whisk in a cornstarch slurry (1 tsp cornstarch + 1 tbsp water).
- Burnt Bottom:
- Prevention: Use a heavy-bottomed pot and stir frequently. If burning occurs, transfer unburnt porridge to a new pot and discard the burnt portion.
- Grains Are Crunchy:
- Solution: Add 1/2 cup liquid and continue simmering. Cover tightly to trap steam.
Cultural Variations and Their Cooking Times
Rice porridge transcends borders, with each culture adding its twist:
- Chinese Congee (Jook): Simmered for 1.5–3 hours with chicken or pork bone broth, resulting in a silken texture.
- Japanese Okayu: Cooked with a 1:5 rice-to-water ratio for 45 minutes, often served with umeboshi (pickled plum) or a raw egg.
- Korean Juk: Made with short-grain rice and simmered for 1–2 hours, sometimes with abalone or pumpkin.
- Indian Khichdi: A lentil-rice porridge cooked for 25–30 minutes with turmeric and ghee.
The Science Behind Starch Gelatinization
Rice porridge’s creaminess stems from starch gelatinization—the process where heat breaks down starch granules, causing them to swell and release gel-like substances.

- Temperature: Gelatinization begins at 140°F (60°C) and peaks at 183°F (84°C). Simmering below boiling (185–205°F) ensures even cooking without scorching.
- Time: Prolonged cooking allows maximum starch release, thickening the porridge.
Advanced Techniques for Gourmet Results
Elevate your porridge with these chef-approved tips:
- Roast the Rice: Toast dry rice in a pan until golden before cooking. This adds a nutty depth of flavor.
- Infuse Aromatics: Simmer porridge with pandan leaves, lemongrass, or cinnamon sticks. Remove before serving.
- Layer Flavors: Cook rice in broth, then finish with fresh herbs, pickled vegetables, or a poached egg.
- Chill and Reheat: For a thicker texture, refrigerate porridge overnight and reheat with extra liquid.
Health Benefits and Nutritional Profile
Rice porridge is not only comforting but also nutritious:
- Digestive Health: The gelatinized starch is easy to digest, making it ideal for convalescents.
- Hydration: High water content aids in rehydration.
- Low Fat: When cooked without added fats, it’s a lean meal option.
Nutritional Content (per 1-cup serving):

- Calories: 130–200 (varies by rice type and toppings)
- Carbohydrates: 28–45g
- Protein: 2–4g
- Fiber: 0.5–2g (higher in brown rice porridge)
Conclusion: The Journey to Porridge Perfection
Cooking rice porridge is an art that rewards patience and practice. While timing is crucial, flexibility is key—adjust heat, liquid, and duration to suit your taste. Whether you prefer a quick 20-minute Instant Pot meal or a leisurely 3-hour stovetop simmer, the result is a bowl of warmth and nostalgia. Experiment with grains, spices, and toppings to make this ancient dish your own. Remember, the best porridge is not just about minutes on the clock but the love poured into each stir.
Final Tip: Invest in a heavy-bottomed pot and a reliable timer. Over time, you’ll instinctively know when your porridge sings with creamy perfection.


0 comments