Introduction
Fried pork skin, a culinary delight enjoyed across cultures, is a testament to the versatility of humble ingredients. Often referred to as chicharrón in Latin America, pork rinds in the United States, or cracklings in the Southern United States, this crispy treat boasts a satisfying crunch and a rich, savory flavor. While its origins trace back to traditional peasant dishes, fried pork skin has transcended borders, becoming a beloved snack, appetizer, or even a garnish in modern cuisine. This article delves into the intricacies of preparing fried pork skin at home, exploring techniques, flavor variations, and tips to achieve that coveted light, airy texture. Whether you’re a seasoned home cook or a curious novice, this guide will equip you with the knowledge to transform a simple ingredient into a culinary masterpiece.
Understanding the Ingredient: Pork Skin
Pork skin, the star of this dish, is the outer layer of a pig’s hide. When cooked properly, it undergoes a magical transformation, puffing into golden, crispy bubbles. The key to success lies in selecting the right cut of pork skin. Opt for fresh, high-quality skin with minimal fat attached. Thicker skin tends to yield larger, more dramatic puffs, while thinner skin results in delicate, crispier bites. Butchers or specialty meat shops often sell pork skin separately, but if unavailable, ask your local grocer to reserve some for you.
Preparation: The Foundation of Crispiness
Achieving perfect fried pork skin begins long before the oil hits the stove. Proper preparation ensures the skin puffs evenly and avoids chewiness.
-
Cleaning and Trimming:
Rinse the pork skin thoroughly under cold water to remove any debris. Pat it dry with paper towels. Using a sharp knife, trim excess fat from the skin, leaving a thin layer (about 1/4 inch) to aid in rendering during cooking. Excessive fat can lead to greasy, heavy results. -
Boiling for Tenderness:
Place the trimmed pork skin in a large pot and cover it with cold water. Add aromatics like bay leaves, peppercorns, or garlic cloves for subtle flavor (optional). Bring the water to a boil, then reduce the heat to a simmer. Cook for 45–60 minutes, or until the skin becomes tender but not falling apart. This step softens the collagen in the skin, setting the stage for puffing. -
Drying Thoroughly:
After boiling, drain the skin and lay it flat on a baking sheet. Pat it dry with paper towels, then let it air-dry at room temperature for several hours, or overnight in the refrigerator. For faster drying, use a fan or place the skin in a dehydrator at low heat (135°F/57°C) for 2–3 hours. The drier the skin, the better it will puff during frying. -
Cutting into Pieces:
Once dried, cut the pork skin into bite-sized pieces or strips. Smaller pieces puff more dramatically, while larger chunks retain a chewier texture. Use kitchen shears or a very sharp knife to avoid jagged edges.
Cooking Methods: Deep-Frying vs. Alternative Techniques
While deep-frying is the traditional method, modern cooks have embraced alternatives like air-frying or baking for a healthier twist. Each technique offers unique results.
-
Deep-Frying (The Classic Approach):
- Oil Selection: Use a neutral oil with a high smoke point, such as vegetable, canola, or peanut oil. Avoid olive oil, as its low smoke point can impart a bitter taste.
- Temperature Control: Heat the oil to 375°F (190°C). Maintaining this temperature is critical—too low, and the skin absorbs oil; too high, and it burns before puffing.
- Frying Process: Fry the pork skin in batches to avoid overcrowding, which lowers the oil temperature. Gently lower the pieces into the oil using a slotted spoon. Listen for the sizzle; within seconds, the skin will begin to puff and turn golden. Fry for 2–3 minutes, or until fully expanded and crisp. Remove with a slotted spoon and drain on paper towels. Season immediately with salt or desired spices.
-
Air-Frying (A Lighter Option):
- Preheat the air fryer to 400°F (200°C). Arrange the dried pork skin in a single layer, ensuring pieces don’t overlap.
- Cook for 8–12 minutes, shaking the basket halfway through. Monitor closely, as air fryers vary in heat distribution. The result is a slightly less voluminous puff but with significantly less oil.
-
Baking (For Oven Enthusiasts):
- Preheat the oven to 400°F (200°C). Line a baking sheet with parchment paper and arrange the pork skin in a single layer.
- Bake for 20–25 minutes, flipping halfway, until golden and crisp. This method yields a denser texture but is ideal for large batches.
Achieving the Perfect Puff: Troubleshooting Common Issues
- Uneven Puffing: Ensure the skin is completely dry before frying. Moisture prevents puffing.
- Greasy Result: Overcrowding the pan lowers oil temperature. Fry in small batches and maintain heat.
- Chewy Texture: Undercooked skin lacks crispness. Fry until fully expanded and golden.
Flavor Variations: From Classic to Creative
Fried pork skin’s neutral flavor makes it a canvas for endless seasoning possibilities.
-
Classic Salted:
Sprinkle with coarse sea salt immediately after frying for a simple, addictive snack.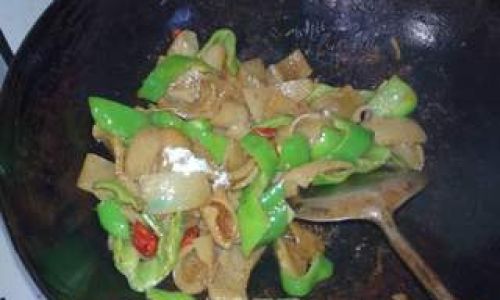
-
Spicy Kick:
Toss with chili powder, cayenne, or smoked paprika for heat. Add a pinch of sugar to balance. -
Herb-Infused:
Mix dried herbs like rosemary, thyme, or oregano with salt. For a Mediterranean twist, add lemon zest. -
Cheesy Delight:
Sprinkle with grated Parmesan or nutritional yeast while hot for a cheesy crust. -
Sweet and Savory:
Toss with a mixture of brown sugar, cinnamon, and a pinch of salt for a dessert-inspired treat.
Serving Suggestions: Beyond the Snack Bowl
Fried pork skin transcends its role as a standalone snack. Elevate meals with these ideas:
- Salads: Crumble over greens for added crunch.
- Soups: Use as a garnish for ramen or pozole.
- Tacos: Top with chicharrón for texture in al pastor or carnitas tacos.
- Dips: Serve with guacamole, salsa, or spicy mayo for dipping.
Storage and Reheating: Preserving Crispiness
Fried pork skin is best enjoyed fresh, but proper storage extends its shelf life.
- Storage: Once cooled, store in an airtight container at room temperature for up to 3 days. Avoid refrigeration, which softens the texture.
- Reheating: To revive crispiness, reheat in a 350°F (175°C) oven for 5 minutes or in an air fryer for 2–3 minutes.
Health Considerations: Indulgence in Moderation
While fried pork skin is high in protein and collagen (beneficial for skin and joints), it’s also calorie-dense. Moderation is key. Opt for air-frying or baking to reduce fat content, and pair with fresh vegetables or dips to balance the meal.
Cultural Significance: A Global Snack
Fried pork skin’s popularity spans continents, each culture adding its unique flair:
- Mexico: Chicharrón is a street food staple, often served with salsa and lime.
- China: Zhá pí (炸皮) appears in Sichuanese cuisine, spiced with chili and Sichuan pepper.
- Philippines: Chicharon is a beloved pulutan (beer snack), paired with vinegar dip.
- Germany: Grieben are fried pork rinds used to flavor soups and stews.
Conclusion: The Joy of Homemade Crisp
Crafting fried pork skin at home is a rewarding endeavor that bridges tradition and innovation. By mastering the preparation, cooking, and seasoning techniques outlined here, you’ll unlock a snack that delights the senses and sparks culinary creativity. Whether you adhere to tradition or experiment with bold flavors, the humble pork skin offers a canvas for endless possibilities. So, fire up the stove, embrace the sizzle, and savor the satisfying crunch of your labor—a testament to the magic that happens when patience, technique, and a dash of adventure converge in the kitchen.
Final Tip: Share your creation with friends and family—few dishes inspire such universal delight as a plate of fresh, golden fried pork skin. Happy cooking!




0 comments