Table of content
Cooking goose meat to perfection is an art that combines precision, patience, and a keen understanding of flavors. Whether you’re preparing a traditional roast goose for a festive occasion or experimenting with a new goose recipe, knowing how to cook goose meat so that it’s tender, juicy, and flavorful can elevate your culinary skills to new heights. In this comprehensive guide, we’ll delve into every aspect of preparing and cooking goose meat, from selecting the right bird to achieving the perfect crispy skin and moist interior. By the end, you’ll be equipped with the knowledge and techniques to create mouthwatering goose dishes that will impress even the most discerning palate.
Understanding Goose Meat: A Culinary Delight
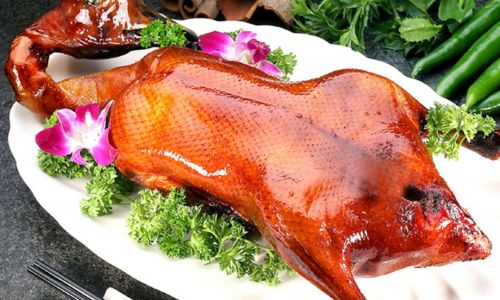
Goose meat is prized for its rich, succulent texture and deep, savory flavor. Unlike chicken or duck, goose has a higher fat content, particularly in the skin and around the breasts, which can be both a blessing and a challenge when cooking. The fat adds layers of flavor and helps achieve a beautifully crispy exterior, but it also requires careful handling to prevent the meat from becoming greasy.
Choosing the Right Goose
-
Breed and Age: Different goose breeds have varying meat qualities. For instance, Toulouse and Embden geese are known for their larger size and richer flavor, making them ideal for roasting. Younger geese tend to have more tender meat, while older birds offer a stronger flavor profile.
-
Freshness: Always opt for fresh, never frozen, goose if possible. Fresh goose has a firmer texture and a fresher taste. Look for a bird with firm, moist flesh and a clean, fresh smell.
-
Size: The size of the goose will depend on the number of servings you need. A medium-sized goose (around 8-10 pounds) is usually sufficient for a family gathering or small dinner party.
Preparation: The Foundation of Success
Before you start cooking, proper preparation is crucial. This includes thawing (if frozen), trimming, seasoning, and sometimes even brining the goose to ensure it cooks evenly and retains moisture.
Thawing and Trimming
-
Thawing: If you’re using a frozen goose, thaw it in the refrigerator for 24-48 hours, depending on its size. Never thaw a goose at room temperature or in hot water, as this can promote bacterial growth.
-
Trimming: Once thawed, remove any excess fat from the cavity and around the neck area. You can leave some fat on the skin, as it will help achieve a crispy finish, but trim away any large chunks to prevent the meat from becoming too greasy.
Brining (Optional but Recommended)
Brining is a process of soaking the goose in a saltwater solution for several hours or overnight. It helps to tenderize the meat, enhance flavor, and ensure that the goose stays juicy during cooking.
-
Basic Brine Recipe: Combine 1 cup of kosher salt, 1/2 cup of sugar, and enough water to fully submerge the goose in a large, non-reactive pot or container. Heat until the salt and sugar are dissolved, then cool to room temperature before adding the goose. Brine for 6-12 hours, refrigerated.
-
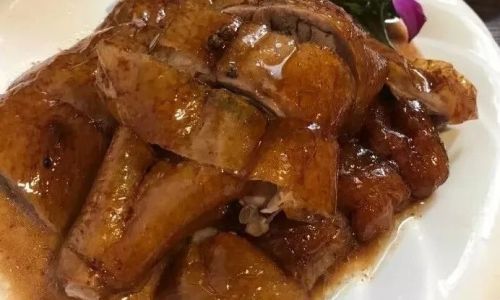
Rinsing and Drying: After brining, rinse the goose thoroughly under cold running water to remove all traces of salt. Pat it dry with paper towels, both inside and out, then let it air-dry in the refrigerator, uncovered, for at least 2 hours or overnight. This helps to dry out the skin, promoting a crispier finish.
Seasoning and Trussing
Seasoning the goose is essential for flavor, while trussing ensures that it cooks evenly and maintains its shape.
Seasoning
-
Basic Seasoning: Use a blend of coarse salt, freshly ground black pepper, and a pinch of dried thyme or rosemary. Rub the seasoning evenly over the skin and inside the cavity.
-
More Complex Seasoning: For a more complex flavor profile, consider making a compound butter with herbs, garlic, and citrus zest, then spreading it under the skin and over the breast meat.
Trussing
Trussing involves tying the goose’s legs and wings close to the body with kitchen twine. This helps to keep the bird compact, ensuring that heat distributes evenly during cooking and preventing the wings and legs from drying out.
- How to Truss: Tuck the wingtips under the bird, then cross the legs and tie them together securely. Next, tie a length of twine around the neck area to close the cavity and secure the wings and legs in place.
Cooking Techniques: From Roasting to Smoking
There are several methods for cooking goose meat, each offering unique textures and flavors. Here, we’ll focus on roasting, the most popular and straightforward technique.
Roasting Goose: The Classic Approach
-
Preheat the Oven: Preheat your oven to 325°F (163°C). A lower temperature helps to render the fat slowly, ensuring the skin becomes crispy without overcooking the meat.
-
Roasting Rack and Pan: Use a roasting rack set inside a roasting pan to catch the drippings. This not only prevents the goose from sitting in its own fat but also allows you to make delicious gravy from the drippings later.
-
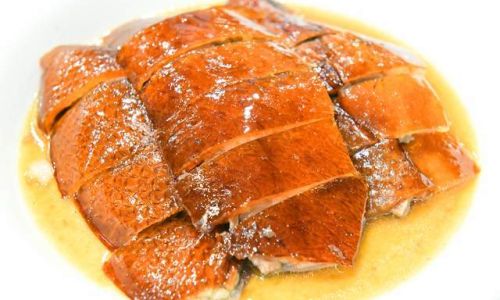
Initial Roasting: Place the trussed goose breast-side up on the roasting rack. Roast for about 2 hours, then carefully turn the goose breast-side down and roast for another hour. This helps to render more fat and crisp the skin on the breast.
-
Final Roasting and Basting: Turn the goose back to breast-side up and roast for another 45 minutes to 1 hour, or until the internal temperature reaches 165°F (74°C) for medium-well doneness. Baste the goose occasionally with its own juices or a mixture of melted butter, honey, and herbs for added flavor and moisture.
-
Resting: Once done, remove the goose from the oven and let it rest for 20-30 minutes before carving. This allows the juices to redistribute, ensuring a juicy, tender slice.
Monitoring and Adjustments
-
Check the Temperature: Use a meat thermometer to monitor the internal temperature of the goose, inserting it into the thickest part of the breast or thigh.
-
Crispy Skin: If the skin starts to brown too quickly, cover the goose loosely with aluminum foil or a tent of parchment paper. Remove the covering for the last 30 minutes of cooking to allow the skin to crisp up.
-
Fat Management: Periodically check the roasting pan and remove excess fat as needed to prevent the goose from sitting in a pool of grease. You can pour off the fat or use a bulb baster to remove it without disturbing the goose.
Serving and Enjoying Your Goose
With your beautifully roasted goose resting, it’s time to focus on the accompanying dishes and presentation.
Carving the Goose
-
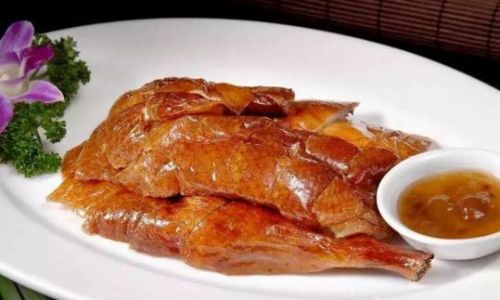
Tools: Use a sharp carving knife and fork to slice the goose. Start by removing the legs and wings, then carve the breast meat into thin slices.
-
Presentation: Arrange the slices on a warm platter, garnishing with fresh herbs like parsley or thyme. Serve with roasted vegetables, mashed potatoes, or cranberry sauce to balance the rich flavors of the goose.
Making Gravy
-
Strain the Drippings: Pour the drippings from the roasting pan into a fat separator or strain them through a fine-mesh sieve to remove any solid particles.
-
Making the Gravy: In a saucepan, combine the strained drippings with an equal amount of chicken or vegetable broth. Whisk in a cornstarch slurry (cornstarch mixed with water) to thicken, then season with salt, pepper, and a touch of lemon juice or vinegar for brightness.
Conclusion: A Culinary Journey
Cooking goose meat to perfection is a rewarding culinary endeavor that combines science and art. By following the steps outlined in this guide—from selecting the right bird to seasoning, trussing, roasting, and serving—you’ll be able to create a dish that is not only visually stunning but also bursting with flavor. Remember, the key to success is patience, attention to detail, and a willingness to experiment with different seasonings and cooking techniques. With each attempt, you’ll refine your skills, moving closer to mastering the art of cooking delicious goose meat. Happy cooking!



0 comments