Introduction
Chilled okra, also known as ice-cold okra or hiyayakko-style okra in some cuisines, is a dish that marries simplicity with refreshing flavors. Often overlooked in Western cooking, okra—a vibrant green vegetable native to Africa—has long been celebrated in Southern, Middle Eastern, and Asian cuisines for its unique texture and nutritional benefits. When prepared correctly, chilled okra becomes a crisp, slightly tangy, and utterly satisfying appetizer or side dish, perfect for hot summer days or as a light addition to any meal. This article will guide you through the intricacies of selecting, preparing, and serving chilled okra, ensuring that even novice cooks can master this underrated culinary gem.
Understanding Okra: A Brief Overview
Before diving into the recipe, it’s essential to appreciate what makes okra special. Scientifically known as Abelmoschus esculentus, okra is a flowering plant in the mallow family. Its pods are the edible part, prized for their mild, grassy flavor and a distinctive mucilaginous texture when cooked. While this sliminess is often associated with stews and soups like gumbo, chilled okra leverages a different preparation method to minimize this trait, resulting in a crisp, refreshing bite.

Okra is also a nutritional powerhouse. Rich in dietary fiber, vitamins C and K, folate, and antioxidants, it supports digestion, immune function, and heart health. Its low-calorie profile makes it an excellent choice for health-conscious eaters. When served chilled, okra retains most of these nutrients, offering a guilt-free indulgence.
Ingredients and Equipment
To create the perfect chilled okra, you’ll need the following:
Ingredients:
- Fresh okra pods (12–16 medium-sized, approximately 1 pound)
- Water (for blanching)
- Ice cubes (for shocking)
- Salt (kosher or sea salt, to taste)
- Optional seasonings:
- Black pepper (freshly ground)
- Lemon wedges or rice vinegar (for acidity)
- Sesame oil or olive oil (for drizzling)
- Soy sauce or tamari (for umami depth)
- Toasted sesame seeds or chili flakes (for garnish)
Equipment:
- Large pot (for blanching)
- Slotted spoon or spider strainer
- Bowl of ice water (large enough to submerge okra)
- Kitchen towel or paper towels (for drying)
- Cutting board and sharp knife
- Serving platter or individual plates
Step-by-Step Preparation
Selecting and Cleaning Okra
The foundation of great chilled okra begins with selecting the freshest pods. Look for okra that is bright green, firm, and free of blemishes or soft spots. Avoid pods that are overly large, as they may be tough and fibrous. Smaller to medium-sized okra (3–4 inches long) tend to be more tender.
To clean the okra, rinse the pods under cool water, gently scrubbing to remove any dirt. Avoid soaking, as this can make the pods waterlogged. Pat them dry with a kitchen towel or paper towels.

Trimming the Okra
Using a sharp knife, trim the stem end of each okra pod. Be careful not to cut too deeply into the pod, as this can cause the seeds to spill out during cooking. Some recipes suggest trimming both the stem and the tip, but leaving the tip intact can help preserve the pod’s shape during blanching.
Blanching the Okra
Blanching is a critical step in preparing chilled okra. It softens the pods slightly while preserving their vibrant color and crisp texture.
- Fill a large pot with water, add a generous pinch of salt, and bring it to a rolling boil.
- Prepare a bowl of ice water nearby.
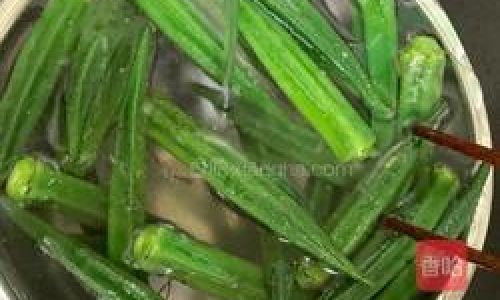
- Once boiling, carefully add the okra pods to the pot. Cook for 2–3 minutes, depending on their size. Smaller pods may need only 2 minutes, while larger ones may require 3.
- The okra should turn a brighter shade of green but remain firm. Overcooking will result in mushy pods, so test one after 2 minutes by piercing it with a knife—it should meet slight resistance.
Shocking in Ice Water
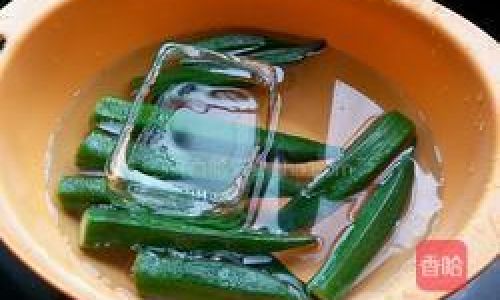
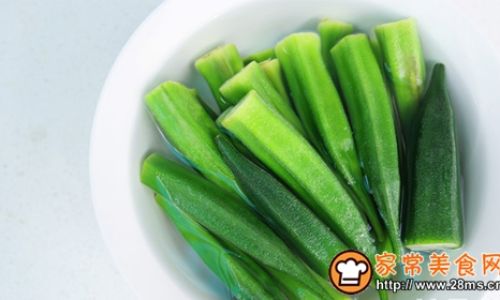
Immediately after blanching, transfer the okra to the ice water bath using a slotted spoon or spider strainer. This step, called “shocking,” halts the cooking process and ensures the pods retain their color and crispness. Let them chill in the ice water for 3–4 minutes, then drain thoroughly.
Drying and Chilling
After shocking, pat the okra dry with a clean kitchen towel or paper towels. Excess moisture can dilute the seasonings and lead to a soggy texture. Once dried, arrange the okra on a plate or platter and refrigerate for at least 30 minutes. Chilling further enhances their crispness and makes them more refreshing.
Seasoning and Serving
Chilled okra shines when dressed simply, allowing its natural flavor to take center stage. However, feel free to experiment with seasonings to suit your palate.
- Classic Presentation: Lightly salt the chilled okra just before serving. The salt enhances the vegetable’s grassy notes without overpowering them.
- Zesty Option: Squeeze fresh lemon juice over the okra or drizzle with rice vinegar for a bright, acidic kick.
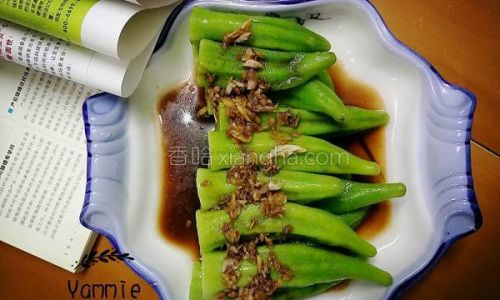
- Umami Boost: A splash of soy sauce or tamari adds depth, while a drizzle of toasted sesame oil introduces nutty richness.
- Garnish Ideas: Sprinkle with toasted sesame seeds, chili flakes, or finely chopped herbs like cilantro or mint for visual appeal and added flavor layers.
Serve the chilled okra whole or sliced. For a more elegant presentation, halve the pods lengthwise to showcase their star-shaped seeds.
Tips for Perfect Chilled Okra

- Avoid Overcrowding the Pot: Blanch the okra in batches if necessary. Overcrowding lowers the water temperature, leading to uneven cooking.
- Master the Blanching Time: Err on the side of undercooking, as the okra will continue to soften slightly during chilling.
- Use Quality Salt: Flaky sea salt or kosher salt adheres better to the pods than fine table salt, offering a more even seasoning.
- Experiment with Acidity: Lime juice, apple cider vinegar, or even a splash of balsamic glaze can transform the dish’s profile.
- Make Ahead: Chilled okra can be prepared up to 8 hours in advance. Store it in an airtight container in the refrigerator until ready to serve.
Variations and Creative Twists
While the classic chilled okra recipe is a winner, feel free to explore these variations:
- Grilled Chilled Okra: After blanching, briefly grill the okra over high heat to add smokiness. Chill as usual and serve with a yogurt-based dip.
- Pickled Okra: Submerge blanched okra in a quick pickle brine (vinegar, sugar, salt, and spices) for a tangy twist.
- Spicy Chilled Okra: Toss chilled okra with a mixture of chili oil, minced garlic, and a pinch of sugar for a fiery kick.
- Mediterranean-Inspired: Drizzle with olive oil, sprinkle with feta cheese, and garnish with chopped olives and oregano.
Health Benefits of Chilled Okra
Chilled okra isn’t just delicious—it’s a nutritional powerhouse. Here’s why you should include it in your diet:
- Rich in Fiber: A single cup of okra provides 3 grams of dietary fiber, aiding digestion and promoting satiety.
- Antioxidant-Rich: Okra contains polyphenols like quercetin, which combat oxidative stress and inflammation.
- Low in Calories: With only 33 calories per cup, it’s an ideal food for weight management.
- Vitamin and Mineral Content: High in vitamins C and K, folate, and magnesium, okra supports immune function, bone health, and energy metabolism.
Troubleshooting Common Issues
- Slimy Texture: If your okra turns slimy, you may have overcooked it or not dried it sufficiently after blanching. Stick to shorter blanching times and ensure thorough drying.
- Bitter Taste: Overly mature okra pods can develop bitterness. Always select young, tender pods.
- Bland Flavor: Okra’s mild taste benefits from bold seasonings. Don’t skimp on salt, acid, or aromatics.
Serving Suggestions
Chilled okra pairs beautifully with a variety of dishes:

- As an Appetizer: Serve it with a side of tangy dipping sauce, such as a soy-ginger dressing or Greek yogurt mixed with harissa.
- With Grilled Meats: The crispness of okra complements smoky grilled chicken, fish, or tofu.
- In Salads: Toss chilled okra into a green salad with cherry tomatoes, cucumbers, and a lemon-tahini dressing.
- As a Side Dish: Pair it with rice bowls, fried rice, or noodle dishes for added texture and nutrition.
Cultural Significance of Okra
Okra has deep roots in global cuisine. In the American South, it’s a star in gumbo and fried okra. In India, it’s stewed in spicy curries, while in Japan, it’s sometimes enjoyed raw in salads. Chilled okra, however, is a preparation that highlights the vegetable’s versatility, bridging culinary traditions and appealing to modern palates seeking light, healthy fare.
Conclusion
Chilled okra is a testament to the beauty of simplicity in cooking. With minimal ingredients and effort, you can transform this humble vegetable into a dish that delights the senses and nourishes the body. Whether you’re a seasoned cook or a curious beginner, mastering the art of chilled okra opens doors to endless culinary exploration. Experiment with seasonings, embrace its refreshing crunch, and let this vibrant green vegetable become a staple in your kitchen repertoire. So next time you spot fresh okra at the market, grab a bunch—your taste buds (and your gut) will thank you.
Final Thoughts
The allure of chilled okra lies not just in its taste or texture but in its ability to adapt. It’s a blank canvas for creativity, inviting you to play with flavors, textures, and presentations. As you gain confidence, try incorporating it into mezze platters, bento boxes, or even as a garnish for cocktails. The possibilities are as endless as the summer days it’s destined to grace. Happy cooking!


0 comments