Introduction:

In the realm of culinary delights, braised dishes often stand as testament to patience, flavor, and the art of slow cooking. Among these, braised pork trotters (or pig’s feet) occupy a unique niche, celebrated for their rich gelatinous texture, deep-rooted flavors, and versatility in various cuisines worldwide. From the savory streets of Asia to the hearty kitchens of Europe, pork trotters have been a staple in many traditional meals, offering not just nourishment but also a sense of nostalgia and comfort. This comprehensive guide aims to equip you with the knowledge and techniques necessary to master the art of braising pork trotters, ensuring every bite is as satisfying as the last.
Section 1: Understanding Pork Trotters
Before diving into the braising process, it’s crucial to understand what makes pork trotters special. Pork trotters are the feet of a pig, rich in collagen, which, when cooked slowly, transforms into a gelatinous, mouthwatering texture. This high collagen content not only enhances the eating experience but also provides numerous health benefits, including improved skin elasticity and joint health.
When selecting pork trotters for braising, look for those that are fresh, with a firm texture and minimal discoloration. Ideally, source them from a trusted butcher or grocery store that specializes in quality meat products. Additionally, larger trotters tend to have more meat and collagen, making them ideal for braising.
Section 2: Preparing the Trotters
Proper preparation is key to achieving a flavorful and tender braised pork trotter. Begin by rinsing the trotters thoroughly under cold running water to remove any surface impurities. Next, trim away any excess hair, nails, or hard skin using a sharp knife or kitchen scissors. This step is crucial for both aesthetic appeal and ensuring a smooth cooking process.
Once cleaned, you may opt to blanch the trotters in boiling water for about 5-10 minutes. This helps to draw out impurities, tightens the skin, and removes any unwanted odors. After blanching, rinse the trotters again under cold water and pat them dry with paper towels.
Section 3: Seasoning and Aromatics

The beauty of braising lies in the layers of flavor that develop over time. To create a memorable dish, gather a selection of aromatics and seasonings that complement pork. Common ingredients include garlic, ginger, onions, carrots, celery, bay leaves, black peppercorns, and star anise. For a more complex flavor profile, consider adding soy sauce, hoisin sauce, rice vinegar, or even a splash of beer or red wine.
Create a bed of chopped vegetables (onions, carrots, celery) in the bottom of your braising pot. Place the seasoned trotters atop this vegetable base, ensuring they are not overcrowded. This allows for even heat distribution and prevents sticking.
Section 4: The Braising Liquid
The braising liquid is the soul of the dish, infusing the trotters with flavor and moisture. A combination of stock (chicken, beef, or vegetable), water, and your chosen seasonings forms the basis. Aim for a liquid level that just covers the trotters; too much liquid can result in a diluted flavor, while too little may lead to burning.
Bring the liquid to a gentle simmer before reducing the heat to low. The goal is to maintain a steady, gentle bubble, allowing the collagen to slowly break down and the flavors to meld together. Cover the pot with a tight-fitting lid to retain heat and moisture.
Section 5: Cooking Time and Temperature
Braising pork trotters requires patience. Depending on their size and the desired texture, the cooking time can range from 2 to 4 hours, or even longer for a more tender, fall-off-the-bone result. Maintaining a consistent temperature around 150-170°F (65-75°C) is crucial. This low and slow cooking method ensures that the meat becomes tender and the collagen converts into a silky, gelatinous sauce.
Occasionally check the pot, skimming off any foam that rises to the surface and adding more liquid if necessary. Turning the trotters halfway through cooking can help achieve even cooking on all sides.

Section 6: Finishing Touches
Once the trotters are tender and the sauce has thickened to your liking, remove them from the heat. Allow them to rest in the braising liquid for at least 30 minutes, or even overnight in the refrigerator for maximum flavor absorption. This resting period also helps the meat reabsorb some of the juices, making it even more moist and flavorful.
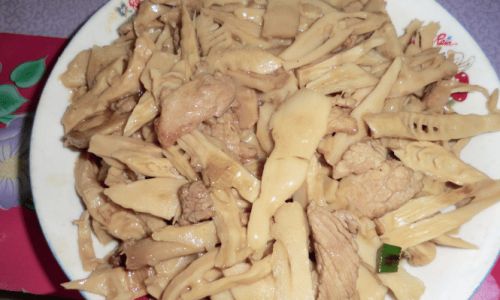
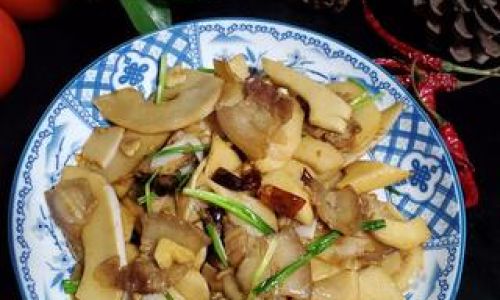
Before serving, gently remove the trotters from the braising liquid and discard the aromatics and vegetables. You can serve them whole, sliced, or shredded, depending on your preference. Accompanying sides might include steamed rice, noodles, or a fresh green salad to balance out the rich flavors.
Conclusion:
Braising pork trotters is an art that rewards those who invest time and care into the process. By following these steps—from careful selection and preparation to meticulous seasoning and slow cooking—you can create a dish that is not only delicious but also deeply satisfying. Whether enjoyed as a main course or incorporated into various recipes, braised pork trotters offer a culinary experience that is both nostalgic and innovative. So, gather your ingredients, fire up your braising pot, and embark on a journey to mastering the art of braising pork trotters. Your taste buds will thank you!


0 comments